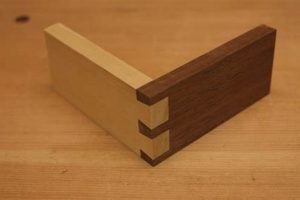
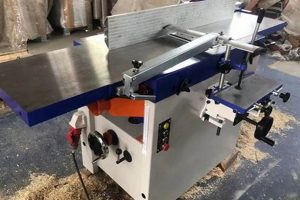
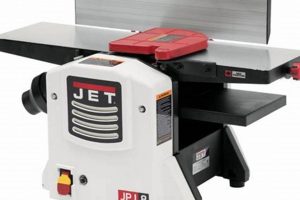
This specialized area focuses on preparing timber surfaces to achieve perfectly flat and square edges. The goal is to create seamless joints between pieces of wood, which is vital for constructing furniture, cabinetry, and other woodworking projects. An example would be preparing boards for a tabletop so they can be glued together edge-to-edge, creating a large, stable surface.
Accuracy in this process is paramount to ensuring the structural integrity and visual appeal of the final product. By creating flush, tight-fitting joints, the strength and durability of the assembled piece are significantly enhanced. Historically, achieving this precision required painstaking hand-tool work; modern machinery has streamlined the process while still demanding skill and attention to detail.
Subsequently, the following sections will explore specific techniques for achieving optimal results, examine the essential tools involved, and provide guidance on maintaining those tools for long-term performance. Furthermore, different applications of this skill in diverse woodworking projects will be discussed.
Tips for Precise Edge Jointing
Achieving high-quality edge joints requires a combination of proper technique, appropriate equipment, and consistent maintenance. The following guidelines offer a framework for improved accuracy and efficiency in this area of woodworking.
Tip 1: Material Selection: Choose lumber carefully. Inspect boards for straightness and minimal warp or twist prior to commencing. Wood with significant defects will be challenging to work with and may compromise the final joint.
Tip 2: Proper Machine Setup: The jointer’s knives must be accurately aligned with the outfeed table. Misalignment results in uneven cuts and prevents achieving a true 90-degree edge. Regularly check and adjust knife height using a precision measuring tool.
Tip 3: Feed Rate Control: Maintain a consistent feed rate. Feeding too quickly can cause tear-out or snipe, while feeding too slowly can lead to burning or uneven removal. Experiment to find the optimal feed rate for the specific wood being used.
Tip 4: Use Push Blocks and Push Pads: These safety devices provide better control over the workpiece and keep hands safely away from the cutterhead. Apply consistent, even pressure across the board during the cut.
Tip 5: Minimize Material Removal: Take multiple shallow passes rather than a single deep cut. This reduces stress on the wood and minimizes the risk of tear-out, resulting in a smoother, more accurate edge.
Tip 6: Check for Squareness: After jointing, use a precision square to verify the edge is perfectly perpendicular to the face of the board. Any deviation indicates a problem with the machine setup or technique that requires correction.
Tip 7: Alternate Grain Direction: When jointing multiple boards for edge gluing, alternate the grain direction of adjacent pieces. This minimizes the risk of cupping or warping in the finished panel due to differential wood movement.
Consistent adherence to these practices will yield improved results, stronger glue joints, and a more professional-looking finished product. Remember that meticulous preparation is foundational to successful woodworking.
The subsequent article sections will expand upon these principles, providing further details on specific jointing techniques and applications.
1. Flatness
Flatness represents a fundamental requirement within the realm of precise edge preparation. It defines the condition of a board surface where no deviations or undulations exist across its length and width. The absence of flatness directly undermines the ability to create tight, seamless joints. When mating surfaces are not perfectly planar, gaps inevitably occur, compromising both the structural integrity and aesthetic quality of the finished workpiece.
The establishment of a flat reference surface serves as the initial step in accurately preparing edges. Without this foundation, subsequent cuts and shaping operations will inherit any existing imperfections, resulting in cumulative errors. Consider a cabinet door assembly where the stiles and rails are not properly flattened prior to jointing. The resulting gaps and misalignments at the joints will not only be visually unappealing, but will also weaken the entire structure, making it prone to racking and failure. Furthermore, any finishing process, such as applying paint or stain, will highlight these imperfections, resulting in an unprofessional appearance.
Achieving the necessary degree of flatness demands the use of appropriate machinery, meticulous setup, and a skillful operator. A properly tuned machine with sharp cutting edges, combined with controlled feed rates, is critical to achieving success. The pursuit of flatness is, therefore, not merely a technical exercise, but an investment in the long-term performance and visual appeal of the final product. The degree of flatness needed should be based on the scope of the project.
2. Squareness
Squareness, in the context of precise edge preparation, refers to the condition where an edge is perfectly perpendicular to a face of the board. Its achievement is not merely aesthetic; rather, it forms a critical structural element in many woodworking projects. Ensuring true squareness during edge preparation directly impacts the integrity and stability of assembled components.
- Accurate Joint Construction
When edges are precisely square, they form tight, gap-free joints with adjacent pieces. This tight fit is essential for maximizing the surface area available for glue adhesion. Stronger glue joints result in more durable and long-lasting constructions. A failure to achieve squareness will lead to weakened joints prone to failure under stress.
- Structural Stability
Square edges contribute significantly to the overall structural stability of a piece. Consider a cabinet carcass: if the vertical stiles are not square to the horizontal shelves, the entire structure will be prone to racking and deformation. Maintaining squareness ensures that forces are distributed evenly throughout the assembly, minimizing stress points.
- Precise Assembly of Frames and Doors
In the creation of frames or doors, squareness is paramount. Mitered corners, in particular, require perfectly square edges for a seamless and visually appealing joint. Even minor deviations from squareness can result in unsightly gaps or misalignments, detracting from the overall quality of the finished piece. The accuracy of joinery, such as mortise and tenon joints, relies upon starting with square stock.
- Ease of Subsequent Operations
When edges are square, subsequent woodworking operations, such as planing, routing, or sanding, become significantly easier and more accurate. A square edge provides a reliable reference surface for these operations, allowing for consistent and predictable results. Conversely, working with non-square edges introduces complexity and increases the likelihood of errors.
The attainment of squareness demands rigorous attention to detail and proper machine calibration. Using precision measuring tools to verify accuracy is crucial. The skill ensures that assembled projects not only meet aesthetic expectations but also possess the structural integrity required for long-term use. Therefore, achieving squareness is a non-negotiable aspect of effective edge preparation and a prerequisite for quality woodworking.
3. Grain direction
Grain direction fundamentally influences the outcome when undertaking precise edge preparation. Understanding its role is paramount, as it dictates the optimal approach to prevent tear-out and ensure a smooth, consistent surface. Failing to account for grain direction leads to inefficient material removal and compromised joint integrity.
- Preventing Tear-Out
Cutting against the grain often results in tear-out, where wood fibers lift and splinter, creating an uneven surface. This is particularly noticeable when using power jointers. Identifying the grain’s orientation and feeding the wood into the machine in the direction of the grain minimizes this effect, yielding a cleaner cut and reducing the need for extensive sanding.
- Optimizing Surface Smoothness
Working with the grain enhances surface smoothness. When the cutting tool shears the wood fibers in the direction they naturally lie, it produces a polished surface with minimal imperfections. Conversely, cutting against the grain creates a rougher texture that is difficult to smooth, even with subsequent sanding operations.
- Ensuring Consistent Material Removal
Grain direction affects the rate and uniformity of material removal. Cutting with the grain allows for consistent shaving of wood, leading to predictable results. Cutting against the grain can cause the tool to dig in or skip, resulting in uneven material removal and a wavy surface. This variability necessitates repeated passes to achieve the desired flatness and straightness.
- Impact on Joint Strength
In edge-gluing applications, considering the grain direction is essential for long-term joint stability. Alternating the grain direction of adjacent boards in a panel minimizes cupping or warping due to seasonal wood movement. This practice ensures that the panel remains flat and stable over time, contributing to the overall durability and aesthetic appeal of the finished piece.
The principles of grain direction are not merely academic considerations but practical necessities in effective edge preparation. By understanding and applying these principles, woodworkers can maximize the efficiency of the preparation process, minimize material waste, and create joints that are both aesthetically pleasing and structurally sound. The long-term performance of a woodworking project hinges significantly on the ability to properly manage grain direction during edge preparation.
4. Machine setup
The correct configuration of machinery constitutes a critical prerequisite for achieving precision in the domain of woodworking. The jointer is no exception; its adjustment directly affects the quality and accuracy of prepared edges. Precise configuration demands careful calibration and ongoing maintenance to ensure optimal performance.
- Knife Height and Alignment
The jointer’s knives must be set flush with the outfeed table at their highest point. Any deviation results in snipe (unintentional removal of material at the beginning or end of a board) or prevents achieving a truly flat surface. Furthermore, knives must be parallel to each other and to the outfeed table to ensure consistent material removal across the width of the cut. Example: Uneven knife height results in a board that is thicker on one side than the other, negating the benefits of jointing. Implications are significant; a tabletop built with such boards will be uneven and difficult to sand smooth.
- Fence Squareness
The jointer fence must be exactly perpendicular to the tables. This ensures that the edge being jointed is square to the face of the board. Inaccurate fence alignment results in edges that are out of square, making it difficult to create tight-fitting joints. Example: A fence that is off by even a fraction of a degree will result in a mitered corner with a visible gap. The implications are that cabinets or frames assembled with non-square edges will lack structural integrity and aesthetic appeal.
- Table Coplanarity
The infeed and outfeed tables must be coplanar, meaning they exist on the same plane. If one table is higher or lower than the other, the jointer will not produce a flat surface. Example: A table that dips downward will cause the board to rock during the cut, resulting in an uneven edge. The implications are that creating truly flat surfaces becomes impossible, leading to wobbly tables or cabinets that do not sit flush against the wall.
Machine setup, therefore, should not be seen as a one-time task, but rather an ongoing process integral to the workflow. Regular inspection and adjustment are essential to maintaining the accuracy of the machine and ensuring consistent, high-quality results. Neglecting this aspect undermines the entire purpose of precise edge preparation.
5. Blade sharpness
Blade sharpness is a non-negotiable element in successful edge preparation. The condition of the jointer blades directly correlates with the quality of the finished surface and the efficiency of the material removal process. Maintaining keen cutting edges is paramount for achieving smooth, accurate, and safe results.
- Reduced Tear-Out
Sharp blades cleanly sever wood fibers, minimizing the risk of tear-out, especially when working with figured woods or against the grain. Dull blades tend to crush or tear the fibers, resulting in a rough, uneven surface that requires additional sanding. For example, preparing curly maple with dull blades often leads to significant tear-out, rendering the workpiece unusable without extensive repair. Sharp blades provide a clean shearing action, preserving the wood’s integrity.
- Improved Surface Finish
Sharp blades produce a smoother surface finish, reducing the need for subsequent sanding. A keen cutting edge creates a planed surface that is nearly ready for finishing, saving time and effort. Conversely, dull blades leave a rough or burnished surface, necessitating extensive sanding to achieve a smooth texture. This difference is particularly evident when working with hardwoods like cherry or walnut, where a smooth surface enhances the natural beauty of the wood.
- Enhanced Cutting Efficiency
Sharp blades require less force to remove material, making the jointing process more efficient and reducing strain on both the operator and the machine. Dull blades necessitate increased pressure, which can lead to uneven cuts, motor overheating, and potential kickback. The efficiency gain from using sharp blades translates into faster production times and reduced wear and tear on equipment.
- Safer Operation
Sharp blades contribute to safer operation by reducing the likelihood of kickback. When blades are dull, the wood is more likely to catch or bind, increasing the risk of the workpiece being thrown back towards the operator. Sharp blades engage the wood cleanly and predictably, minimizing the chance of sudden, uncontrolled movements. This is crucial for preventing accidents and ensuring a safe working environment.
The link between blade sharpness and effective edge preparation is undeniable. Maintaining sharp jointer blades through regular honing or replacement is not merely a matter of convenience, but a fundamental aspect of achieving professional-quality results and ensuring safe operation. Regular maintenance routines prove crucial for the longevity of blades and woodworking projects.
6. Consistent feed
A consistent feed rate is a vital factor in precision edge preparation. Regulating the speed at which material passes over the jointer’s cutterhead influences the quality of the resulting surface and the accuracy of the cut. Maintaining uniformity is essential for predictable and repeatable results.
- Minimizing Snipe
Snipe refers to an unwanted indentation or reduction in thickness at the beginning or end of a board. This often occurs when the feed rate is inconsistent, particularly when starting or stopping the cut. A consistent feed helps maintain constant pressure and contact between the wood and the cutterhead, mitigating the risk of snipe. Example: A board abruptly pushed onto the jointer is likely to exhibit snipe, requiring additional passes to correct.
- Reducing Tear-Out
Variable feed rates can exacerbate tear-out, particularly when working with figured woods or against the grain. A jerky or uneven feed can cause the blades to catch or lift wood fibers, resulting in a splintered or ragged surface. A steady, controlled feed allows the blades to shear the wood fibers cleanly, minimizing tear-out. Example: Feeding a piece of oak too quickly can result in substantial tear-out, whereas a slower, more consistent feed yields a smoother finish.
- Ensuring Uniform Material Removal
A consistent feed rate promotes uniform material removal along the entire length of the board. This ensures that the edge is straight and flat, without dips or humps. Variable feed leads to uneven material removal, requiring multiple passes to achieve the desired flatness. Example: Using a hand-pushed feed system on a long board, variations in the speed may cause inconsistent material removal, and therefore additional passes are necessary to achieve the desired result.
- Enhancing Safety
A steady, controlled feed contributes to a safer working environment. It reduces the likelihood of kickback, where the workpiece is violently ejected from the machine. A jerky or inconsistent feed can cause the wood to bind or catch, increasing the risk of kickback. Maintaining a firm grip and a consistent feed rate provides better control over the workpiece, minimizing the potential for accidents. Example: Suddenly hesitating or stopping the board mid-cut significantly increases the risk of kickback. Maintaining a constant movement is important.
The adoption of a consistent feed rate represents an essential skill in achieving superior outcomes in edge preparation. Its influence extends beyond the mere aesthetics of the final product, impacting structural integrity, safety, and overall efficiency. Practicing a controlled, uniform feed improves the likelihood of achieving professional-level results.
Frequently Asked Questions About Precise Edge Preparation
This section addresses common queries concerning precise edge preparation, offering clarity on crucial aspects and dispelling potential misconceptions.
Question 1: What is the primary purpose of edge preparation?
The primary purpose is to create perfectly flat and square edges on lumber, enabling tight-fitting and structurally sound joints in woodworking projects.
Question 2: Why is machine setup critical to edge preparation?
Correct machine setup, including knife height, fence squareness, and table coplanarity, ensures accuracy and prevents common issues such as snipe and uneven material removal.
Question 3: How does grain direction impact the process?
Grain direction affects surface smoothness, tear-out prevention, and consistency of material removal; cutting with the grain yields the best results.
Question 4: What constitutes a consistent feed rate, and why is it important?
A consistent feed rate involves maintaining a uniform speed while passing material over the cutterhead. It minimizes snipe, reduces tear-out, and ensures uniform material removal.
Question 5: How often should jointer blades be sharpened?
Blade sharpness should be assessed regularly and addressed whenever a decline in cutting performance is observed. Factors such as wood type and usage frequency influence the sharpening schedule.
Question 6: Can accurate edge preparation be achieved with hand tools alone?
Yes, accurate edge preparation can be achieved with hand tools, such as hand planes, but requires significant skill and patience. Power jointers expedite the process, provided they are properly tuned.
In summary, achieving precision in edge preparation requires a holistic approach, encompassing proper technique, equipment maintenance, and an understanding of wood properties.
The subsequent sections will delve into advanced techniques and practical applications of these principles.
Jointer Woodwork
The preceding exploration has underscored the critical role of jointer woodwork in establishing a foundation for quality woodworking. From meticulous machine setup and blade maintenance to the nuanced understanding of grain direction and consistent feed rates, each element contributes significantly to the creation of accurate, stable, and aesthetically pleasing wooden structures. The principles outlined serve as a guide for both novice and experienced woodworkers striving for superior results.
Mastering these techniques offers lasting advantages, resulting in enhanced structural integrity, minimized material waste, and elevated craftsmanship. Continued refinement of these skills remains essential for advancing woodworking proficiency and achieving lasting excellence in every project undertaken. The enduring value of precision in jointer woodwork ensures its continued relevance within the craft.


