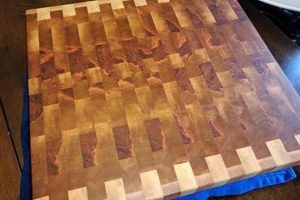
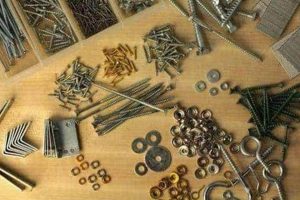
Small, cylindrical pieces of wood, carefully shaped and sized, are frequently employed to conceal or reinforce screw holes and other blemishes in woodworking projects. These components, often crafted from matching or contrasting wood species, are discreetly inserted into pre-drilled recesses and then sanded flush with the surrounding surface, creating a seamless or decorative effect. A typical application involves covering the countersunk screw heads used in furniture construction, thereby enhancing the aesthetic appeal and structural integrity of the piece.
The utilization of these wooden elements offers several advantages. Functionally, they provide an additional layer of strength to joints and can prevent screw heads from stripping or loosening over time. Aesthetically, they contribute to a refined, professional finish by masking unsightly hardware. Their use dates back centuries, reflecting a commitment to craftsmanship and a desire to conceal the mechanical aspects of joinery. Historically, the availability of these items depended on specialized tools and skills; however, modern manufacturing processes have made them readily accessible to both amateur and professional woodworkers.
The following discussion will delve into the various types and sizes of these wooden fasteners, explore optimal methods for their installation, and consider the diverse applications in furniture making, cabinet construction, and other woodworking endeavors. The selection of appropriate materials and techniques will also be addressed to ensure a high-quality, durable result.
Woodworking Plugs
Employing wooden plugs effectively requires attention to detail and adherence to established best practices. These tips enhance the quality and longevity of woodworking projects that utilize these fasteners.
Tip 1: Select Appropriate Wood Species: Match the plug’s wood to the surrounding material for seamless integration. Alternatively, choose a contrasting species to create a deliberate decorative element. Consider the grain direction for visual harmony.
Tip 2: Precisely Size the Plug: Ensure a snug fit by using a plug cutter that matches the diameter of the drilled recess. Loose plugs are prone to failure, while excessively tight plugs can cause splitting.
Tip 3: Apply Adhesive Sparingly: Use a minimal amount of wood glue to secure the plug. Excessive glue can prevent the plug from fully seating and may create a visible glue line.
Tip 4: Orient Grain Direction: Align the plug’s grain direction with that of the surrounding wood. This minimizes visual disruption and contributes to a more cohesive appearance.
Tip 5: Allow Glue to Dry Completely: Permit sufficient drying time for the adhesive before sanding. Premature sanding can result in the plug being pulled out or sinking below the surface.
Tip 6: Employ Sharp Sanding Tools: Utilize sharp sandpaper and sanding blocks to prevent tear-out and ensure a smooth, flush surface. Start with coarser grits and progressively refine the finish.
Tip 7: Consider Plug Placement: Strategically position plugs to enhance the overall design. Plugs can be used to conceal fasteners or to add visual interest to otherwise plain surfaces.
Successful integration of wooden plugs hinges on precise execution of each step, from material selection to final finishing. These guidelines promote durability, aesthetics, and overall project success.
With the fundamentals of plug application established, the subsequent sections will address advanced techniques and specialized applications for these versatile woodworking components.
1. Material Compatibility
The selection of compatible materials constitutes a foundational principle in woodworking, particularly when integrating wooden plugs. A disparity in physical properties, such as density or expansion coefficient, between the plug and the surrounding wood can instigate stress concentrations. These stresses manifest over time due to fluctuations in temperature and humidity, potentially leading to joint failure, cracking, or aesthetic degradation. For instance, inserting a plug made of hard maple into a recess within a softer pine board increases the likelihood of the pine expanding and contracting at a different rate, thereby compromising the joint’s integrity. Conversely, employing a plug of similar density and grain structure to the surrounding material minimizes these risks, promoting long-term stability and a more homogenous visual appearance.
Consider a practical application in furniture restoration. If repairing an antique oak table with modern poplar plugs, the inherent differences in wood movement will almost certainly result in visible seams and potential structural weakness as the two materials respond differently to environmental changes. A more appropriate approach would involve sourcing oak plugs, ideally from a similar era and exhibiting comparable grain patterns to the original table components. This practice extends beyond merely aesthetic considerations; it directly impacts the longevity and structural soundness of the restored piece. Specialized adhesives designed for specific wood species can also mitigate some compatibility issues but should not be considered a substitute for selecting appropriately matched materials.
In summation, material compatibility within the context of woodworking plugs transcends superficial visual considerations. It is a critical determinant of structural performance and long-term durability. A thorough understanding of wood properties and their interaction within varying environmental conditions is essential for achieving professional-grade results and preventing premature failure. Prioritizing material compatibility ensures that wooden plugs serve their intended purpose: reinforcing joints and concealing fasteners while seamlessly integrating into the overall design.
2. Precise Hole Diameter
The success of employing woodworking wood plugs hinges critically on the precision of the hole diameter intended to receive them. An undersized hole necessitates excessive force during insertion, risking splitting of the surrounding wood or damage to the plug itself. Conversely, an oversized hole results in a loose fit, compromising the structural integrity and aesthetic quality of the repair or embellishment. The relationship between these two elements hole size and plug dimension is therefore one of direct cause and effect. Incorrectly sized holes directly lead to compromised joints and diminished project quality. As a practical example, consider the construction of a chair. If the plugs used to conceal screw holes in the legs are inserted into overly large openings, the legs may develop play over time, reducing the chair’s stability and lifespan.
The importance of precise hole diameter extends beyond mere physical fit. It also influences the effectiveness of the adhesive used to secure the plug. A tight, properly sized fit ensures optimal contact between the plug and the hole’s surface, maximizing the bonding strength of the glue. Conversely, gaps created by an oversized hole reduce the surface area available for adhesion, weakening the joint. Furthermore, precise drilling promotes a cleaner, more professional finish. When plugs fit snugly, they can be sanded flush with the surrounding surface with minimal risk of chipping or tear-out. This precise fit also minimizes the visibility of the plug, allowing it to seamlessly blend into the surrounding wood, particularly when the plug’s grain is aligned with that of the surrounding wood.
In summary, achieving a precise hole diameter is not merely a technical detail but a fundamental requirement for successful woodworking wood plug applications. It directly impacts the structural integrity, aesthetic appeal, and overall longevity of woodworking projects. Challenges in achieving this precision often stem from variations in drill bit sizes or inconsistencies in drilling techniques. However, employing high-quality drill bits, utilizing precise measuring tools, and practicing consistent drilling techniques are crucial for mitigating these challenges and ensuring optimal outcomes. Ultimately, mastery of hole diameter accuracy elevates the quality and durability of woodworking creations involving plugs.
3. Adhesive Application
The application of adhesive is integral to the successful integration of wooden plugs in woodworking projects. The choice and method of adhesive application significantly influence the strength, longevity, and aesthetic quality of the finished piece.
- Type of Adhesive
The selection of adhesive depends on several factors, including the wood species, joint type, and environmental conditions. Polyvinyl acetate (PVA) glues are commonly used due to their ease of application and strong bonding properties. However, in situations requiring water resistance, such as exterior applications, polyurethane or epoxy adhesives are preferred. The appropriate adhesive must be selected to ensure long-term durability and prevent joint failure.
- Amount of Adhesive
The quantity of adhesive applied directly impacts the bond strength. Insufficient adhesive results in a weak bond due to inadequate surface coverage. Conversely, excessive adhesive can create a glue line, which detracts from the aesthetic appeal, or prevent the plug from fully seating in the hole. A thin, even layer of adhesive is generally recommended to achieve optimal bond strength without creating visible excess.
- Application Technique
The method of adhesive application influences its distribution and effectiveness. A brush or syringe can be used to apply the adhesive to the interior of the hole and the surface of the plug. It is crucial to ensure complete and even coverage, particularly in areas where the plug will come into direct contact with the surrounding wood. Failure to achieve adequate coverage can result in localized areas of weakness within the joint.
- Clamping Pressure
While the plug itself creates a mechanical fit, clamping pressure, even if minimal, can improve the bond during the adhesive curing process. Clamping encourages intimate contact between the plug and the surrounding wood, promoting optimal adhesive bonding. If clamping is impractical, ensuring the plug is firmly seated and remains undisturbed during the curing period is essential. Premature movement can disrupt the adhesive bond and weaken the joint.
The preceding facets highlight the critical relationship between adhesive application and the performance of wooden plugs in woodworking projects. Careful consideration of the adhesive type, quantity, application technique, and the use of clamping pressure contributes significantly to the structural integrity and visual quality of the finished piece. The improper selection or application of adhesive can undermine the benefits of using wooden plugs, resulting in premature joint failure or aesthetic imperfections.
4. Grain Alignment
Grain alignment, in the context of woodworking wood plugs, represents a critical factor influencing both the aesthetic integration and structural performance of the finished piece. The orientation of the wood fibers within the plug, relative to the grain direction of the surrounding material, directly impacts the plug’s visual blending and its susceptibility to seasonal movement. Misalignment can result in a visually jarring discontinuity and, more significantly, can create stress points due to differential expansion and contraction of the wood fibers. A practical example would involve inserting a plug with a vertical grain pattern into a board with a horizontal grain; the distinct visual difference immediately draws the eye, detracting from the intended seamless appearance. Furthermore, this grain mismatch can exacerbate swelling or shrinking as the wood responds to humidity changes, potentially leading to cracking around the plug or loosening of the joint.
The importance of grain alignment extends beyond merely hiding the presence of the plug. In restoration projects, meticulously matching the grain pattern of the replacement plug to the original wood can be essential for preserving the historical integrity of the artifact. In contemporary furniture design, intentionally contrasting grain orientations can be used as a design element, but this requires a deliberate and skillful approach to avoid unintended negative visual consequences. Careful selection of the plug material, combined with precise orientation during insertion, is crucial for achieving the desired effect, whether it be seamless concealment or intentional contrast. The effectiveness of this technique often depends on the scale of the project and the proximity of the viewer; smaller projects or finer details demand a higher degree of grain matching to maintain a cohesive aesthetic.
Ultimately, the understanding and application of proper grain alignment techniques significantly elevate the quality and craftsmanship of woodworking projects incorporating wood plugs. While seemingly a minor detail, attention to grain direction minimizes visual distractions, reduces the risk of structural issues stemming from differential wood movement, and reflects a commitment to precision and attention to detail. Neglecting grain alignment, conversely, can undermine even the most skillfully executed joinery, resulting in a finished product that appears amateurish or, in more severe cases, is prone to premature failure. Therefore, meticulous grain matching should be considered a fundamental principle for woodworking professionals and hobbyists alike.
5. Flush Sanding
Flush sanding, in the context of woodworking wood plugs, represents the crucial final step in seamlessly integrating the plug with the surrounding surface. The process entails removing any excess material protruding from the plug after its insertion and adhesive curing, resulting in a smooth, level transition between the plug and the adjacent wood. The success of this sanding operation directly impacts the overall aesthetic appeal and tactile quality of the finished piece. Inadequately sanded plugs result in a raised or uneven surface, readily detectable both visually and by touch, diminishing the perceived quality of the craftsmanship. Conversely, excessive sanding can create a depression around the plug, also detracting from the desired seamless effect. The correlation between proper flush sanding and a professionally finished piece is thus a direct and undeniable one.
The effectiveness of flush sanding is predicated on several factors. The selection of appropriate abrasive grits is essential; typically, a progression from coarser grits (e.g., 120-grit) to finer grits (e.g., 220-grit or higher) is employed to gradually refine the surface without causing excessive scratching. The use of a sanding block or other flat support helps to maintain an even sanding pressure and prevent the formation of dips or unevenness. Moreover, the type of wood influences the sanding technique. Softer woods require a more delicate touch to avoid rapid material removal and potential gouging, while harder woods can withstand more aggressive sanding. In the case of plugs crafted from a different species than the surrounding material, careful attention must be paid to sanding rates, as the differing hardness levels can lead to uneven material removal if not properly managed. Consider, for instance, a walnut plug inserted into a maple surface; the darker walnut will be more easily damaged by aggressive sanding, and precise control of sanding pressure is essential for achieving a truly flush and unmarred surface.
Ultimately, flush sanding is more than just a finishing touch; it is a critical component of the woodworking wood plug process that directly determines the success of concealing or accentuating fasteners and imperfections. The skillful application of sanding techniques, with careful consideration of grit selection, sanding support, and wood species characteristics, is paramount for achieving a professional-grade result. While often perceived as a straightforward operation, effective flush sanding demands precision, patience, and a keen eye for detail. The achievement of a perfectly flush and seamless transition between the plug and the surrounding wood is the hallmark of a skilled woodworker, elevating the overall quality and aesthetic appeal of the finished piece.
Frequently Asked Questions
This section addresses common inquiries and misconceptions regarding the application and utilization of woodworking wood plugs.
Question 1: What is the primary function of a woodworking wood plug?
The primary function is multifaceted. It serves to conceal unsightly screw heads or fasteners, reinforce joints, and provide a decorative element to woodworking projects. The choice of function depends on the project’s design and structural requirements.
Question 2: What wood species are most suitable for crafting these plugs?
The selection depends on the wood species of the workpiece. Ideally, the plug should match the surrounding material for seamless integration. Contrasting wood species can be employed for decorative purposes, provided their physical properties are compatible to avoid differential expansion and contraction issues.
Question 3: What is the appropriate adhesive to use when installing woodworking wood plugs?
Polyvinyl acetate (PVA) glue is a common choice due to its strong bonding properties and ease of use. For applications requiring water resistance, polyurethane or epoxy adhesives are more suitable. The selection should be based on the project’s intended environment and exposure to moisture.
Question 4: How does grain alignment affect the performance of a woodworking wood plug?
Grain alignment is crucial for both aesthetic and structural reasons. Aligning the plug’s grain with that of the surrounding wood minimizes visual disruption and reduces the risk of differential expansion and contraction, which can lead to joint failure.
Question 5: What is the correct method for sanding a woodworking wood plug flush with the surrounding surface?
The process involves using a progression of sandpaper grits, starting with a coarser grit to remove excess material and finishing with a finer grit to achieve a smooth, level surface. A sanding block should be used to ensure even pressure and prevent the formation of dips or unevenness.
Question 6: What can cause a woodworking wood plug to fail prematurely?
Premature failure can result from several factors, including using incompatible wood species, applying insufficient or excessive adhesive, misaligning the grain, sanding improperly, or subjecting the joint to excessive stress or moisture.
Proper installation techniques, material selection, and attention to detail are crucial for ensuring the longevity and structural integrity of woodworking projects incorporating wood plugs.
The following section will explore advanced techniques and alternative applications for these versatile woodworking components.
Conclusion
This exploration of woodworking wood plugs has underscored their pivotal role in both the structural reinforcement and aesthetic refinement of woodworking projects. From material selection and precise hole diameter to adhesive application, grain alignment, and flush sanding, the successful integration of these components hinges on a comprehensive understanding of each step. The ramifications of neglecting these principles range from visual imperfections to compromised structural integrity, ultimately detracting from the value and longevity of the finished piece. Woodworking wood plugs, therefore, are not merely cosmetic additions but integral elements demanding meticulous execution.
The informed application of these techniques represents a commitment to quality and craftsmanship, elevating woodworking from a functional exercise to an art form. As woodworking practices evolve, continued emphasis on precision and material understanding will ensure that these seemingly simple components continue to play a crucial role in producing durable, visually appealing, and expertly crafted pieces. The pursuit of excellence in woodworking mandates a mastery of these fundamental principles, guaranteeing that projects withstand the test of time and reflect the dedication of the artisan.


