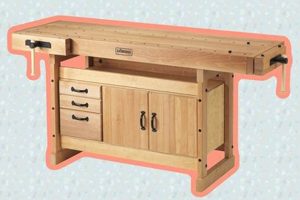
The construction of a sturdy and functional workstation is a cornerstone of any woodworking endeavor. This process involves the careful selection of materials, precise joinery techniques, and a design tailored to the specific needs of the woodworker. A well-executed example provides a stable and versatile platform for a wide range of tasks, from basic cutting and shaping to intricate assembly and finishing.
A dedicated construction like this offers numerous advantages, including improved accuracy, enhanced safety, and increased efficiency. Historically, these structures have been integral to woodworking traditions, evolving from simple trestle tables to sophisticated designs incorporating vises, dog holes, and storage solutions. The presence of a reliable work surface fosters better posture, reduces fatigue, and ultimately contributes to higher quality craftsmanship.
Subsequent sections will delve into critical considerations for planning and executing this type of project. These include factors such as workbench size and height, material selection, joinery options, and essential features that enhance functionality. The goal is to provide the reader with the knowledge needed to create a personalized and effective workspace.
Essential Considerations for Workbench Construction
The following tips provide guidance on key aspects of a successful workbench construction project. Adhering to these principles will enhance the functionality, stability, and longevity of the finished structure.
Tip 1: Prioritize a Solid Foundation: A stable base is paramount. Select dense, rigid materials like hardwood for the legs and ensure they are securely joined to the workbench top. Avoid excessive racking or movement by incorporating robust bracing.
Tip 2: Optimize Workbench Height: The ideal height allows the woodworker to perform tasks comfortably and efficiently. A commonly cited guideline is to set the workbench surface at wrist height when standing. Customization based on individual ergonomics is recommended.
Tip 3: Integrate Effective Work Holding: Vises are indispensable tools. Consider installing both a face vise and a tail vise to accommodate a wide range of workpieces. Ensure the vises are robust and precisely aligned with the workbench surface.
Tip 4: Incorporate Dog Holes: Dog holes, arranged in a grid pattern, provide versatile clamping options. These holes accept bench dogs, which can be used in conjunction with vises or other clamping accessories to secure workpieces of various shapes and sizes.
Tip 5: Select Appropriate Materials: The choice of materials impacts the workbench’s durability and performance. Hardwoods like maple or beech offer excellent strength and stability. Consider the cost and availability of different wood species when making a selection.
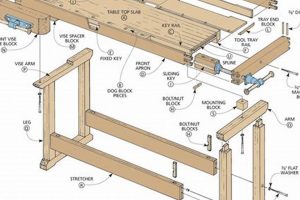
Tip 6: Employ Sound Joinery Techniques: Strong and reliable joints are crucial for the workbench’s structural integrity. Dovetails, mortise-and-tenon joints, and lap joints are all suitable options. Ensure the joints are accurately cut and securely fastened.
Tip 7: Plan for Integrated Storage: Maximize efficiency by incorporating storage solutions into the workbench design. Drawers, shelves, or cabinets can provide convenient access to frequently used tools and materials. Consider the layout carefully to avoid obstructing the workspace.
These considerations are fundamental to achieving a professional and functional result. Careful planning and attention to detail will lead to a workbench that serves as a valuable asset for years to come.
The subsequent section will address common challenges encountered during this construction and offer solutions for overcoming them.
1. Workbench Height
Workbench height is a critical determinant of a woodworking bench’s utility and the woodworker’s physical well-being. An improperly sized workbench can lead to chronic back pain, shoulder strain, and reduced efficiency. The relationship between workbench height and woodworking activities is a direct cause-and-effect scenario: incorrect height directly impacts posture, leverage, and overall ease of task completion. For example, attempting to plane a long board on a bench that is too low will necessitate excessive bending, leading to fatigue and potentially inaccurate results. Conversely, a bench that is too high will hinder the woodworker’s ability to apply downward force effectively during operations like chiseling.
The commonly cited guideline of setting workbench height at wrist level when standing provides a starting point, but individualized adjustments are often necessary. Factors such as the woodworker’s stature, arm length, and the type of woodworking performed should be considered. Individuals primarily engaged in fine detail work may prefer a slightly higher bench to bring the workpiece closer to eye level, while those focusing on heavy stock removal might benefit from a lower bench that allows for greater leverage. Historic examples showcase benches of varying heights reflecting regional traditions and prevalent woodworking techniques. A cabinetmaker in 18th-century France likely used a bench height different from that of a shipwright in colonial America, demonstrating adaptation to specific tasks and physical needs.
Therefore, determining the optimal workbench height is not a standardized prescription but a process of iterative adjustment. It is advisable to construct a workbench with adjustable leg lengths or to build a series of temporary benches of varying heights to experiment and identify the most comfortable and efficient working platform. Addressing this crucial element is not merely an aesthetic choice but a fundamental requirement for a well-designed and functional woodworking bench.
2. Joinery Strength
Joinery strength is a non-negotiable attribute of any robust woodworking bench. It dictates the bench’s ability to withstand the daily stresses of woodworking operations, ensuring stability and longevity. The type and execution of joinery directly correlate with the overall performance and lifespan of the structure.
- Resistance to Racking Forces
Joinery’s primary function is to resist racking, the deformation that occurs when a rectangular frame distorts into a parallelogram under lateral stress. A woodworking bench subjected to planing, sawing, or hammering experiences significant racking forces. Strong joinery, such as mortise-and-tenon or dovetail joints, effectively resists these forces, maintaining the bench’s structural integrity and preventing wobble or instability. A bench with weak joinery will quickly degrade, becoming difficult and potentially dangerous to use.
- Load-Bearing Capacity
The joinery must be capable of supporting the weight of the bench itself, along with any workpieces or tools placed upon it. This load-bearing capacity depends on the type of joint, the materials used, and the precision of the joinery. For instance, a bench with heavy hardwood components requires stronger joinery than one constructed from lightweight softwood. Joints must be properly sized and executed to distribute weight evenly and prevent localized stress concentrations.
- Dimensional Stability Over Time
Wood is a hygroscopic material, meaning it expands and contracts with changes in humidity. Joinery must accommodate these dimensional changes without compromising its strength or structural integrity. Well-designed joinery allows for slight movement within the wood while maintaining a tight and secure connection. Traditional woodworking techniques often incorporate features that address this issue, such as floating tenons or angled dovetails.
- Impact Resistance
A woodworking bench is frequently subjected to impacts from hammering, chopping, and other forceful operations. Joinery must be capable of absorbing these impacts without fracturing or loosening. The selection of appropriate joinery techniques and the use of resilient materials are crucial for ensuring impact resistance. For example, a well-fitted dovetail joint is highly resistant to pull-out forces and can effectively withstand repeated impacts.
In summary, joinery strength directly translates to the long-term usability and safety of a woodworking bench. Proper joinery selection and execution are not merely aesthetic choices but rather essential engineering considerations that ensure the bench can withstand the rigors of woodworking tasks for years to come. A robust and well-joined bench is a testament to the woodworker’s understanding of materials and construction principles, resulting in a reliable and valuable tool.
3. Material Selection
The choice of materials is foundational to the successful construction of a woodworking bench. Material selection impacts structural integrity, work surface properties, long-term durability, and overall cost. Informed decisions regarding wood species, hardware, and finishing products are crucial for achieving a functional and lasting result.
- Hardwood vs. Softwood
The primary decision revolves around selecting hardwoods or softwoods for the bench’s structural components. Hardwoods, such as maple, beech, and oak, offer superior density, strength, and resistance to wear and tear. These properties are essential for areas subjected to heavy use and impact. Softwoods, like pine or fir, are generally less expensive and easier to work with, but lack the durability required for a primary woodworking surface. Softwoods can be suitable for secondary components, such as drawer boxes or shelving, where strength requirements are less demanding. Examples include a hard maple top for a professional bench versus a pine base for a lighter-duty home workshop bench.
- Work Surface Properties
The material used for the work surface dictates its suitability for various woodworking tasks. A dense, flat, and stable surface is essential for accurate measurements, consistent planing, and precise assembly. Hardwoods typically provide these qualities. However, softer materials like MDF (Medium-Density Fiberboard) or butcher block can also be used, particularly if they are adequately supported and protected with a durable finish. The surface must resist dents, scratches, and warping to maintain its functionality over time. An example is a laminated hardwood surface designed to minimize warping compared to a solid wood slab that might be more prone to movement.
- Hardware Selection
The quality of hardware components, such as vises, screws, bolts, and bench dogs, directly affects the bench’s overall performance and longevity. Robust vises made from cast iron or steel provide reliable workholding capabilities, while inferior vises can loosen or fail under pressure. Similarly, high-quality screws and bolts ensure secure connections between structural components. The selection of appropriate hardware is crucial for ensuring the bench’s functionality and preventing premature failure. Examples include heavy-duty metal vises versus plastic bench dogs that are prone to breakage.
- Finish and Protection
The application of a protective finish safeguards the woodworking bench from moisture, stains, and wear. A durable finish can prevent the wood from absorbing moisture, which can lead to warping or cracking. Different types of finishes offer varying levels of protection and aesthetic appeal. Oil-based finishes penetrate the wood and provide a natural look, while polyurethane finishes offer a more durable and water-resistant coating. The choice of finish depends on the desired aesthetic and the level of protection required. An example is applying a polyurethane finish on a bench used for projects involving wet materials to protect against water damage.
The interplay between these material facets determines the final quality and usefulness of a woodworking bench. Strategic material selection, considering both performance and budgetary constraints, is essential for constructing a woodworking bench that meets the specific needs of the woodworker and provides a reliable workspace for years to come. Choosing the right materials for a bench is not merely a cost-saving exercise but an investment in the quality and longevity of the woodworking experience.
4. Vise Placement
Strategic vise placement is a critical determinant of a woodworking bench’s functionality and the woodworker’s efficiency. The location and orientation of vises directly impact the bench’s workholding capabilities, influencing the ease with which various woodworking tasks can be performed. A well-planned vise configuration enhances versatility, while a poorly executed setup can limit the bench’s usefulness.
- Front Vise Location and Function
The front vise, typically positioned on the long side of the bench, is primarily used for clamping workpieces for edge work, joinery, and general assembly. Its optimal location depends on the woodworker’s dominant hand and the types of projects undertaken. A front vise placed too close to the bench’s end can limit the size of workpieces that can be accommodated, while one positioned too far from the edge can reduce clamping force. Consider a cabinetmaker requiring precise edge-planing versus a general woodworker undertaking varied projects; their ideal front vise location will differ based on primary tasks.
- Tail Vise and Dog Hole Integration
The tail vise, often located at the end of the bench, works in conjunction with dog holes to secure long workpieces. The spacing and alignment of dog holes relative to the tail vise are crucial for achieving effective clamping. A tail vise with properly aligned dog holes allows for the secure clamping of boards of varying widths, facilitating tasks such as edge jointing or creating long mortises. An example is the precise alignment required for clamping long boards edge-to-edge for a tabletop, versus a misaligned system that results in uneven clamping pressure.
- Leg Vise for Vertical Clamping
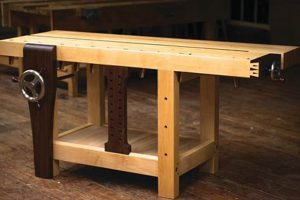
A leg vise, mounted to one of the bench’s legs, provides vertical clamping capabilities, which are particularly useful for holding boards on edge for tasks such as dovetailing or mortising. The size and placement of the leg vise influence the range of workpiece sizes that can be accommodated. A large leg vise can handle thicker stock, while a smaller vise is better suited for thinner materials. Consider a woodworker crafting intricate dovetails versus one primarily working with thick timbers; their leg vise size requirements would differ significantly.
- Consideration of Workbench Orientation
The orientation of the workbench within the workshop also affects vise placement decisions. The direction of light, access to tools, and available space should all be considered when determining the optimal location for each vise. A workbench positioned near a window may benefit from a front vise placed on the side facing the light, allowing for better visibility during tasks such as hand planing. Conversely, a bench placed against a wall may necessitate adjustments to vise placement to ensure adequate access and maneuverability. The consideration of workflow and space constraints plays a crucial role in optimizing vise placement.
These considerations highlight the integral role of vise placement in the overall woodworking bench design. A carefully planned vise configuration contributes significantly to the bench’s versatility and the woodworker’s efficiency, enhancing the ability to perform a wide range of tasks with precision and ease. Ignoring these factors can result in a bench that is less functional and ultimately limits the woodworker’s capabilities.
5. Surface Flatness
Surface flatness is a paramount characteristic of a woodworking bench, directly influencing the accuracy and efficiency of woodworking operations. A non-planar surface compromises precision, leading to inaccuracies in measurements, joinery, and assembly. Consequently, achieving and maintaining a flat work surface is a primary objective during and after bench construction.
- Impact on Accurate Referencing
A flat surface provides a reliable reference plane for measuring and marking. When a workpiece rests on an uneven surface, accurate layout becomes challenging. For instance, transferring dimensions with a marking gauge or accurately setting the blade angle on a bevel gauge requires a true and consistent reference. Deviations from flatness introduce cumulative errors, ultimately affecting the final product. A warped workbench top, therefore, necessitates frequent recalibration of tools and can lead to inaccuracies exceeding acceptable tolerances for precision woodworking.
- Influence on Joinery Execution
The flatness of the bench surface directly impacts the precision of joinery. When assembling joints, such as dovetails or mortise-and-tenon, the workpieces must align accurately to ensure proper fit and strength. An uneven surface can introduce racking or distortion, preventing the joints from closing correctly. Clamping pressure applied to a non-planar surface may further exacerbate these issues, resulting in weak or misaligned joints. Corrective measures to address poorly executed joinery due to a non-flat surface often involve time-consuming and potentially compromising alterations.
- Effect on Planing and Flattening Operations
The ability to effectively flatten and true workpieces relies heavily on the flatness of the workbench. Hand planing, a fundamental woodworking technique, requires a stable and consistent surface to support the workpiece. An uneven bench surface can cause the plane to rock or skip, resulting in an inconsistent cut and preventing the workpiece from being properly flattened. This is particularly problematic when working with large or thin panels, where even minor irregularities in the bench surface can significantly affect the outcome.
- Long-Term Stability Considerations
Maintaining surface flatness over time necessitates careful material selection and construction techniques. Wood is a hygroscopic material, meaning it absorbs and releases moisture, causing dimensional changes. These changes can lead to warping, cupping, or twisting of the workbench top, compromising its flatness. To mitigate these effects, woodworkers often employ techniques such as laminating multiple layers of wood together, using kiln-dried lumber, and applying a durable finish to protect the surface from moisture. Regular maintenance, including periodic flattening with hand planes, may also be necessary to maintain optimal surface flatness over the bench’s lifespan.
The interconnectedness of surface flatness with the woodworking bench underscores its importance in all facets of woodworking. The selection of appropriate construction methods and ongoing maintenance procedures serve to ensure that the established planarity endures, thus guaranteeing a stable and accurate platform for diverse woodworking operations and projects.
6. Storage Integration
Storage integration within a woodworking bench build represents a critical design consideration impacting workflow efficiency and overall shop organization. The presence or absence of thoughtfully planned storage directly influences the proximity of essential tools and materials, minimizing wasted movement and maximizing productive time. A woodworking bench devoid of integrated storage necessitates reliance on separate tool chests, wall-mounted racks, or floor-standing cabinets, thereby increasing retrieval time and potentially cluttering the workspace. Conversely, a well-designed system incorporates drawers, shelves, and specialized compartments tailored to the specific tools and materials used most frequently, creating a streamlined and readily accessible resource center. For example, a cabinetmaker’s bench might feature shallow drawers for storing hand planes and chisels, while a carver’s bench could include specialized compartments for holding carving tools and gouges. These tailored solutions underscore the cause-and-effect relationship between storage integration and workspace optimization.
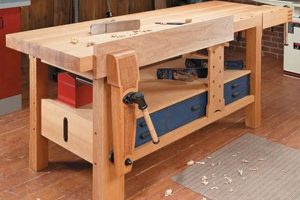
Practical applications of storage integration are manifold. Drawers can be designed with custom dividers to organize hand tools, preventing damage and facilitating quick access. Shelves beneath the bench can accommodate larger items such as power tools, jigs, or project components. Vertical storage, such as racks for saws or planes, can be incorporated into the bench’s structure to maximize space utilization. Moreover, specialized compartments can be created to hold consumables like screws, nails, and sandpaper. The specific configuration of storage should align with the woodworker’s preferred workflow and the nature of the projects undertaken. For instance, a bench designed for furniture making might prioritize storage for hardware and finishing supplies, while a bench intended for carving could emphasize the organization of carving tools and sharpening equipment. The historical evolution of woodworking benches reveals a gradual integration of storage solutions, reflecting a growing understanding of the importance of ergonomics and efficiency.
In summary, storage integration is an indispensable element of woodworking bench construction. It directly affects workspace efficiency, tool accessibility, and overall shop organization. Challenges associated with storage integration include balancing storage capacity with bench stability, optimizing drawer and shelf layouts for specific tool collections, and ensuring ease of access without compromising structural integrity. Effective storage integration transforms a basic workbench into a highly functional and personalized workspace, capable of supporting a wide range of woodworking activities with minimal wasted effort. Furthermore, this understanding emphasizes the relationship between efficient design and high-quality craftsmanship within the sphere of woodworking.
Frequently Asked Questions About Woodworking Bench Build
This section addresses common inquiries regarding the construction of a woodworking bench, providing clarity on essential design considerations and construction techniques.
Question 1: What is the optimal height for a woodworking bench, and how is it determined?
The ideal height is typically set at wrist level when standing. However, adjustments should be made based on individual stature and predominant tasks. Woodworkers performing primarily detail work may benefit from a slightly higher bench, while those focused on heavy stock removal might prefer a lower height for increased leverage.
Question 2: What type of wood is most suitable for building a durable woodworking bench?
Hardwoods such as maple, beech, and oak are generally preferred for their strength, density, and resistance to wear. While softwoods like pine are less expensive, they lack the durability required for a primary workbench surface.
Question 3: What are the essential joinery techniques for ensuring a robust and stable woodworking bench?
Mortise-and-tenon joints, dovetail joints, and lap joints are commonly employed for their strength and resistance to racking forces. The selected joinery method should be carefully executed to ensure accurate fit and secure connections.
Question 4: Where should vises be positioned on a woodworking bench to maximize functionality?
The front vise is typically placed on the long side of the bench for general workholding. A tail vise, located at the end of the bench, is used in conjunction with dog holes for securing long workpieces. A leg vise provides vertical clamping capabilities for holding boards on edge.
Question 5: How can surface flatness be achieved and maintained on a woodworking bench?
Constructing the bench with stable, kiln-dried lumber and laminating multiple layers together can minimize warping. Applying a durable finish protects the surface from moisture. Periodic flattening with hand planes may be necessary to maintain optimal surface flatness.
Question 6: What are some effective strategies for integrating storage into a woodworking bench design?
Drawers can be designed with custom dividers for organizing hand tools. Shelves beneath the bench can accommodate larger items. Vertical storage, such as racks for saws, can be incorporated into the bench’s structure. Specialized compartments can hold consumables.
In summary, the design and construction of a woodworking bench should be carefully considered to ensure a durable, functional, and ergonomic workspace. Addressing these common questions provides a foundation for a successful woodworking bench build.
The subsequent section will provide a detailed, step-by-step building plan.
Woodworking Bench Build
The preceding exploration of woodworking bench build underscores its critical role in the woodworking craft. It highlights the necessity of careful planning, informed material selection, and precise execution of construction techniques to create a functional and durable workspace. The attributes of optimal height, robust joinery, and surface planarity, alongside the strategic integration of workholding and storage solutions, have been identified as fundamental to achieving a successful outcome. The consistent application of these principles determines the long-term utility and value of the woodworking bench.
The commitment to quality in woodworking bench build represents an investment in craftsmanship. A thoughtfully constructed and maintained bench serves as a foundation for accurate work, efficient workflow, and enhanced safety. As woodworking evolves, adherence to sound construction principles remains paramount. This ensures that each bench continues to serve as a reliable platform for realizing creative and functional designs, sustaining the legacy of skillful woodworking practices.


