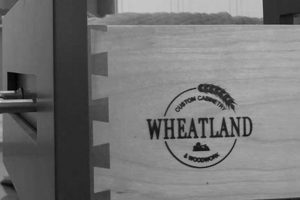
Devices employed to imprint designs, logos, or text onto wooden surfaces are invaluable tools for woodworkers. These implements, typically crafted from durable materials like metal or polymer, feature a raised pattern that, when pressed against wood, leaves a lasting impression. For example, a craftsman might utilize such an implement to add a signature emblem to each handcrafted item.
The utilization of these marking tools enhances the perceived value and authenticity of wooden creations. They provide a means of branding, identification, and personalization, serving both functional and aesthetic purposes. Historically, similar methods have been used for centuries to denote ownership, quality, or origin, imbuing objects with a sense of heritage and craftsmanship.
This article will delve into the various types available, the methods of their creation, best practices for their use, and the range of applications they serve within the woodworking community. Consideration will also be given to the selection criteria for choosing the optimal tool based on project requirements.
Essential Usage Considerations
Achieving optimal results with implements that create impressions on wood requires careful consideration of several key factors. The following points offer guidance on effective application and maintenance.
Tip 1: Material Selection: The choice of wood species impacts the clarity of the impression. Softer woods may require less pressure, while hardwoods demand more force and potentially heat assistance.
Tip 2: Moisture Content: Wood should be properly seasoned before application. Excessive moisture can lead to blurred impressions or warping of the wood itself post-marking.
Tip 3: Pressure Application: Consistent and even pressure is crucial. A vise or arbor press can provide controlled force, minimizing the risk of uneven markings.
Tip 4: Temperature Control: For certain metals, heating the metal before application can enhance the depth and permanence of the mark, particularly on dense hardwoods. Exercise caution and appropriate safety measures when using heat.
Tip 5: Surface Preparation: Ensure the wood surface is clean and free of debris. A smooth, sanded surface yields the best and most detailed impression.
Tip 6: Maintenance and Cleaning: After each use, thoroughly clean the implement to remove any wood residue. Proper storage protects the delicate design from damage.
By attending to these details, woodworkers can consistently produce high-quality, professional-looking results on their projects, thereby maximizing the value and aesthetic appeal of their work.
The next section will address common issues encountered during the imprinting process and offer potential solutions.
1. Design Complexity
The intricacy of a design significantly influences the feasibility and cost-effectiveness of creating implements for marking wood. The level of detail impacts manufacturing processes, material selection, and the end result achieved on the wood surface.
- Manufacturing Feasibility
More elaborate designs demand advanced manufacturing techniques, such as laser engraving or CNC machining. Simple designs can be achieved through traditional methods like hand carving or etching. The chosen method affects both the initial cost and the potential for mass production.
- Material Suitability
Fine lines and detailed patterns necessitate robust materials capable of withstanding the pressure exerted during the imprinting process. Polymers with high tensile strength or metals with hardness are often required to preserve the design integrity under repeated use. Softer materials are prone to wear and distortion, reducing the clarity of subsequent impressions.
- Impression Clarity
The density and spacing of design elements directly correlate with the clarity of the mark on the wood. Closely packed lines may bleed together, especially on softer woods, resulting in a blurred image. Conversely, widely spaced elements provide greater definition and legibility.
- Application Technique
Complex designs frequently require precise alignment and consistent pressure to ensure accurate reproduction. Hand application may prove inadequate, necessitating the use of specialized equipment like arbor presses or heated branding irons to achieve consistent results. The application technique must be carefully calibrated to the design’s complexity and the wood’s properties.
The interaction between design complexity and the choice of manufacturing method, material, and application technique dictates the ultimate success and cost of marking wooden objects. Understanding these factors is critical for woodworkers seeking to incorporate detailed impressions into their projects.
2. Material Durability
The longevity and performance of implements used to create impressions on wood are inextricably linked to the durability of the materials from which they are constructed. The chosen material must withstand repeated applications under pressure, potentially with heat, without degradation that compromises the clarity or accuracy of the resulting mark.
- Resistance to Deformation
The capacity of a material to retain its shape under stress is paramount. Frequent application onto hardwoods demands a material resistant to bending, compression, or chipping. Metals like tool steel or certain hardened polymers are often selected for their ability to maintain dimensional stability, thereby ensuring consistent impressions over time. Inadequate resistance to deformation leads to blurred or distorted markings and a shortened tool lifespan.
- Abrasive Wear Resistance
Contact with wood, particularly abrasive wood species, induces wear on the imprinting surface. Materials with high abrasive wear resistance, such as hardened steels or certain ceramics, extend the tool’s operational life. Conversely, softer metals or polymers are susceptible to erosion, leading to a loss of detail and a gradual degradation of the imprinted design. This wear also depends upon the proper seasoning of the wood which has to be considered as well.
- Thermal Stability
The application of heat to enhance the imprinting process places demands on the material’s thermal stability. Materials prone to expansion or contraction with temperature fluctuations can suffer from dimensional inaccuracies. Some materials also suffer under rapid change in the temperature which can lead to damage. Proper selection of thermally stable materials, such as certain alloys or high-temperature polymers, ensures consistent performance and prevents design distortion.
- Corrosion Resistance
Exposure to environmental factors such as humidity or cleaning agents can induce corrosion in certain materials. Corrosion compromises structural integrity and surface detail. Stainless steel and other corrosion-resistant alloys are often preferred for their ability to withstand these conditions, maintaining a clean and accurate imprinting surface. Similarly, storing the tools in proper places or packaging prevent corrosion over a long period of time.
The careful selection of materials with appropriate durability characteristics is essential for ensuring the reliability and longevity of tools used for imprinting on wood. Trade-offs may exist between cost, manufacturability, and durability; however, prioritizing material durability directly translates to improved performance and a lower long-term cost for woodworkers.
3. Pressure Uniformity
Achieving consistent and even pressure across the entire surface of a is paramount for producing clear, legible impressions on wood. Uneven pressure distribution results in certain areas of the design being more deeply imprinted than others, leading to a distorted or incomplete image. This phenomenon is particularly pronounced when working with intricate designs or varying wood densities. The absence of uniform pressure undermines the intended aesthetic and communicative function of the mark.
Several factors contribute to pressure inconsistencies. Variations in the flatness of the wood surface, subtle imperfections in the itself, or the application of force at an angle can all disrupt uniform pressure. In practical terms, a craftsman using a hand-held might inadvertently apply more pressure to one side of the design, creating a darker impression on that side while leaving the opposite side faint. Furthermore, when employing a press, insufficient shimming or an improperly calibrated pressure gauge can lead to similar outcomes. Precise techniques and appropriate equipment are therefore essential for mitigating these challenges. Applying pressure to the design with a press or clamp also requires using an item to distribute the force evenly, such as a block of wood that has a flat surface and large enough to cover the itself.
Ultimately, the pursuit of pressure uniformity in the application of is an investment in the quality and professionalism of woodworking projects. Understanding the causes of uneven pressure and implementing strategies to minimize its effects elevates the craftsmanship and reinforces the value of the personalized mark. Future advancements in design and pressure application technology will continue to refine this critical aspect of the imprinting process.
4. Heat Application
The application of heat, in conjunction with implements designed to mark wood, serves to enhance the depth, clarity, and permanence of the resulting impression. Heat fundamentally alters the wood’s composition at the point of contact, facilitating a more profound and lasting mark.
- Enhanced Impression Depth
The elevated temperature softens the lignin and cellulose within the wood fibers, allowing the implement to penetrate the surface more readily under pressure. This results in a deeper, more defined mark, particularly advantageous when working with dense hardwoods that resist traditional imprinting methods. For example, branding irons heated to specific temperatures are commonly employed to indelibly mark furniture or lumber.
- Improved Mark Legibility
Heating the wood alters its color in the immediate vicinity of the impression, creating a contrast between the marked area and the surrounding surface. This contrast significantly enhances the legibility of the design, especially for intricate patterns or fine lettering. Applying heat enhances the mark, for example, highlighting the design or logo which makes it easier to see.
- Permanent Marking
The heat-induced modification of the wood’s cellular structure renders the resulting mark more resistant to fading, abrasion, or weathering. The marked area is less susceptible to environmental factors, ensuring long-term visibility and durability. This is crucial for applications where identification or branding is essential for the product’s lifespan. For example, branding lumber before it is used to make a tool will ensure that it is permanently there.
- Reduced Splintering/Cracking
Controlled heat application can minimize the risk of splintering or cracking during the imprinting process, particularly when working with brittle or thin wood. Warming the area to be marked increases the wood’s pliability, reducing the likelihood of damage under pressure. This ensures that designs look cleaner without any issues.
The judicious application of heat represents a crucial technique for optimizing the effectiveness and longevity of impressions on wood. While careful temperature control and safety precautions are essential, the resulting improvements in mark depth, legibility, and permanence make heat application a valuable asset for woodworkers seeking professional, high-quality results.
5. Wood Seasoning
Wood seasoning, the process of reducing the moisture content of timber, directly impacts the effectiveness and longevity of impressions made with implements on wooden surfaces. Excess moisture in wood fibers causes swelling and softness, leading to several detrimental effects. When a implement is pressed against unseasoned wood, the surrounding fibers compress unevenly, resulting in a blurred or indistinct mark. Furthermore, as the wood dries post-imprinting, the shrinking process can distort the design, diminishing its visual appeal and potentially compromising its legibility. A practical example is evident in marking green wood for furniture components; as the wood seasons, the imprinted logo or design may warp or crack, rendering it unprofessional.
The optimal moisture content for wood destined to receive an impression varies depending on the wood species and intended application. As a general rule, wood should be seasoned to a moisture content consistent with its intended environment to minimize dimensional changes after imprinting. This typically involves air-drying or kiln-drying processes to achieve a stable moisture level. Prior to imprinting, the wood surface must also be adequately prepared. Sanding to a smooth finish ensures a uniform surface for the impression, and removing any surface debris prevents interference with the imprinting process. In addition, failing to properly dry the wood can cause the implements to rust or have buildup from the moisture on the wood.
Therefore, proper wood seasoning is not merely a preliminary step but an integral component of the imprinting process. Understanding the influence of moisture content on wood behavior allows woodworkers to produce high-quality, lasting impressions that enhance the aesthetic and commercial value of their products. Neglecting this crucial step introduces risks that can compromise the integrity of the design and the overall quality of the finished piece, leading to waste of time, materials, and potentially the implement itself.
6. Surface Preparation
Surface preparation is a critical determinant in the quality and durability of impressions made using devices to mark wood. A properly prepared surface ensures that the design transfers cleanly and remains legible over time, while inadequate preparation can lead to blurred impressions, inconsistent depth, and premature degradation of the mark.
- Removal of Surface Contaminants
The presence of dust, oil, or other foreign materials on the wood surface impedes direct contact between the implement and the wood fibers. This results in a weak or incomplete impression, particularly in areas where contaminants are concentrated. Thorough cleaning with appropriate solvents or abrasives removes these barriers, promoting optimal adhesion and a crisp, well-defined mark. Examples include the removal of sawdust from sanding or residual oil from handling, ensuring a pristine surface ready for imprinting.
- Smoothing of the Wood Grain
The inherent texture of wood, characterized by variations in grain direction and density, can interfere with uniform pressure distribution during imprinting. A rough surface introduces inconsistencies in the depth of the impression, leading to uneven lines and a lack of clarity. Sanding with progressively finer grits creates a smooth, level surface that allows for consistent pressure application and a more uniform transfer of the design. This is exemplified by sanding a rough-sawn board to create a polished surface before imprinting a delicate logo.
- Achievement of Uniform Porosity
Variations in the porosity of wood affect the absorption of any applied heat or pressure, influencing the depth and contrast of the resulting mark. Areas of high porosity may absorb more heat or pressure, leading to a darker, more pronounced impression, while areas of low porosity may resist the process, resulting in a lighter, fainter mark. Applying a sealant or pre-treatment can even out the porosity, creating a more uniform surface for imprinting and a consistent final appearance. This is essential when working with wood species with distinct grain patterns and varying densities.
- Enhancement of Wood Color/Tone
The existing color or tone of the wood can influence the visibility of the imprinted design. Darker woods may require techniques to lighten the surface before imprinting, while lighter woods may benefit from treatments that darken the wood around the impression, creating a greater contrast. Bleaching, staining, or other color alteration methods can prepare the surface to maximize the legibility and aesthetic impact of the imprinted design. One can select wood species with higher contrast to make the design more visible.
In conclusion, meticulous surface preparation is not an optional add-on but a fundamental requirement for achieving professional-quality results. By addressing issues related to contaminants, texture, porosity, and color, woodworkers can optimize the imprinting process and create lasting impressions that enhance the value and appeal of their crafted pieces. These steps are crucial to ensure a clean and accurate reproduction of the design and the final product.
7. Maintenance Protocols
The longevity and consistent performance of custom woodworking stamps are directly contingent upon the implementation of rigorous maintenance protocols. These protocols serve as preventative measures against degradation, ensuring the tool retains its precision and functionality over extended periods. Neglecting these measures precipitates a cascade of adverse effects, culminating in diminished impression quality and premature tool failure. The materials used to construct woodworking stamps, whether metal alloys or durable polymers, are susceptible to wear, corrosion, and the accumulation of wood residue. A failure to address these vulnerabilities compromises the tool’s ability to produce crisp, well-defined impressions. Consider a metal stamp used extensively on hardwoods; the frictional forces involved can lead to gradual erosion of the design’s finer details, resulting in a progressively less accurate mark. Similarly, wood residue can solidify within the intricate crevices of the design, obscuring the lines and hindering uniform contact with the wood surface.
Effective maintenance protocols encompass several key steps. Post-use cleaning, involving the removal of all wood particles and other debris, is paramount. Solvents appropriate to the stamp’s material composition can aid in dissolving stubborn residue without damaging the tool. Periodic inspection for signs of wear, corrosion, or deformation allows for timely intervention, preventing minor issues from escalating into major problems. Protective storage, in a dry environment shielded from extreme temperatures and physical impact, further mitigates the risk of damage. For instance, a polymer stamp should be stored away from direct sunlight to prevent warping or cracking, while a metal stamp should be coated with a rust inhibitor to guard against corrosion. Real-world examples highlight the practical significance of these protocols; woodworking businesses that adhere to strict maintenance schedules report significantly lower tool replacement costs and consistently high-quality impressions, enhancing the value and appeal of their products.
In summary, maintenance protocols are an indispensable component of custom woodworking stamp ownership. Their diligent application ensures the tool’s continued functionality, protects the investment, and ultimately contributes to the quality and consistency of the woodworker’s output. Overcoming the challenges associated with tool upkeep, such as time constraints or a lack of awareness, requires prioritizing maintenance as an integral part of the workflow. By recognizing the critical link between maintenance and performance, woodworkers can maximize the lifespan and effectiveness of their custom woodworking stamps, solidifying their reputation for craftsmanship and attention to detail.
Frequently Asked Questions
This section addresses common inquiries regarding the acquisition, application, and maintenance of implements for imprinting custom designs on wood. It aims to provide clarity on critical aspects related to the use and care of these tools.
Question 1: What factors influence the cost of a implement used to create custom impressions on wood?
The price is determined by design complexity, material selection, size, and manufacturing method. Intricate designs, durable materials (such as hardened steel), larger sizes, and advanced manufacturing techniques (like CNC machining) elevate costs.
Question 2: What wood species are best suited for use with tools that imprint designs on wood?
Hardwoods like maple, cherry, and walnut generally provide the clearest impressions due to their tight grain structure. Softwoods, such as pine, are usable but may require adjustments in pressure and temperature.
Question 3: How can a woodworker prevent blurred impressions when using a implement to mark wood?
Ensure the wood is properly seasoned to the appropriate moisture content. Apply consistent and even pressure. Use a clean, well-prepared wood surface. For hardwoods, consider controlled heat application.
Question 4: What cleaning procedures are recommended for implements used for imprinting designs on wood?
Remove wood residue immediately after each use with a soft brush and appropriate solvent (if necessary). Avoid abrasive cleaners that could damage the design. Store in a dry environment to prevent corrosion.
Question 5: How does the choice of material affect the durability of marking tools for wood?
Durable materials, such as tool steel or hardened polymers, offer greater resistance to wear, deformation, and corrosion, ensuring a longer lifespan and consistent impression quality. Softer materials degrade more rapidly.
Question 6: Can heat be safely applied to all designs to enhance impressions on wood?
Heat application is generally safe when controlled and appropriate for the material composition of the tool and the wood species. However, excessive heat can damage the wood or distort the , therefore, care must be taken when performing this task.
Understanding these aspects enables informed decisions regarding the selection, application, and preservation of tools that imprint wood surfaces. Proper utilization of these tools guarantees the longevity of equipment and projects.
The subsequent section will explore case studies of businesses that have successfully integrated implements used to create custom impressions on wood into their branding strategies.
Conclusion
The preceding exploration has illuminated the multifaceted nature of custom woodworking stamps, emphasizing their role in enhancing both the functional and aesthetic value of woodcraft. From material selection and design complexity to proper application and maintenance, each element contributes significantly to the quality and longevity of the resulting impression. Achieving optimal results requires a comprehensive understanding of these factors, reflecting a commitment to craftsmanship and precision.
The strategic integration of custom woodworking stamps represents a significant investment in brand identity, product authentication, and overall market differentiation. As woodworking continues to evolve, the utilization of these tools will only grow in importance, providing a tangible link between creator and creation, and serving as a lasting testament to the enduring appeal of handcrafted artistry. Those seeking to elevate their woodworking endeavors should carefully consider the implementation of custom marking solutions.


![Bespoke Woodworking Custom Furniture: [Style] Design Step-by-Step Guides, Tools & Inspiration to Build Beautiful Wooden Decor on a Budget Bespoke Woodworking Custom Furniture: [Style] Design | Step-by-Step Guides, Tools & Inspiration to Build Beautiful Wooden Decor on a Budget](https://woodfromhome.com/wp-content/uploads/2026/02/th-203-300x200.jpg)
