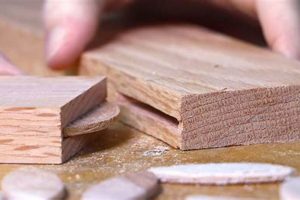
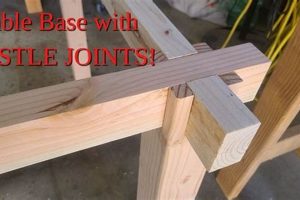
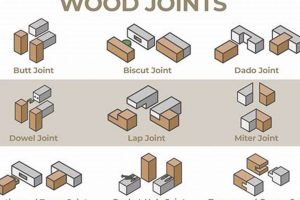
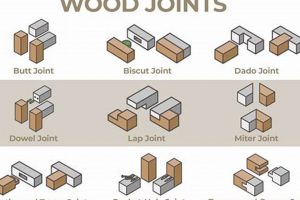
A woodworking connection where two pieces of material overlap is termed a lap joint. This configuration, frequently employed in various construction and craft applications, involves removing material from one or both pieces to create a flush surface where they join. A common example includes frame construction, where the rails and stiles of a door or a picture frame are connected in this manner, providing a strong and aesthetically pleasing union.
The utilization of overlapping connections presents several advantages. The increased surface area allows for a robust glue bond, resulting in considerable strength and stability. Historically, this method has been favored for its simplicity and the relative ease with which it can be executed using basic tools. Furthermore, it provides a tolerance for slight inaccuracies in measurements, making it a forgiving option for woodworkers of varying skill levels.
Understanding the principles of creating effective overlapping connections is essential for successful woodworking projects. Subsequent discussion will delve into different types of this connection, explore the tools and techniques necessary for precise execution, and examine factors that influence its structural integrity.
Lap Joint Execution
The following guidelines aim to enhance the precision and durability of overlapping wood connections.
Tip 1: Material Selection: Employ wood species with complementary gluing properties. Avoid combining dense hardwoods with porous softwoods when structural integrity is paramount. Differential expansion and contraction can compromise the bond over time.
Tip 2: Precise Measurement: Accurate marking and cutting are critical. Use a sharp marking knife and a precision square to transfer dimensions accurately. Inaccurate measurements lead to gaps and weakened connections.
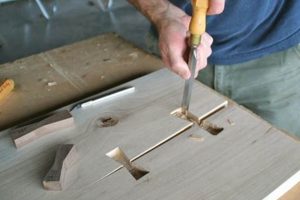
Tip 3: Consistent Material Removal: Maintain uniform depth when removing material to create the lap. Hand tools, such as chisels, or power tools, like routers, should be used with care and precision. Irregular depth affects the flushness of the joint.
Tip 4: Glue Selection: Choose an adhesive appropriate for the wood species and the intended application. Consider factors such as open time, clamp time, and moisture resistance. Improper glue selection can result in joint failure.
Tip 5: Adequate Clamping Pressure: Apply sufficient clamping pressure to ensure intimate contact between the overlapping surfaces during the glue’s curing process. Insufficient pressure reduces the glue’s effectiveness.
Tip 6: Joint Alignment: Prior to clamping, meticulously align the components. Misalignment compromises the structural integrity and aesthetic appeal of the finished piece.
Tip 7: Surface Preparation: Ensure that the surfaces to be glued are clean, dry, and free from dust or contaminants. A light sanding with fine-grit sandpaper can enhance adhesion.
Adhering to these recommendations will contribute to the creation of robust and visually appealing overlapping wood connections, ensuring the longevity and structural soundness of woodworking projects.
The ensuing segments of this article will address advanced techniques and applications related to this form of joinery.
1. Overlapping Surfaces
Overlapping surfaces constitute the defining characteristic of a woodworking lap joint. This arrangement dictates the method of connection, influencing its structural integrity and aesthetic outcome. The following details elucidate the significance of overlapping surfaces within the framework of a lap joint.
- Surface Area for Adhesion
The extended contact area afforded by overlapping surfaces enables a larger gluing surface. This increased surface area provides a more robust bond compared to end-to-end connections. The enhanced adhesion contributes substantially to the overall strength and durability of the completed joint.
- Load Distribution Mechanism
Overlapping surfaces facilitate a more even distribution of stress and load across the joint. The force is spread over a greater area, reducing the likelihood of localized stress concentrations that could lead to failure. This mechanism is particularly beneficial in applications subject to significant weight or pressure.
- Alignment and Stability
The physical overlap provides inherent stability during assembly. It aids in maintaining proper alignment of the components while the adhesive sets. This reduces the reliance on complex clamping arrangements and minimizes the potential for misalignment.
- Material Thickness Considerations
The degree of overlap directly affects the final thickness of the joint. Careful consideration must be given to ensure that the resulting thickness is suitable for the intended application. Excessive overlap can create an undesirable bulge, while insufficient overlap may compromise the joint’s strength.
The properties derived from overlapping surfaces are fundamental to understanding and executing an effective lap joint. By carefully managing the extent of the overlap and optimizing surface preparation, woodworkers can leverage these benefits to create strong, stable, and visually appealing connections.
2. Increased gluing area
The enlarged bonding surface area characteristic of a lap joint directly impacts its structural integrity and overall performance in woodworking applications. This attribute is a primary reason for its selection in projects requiring robust and durable connections.
- Enhanced Bond Strength
The expanded surface area allows for a more extensive glue line, thereby maximizing the adhesive’s ability to create a strong bond between the joined pieces. A larger glue surface distributes stress more evenly, reducing the likelihood of localized failure under load. This characteristic is crucial in applications where the joint is subjected to significant tension or shear forces.
- Improved Load Distribution
The increased bonding surface facilitates a more uniform transfer of stress across the joint. This distribution mitigates the concentration of forces at specific points, preventing premature weakening or cracking. In situations where the joint is subjected to dynamic loads or vibrations, this uniform distribution is essential for long-term durability.
- Reduced Susceptibility to Environmental Factors
A wider glue line can provide enhanced resistance to moisture ingress and temperature fluctuations. The greater surface area allows for a more effective seal, minimizing the risk of swelling, shrinking, or degradation of the adhesive due to environmental exposure. This factor is particularly relevant in outdoor or high-humidity applications.
- Tolerance for Imperfections
While precise joinery is always desirable, the increased gluing area can offer a degree of forgiveness for minor imperfections in the mating surfaces. The wider glue line can fill small gaps or irregularities, maintaining a strong bond even in the presence of slight variations in the material. This can be beneficial in situations where achieving perfectly flush surfaces is challenging.
In summary, the expanded gluing area inherent in a lap joint directly contributes to its strength, stability, and resilience. This attribute is a key consideration when selecting a joint for applications requiring a reliable and durable connection, showcasing the crucial connection to its role in woodworking.
3. Strength and stability
The inherent design of overlapping wood connections directly contributes to the strength and stability of the resulting structure. The increased surface area for adhesive bonding provides a more robust connection than edge-to-edge or end-to-end joints. This expanded gluing surface distributes stress more evenly, mitigating the risk of concentrated stress points that could lead to premature failure. The resulting structural integrity is especially beneficial in applications where the joint will be subjected to significant loads or stress, such as in frame construction or supporting elements of furniture. A robust connection ensures the longevity and reliability of the woodworking project.
Examples of this connection’s application in achieving strength and stability are numerous. In cabinet making, it is frequently employed to connect face frames, providing a solid and stable structure to which doors and drawers can be attached. Similarly, in timber framing, overlapping connections, secured with fasteners, offer a durable and load-bearing union for large structural members. The resistance to racking and twisting imparted by a well-executed overlapping connection makes it a preferred choice in applications requiring dimensional stability over time. The selection of appropriate wood species and adhesives further enhances the strength and stability characteristics.
In conclusion, the link between overlapping connection and structural integrity is undeniable. The design, which incorporates an increased gluing surface and even stress distribution, directly enhances strength and stability. While other jointing techniques may offer aesthetic advantages or ease of construction, the robust nature of this connection makes it a cornerstone of reliable woodworking. Understanding the principles behind its strength is crucial for selecting the appropriate joint for any given project, ensuring both structural integrity and longevity. Challenges in executing a perfect joint, such as precise material removal and clamping pressure, are outweighed by the long-term benefits of enhanced structural performance.
4. Simplicity of construction
The relative ease of execution forms a significant component of the appeal and utility of overlapping wood connections. This attribute stems from the limited number of tools and steps required for its creation, positioning it as an accessible joint for both novice and experienced woodworkers. In contrast to more complex joinery techniques demanding intricate cuts and specialized equipment, its construction relies primarily on accurate measurement, straight cuts, and secure fastening, such as gluing or screwing.
The accessibility of this connection translates directly into practical advantages. For example, in basic framing projects, its straightforward nature allows for quick and efficient assembly, reducing both the time and skill required to achieve a structurally sound result. Its tolerance for slight inaccuracies in cutting further contributes to its user-friendliness. This inherent simplicity makes it a popular choice in educational settings where woodworking skills are being introduced, as it provides a readily achievable demonstration of fundamental joinery principles. Furthermore, the ease of construction facilitates on-site repairs and modifications, making it a versatile option for field applications.
In summary, the connection’s straightforward construction is a critical factor in its widespread adoption. By minimizing the complexity of the joinery process, it makes woodworking more accessible, efficient, and adaptable to a range of projects and skill levels. While precision remains essential for optimal results, the forgiving nature of the design allows for successful implementation even without extensive training or specialized tools, solidifying its place as a fundamental technique in woodworking. However, the strength of the joint may require reinforcement for certain critical applications to ensure a reliable, long-term bond.
5. Flush surface alignment
The achievement of a flush surface is a significant aesthetic and functional consideration in the execution of overlapping wood connections. It directly influences the visual appeal and usability of the finished piece.
- Material Removal Precision
To attain flush alignment, accurate material removal from each component is imperative. The depth of the recess must precisely match the thickness of the overlapping section. Any deviation results in an uneven surface, detracting from the overall appearance and potentially compromising functionality. Careful measurement and precise cutting techniques are essential to ensure that both pieces align seamlessly.
- Assembly and Clamping Techniques
Proper assembly and clamping procedures are crucial in maintaining flush alignment during the adhesive curing process. Adequate clamping pressure ensures that the pieces are held tightly together, preventing any shifting or movement that could disrupt the alignment. The use of cauls or clamping blocks can further aid in distributing pressure evenly across the surfaces, minimizing the risk of unevenness.
- Finishing Considerations
Even with meticulous material removal and assembly, minor discrepancies in surface alignment may still occur. Finishing techniques, such as sanding and planing, can be employed to rectify these imperfections and achieve a perfectly flush surface. The choice of finishing method depends on the extent of the misalignment and the desired aesthetic outcome. In some cases, a thin layer of filler may be necessary to level the surface prior to final finishing.
- Functional Implications
Flush surfaces not only enhance the aesthetic appeal of a project, but also have implications on the functionality. Flat, even surfaces are necessary for certain applications such as drawer slides and table tops. Deviations from the proper alignment will not allow these pieces to function as they are intended to. Safety can be another aspect to consider with flush surfaces, as a flush surface on a handrail is important for gripping.
Attaining flush surface alignment in overlapping wood connections requires a combination of precise material preparation, careful assembly techniques, and appropriate finishing methods. The resulting seamless transition between surfaces contributes significantly to the visual quality and functional performance of the finished woodworking project. Flush surfaces will leave woodworkers and observers alike, viewing a piece of work as a professional grade creation.
Frequently Asked Questions
The following addresses common inquiries regarding the characteristics, applications, and execution of overlapping wood connections. The intent is to provide clarity and enhance understanding of this fundamental woodworking technique.
Question 1: What defines an overlapping wood connection?
An overlapping wood connection is defined by the partial superimposition of two pieces of wood, where a portion of each piece is removed to create a flush surface at the point of union. This configuration provides an increased surface area for adhesive bonding.
Question 2: Where are overlapping connections typically utilized?
Overlapping connections find application in various woodworking projects, including frame construction, cabinet making, furniture building, and timber framing. They are often employed where strength and stability are paramount.
Question 3: How does an overlapping connection achieve strength?
Strength is achieved through the augmented surface area available for adhesive bonding. The expanded glue line distributes stress more evenly across the joint, reducing the potential for localized failure.
Question 4: What tools are essential for creating an overlapping connection?
Essential tools include measuring devices, marking tools (such as a marking knife), saws (hand saws or power saws), chisels (for fine adjustments), and clamping devices. Accuracy in measurement and cutting is critical.
Question 5: What are the primary advantages of using an overlapping connection?
Advantages include increased strength and stability due to the larger gluing surface, relative simplicity of construction, and a degree of tolerance for minor inaccuracies in measurements.
Question 6: How does one ensure proper alignment in an overlapping connection?
Proper alignment is maintained through precise marking, accurate material removal, and the use of clamping devices during adhesive curing. Cauls or clamping blocks can help distribute pressure evenly to prevent shifting.
The consistent execution of overlapping connections is dependent on the proper implementation of these processes.
Subsequent sections will address the practical aspects of selecting and applying different types of overlapping connections in specific woodworking scenarios.
Conclusion
The preceding exploration has illuminated various facets of the woodworking joint, specifically addressing what is a lap joint in woodworking. This method of connection, characterized by overlapping components and an expanded bonding surface, provides a foundational element for robust and enduring wood structures. The inherent simplicity, coupled with its capacity for considerable strength, positions it as a staple technique across diverse woodworking applications. The examination encompassed structural benefits, practical execution, and addressed common inquiries to foster a comprehensive understanding.
Mastery of overlapping connections is essential for any serious woodworker. As projects demand increasingly refined and durable solutions, the judicious application of its principles becomes ever more critical. Continued exploration and rigorous practice will yield proficiency, empowering craftsmen to create lasting works of both structural integrity and aesthetic merit. The principles explored here are not static, but rather form a base upon which deeper understandings of related joinery can be built, opening avenues for innovation and design refinement.


