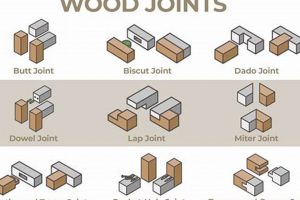
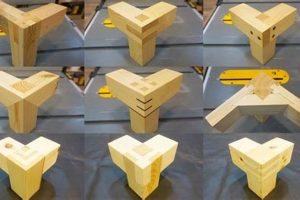
A specific technique in woodworking involves creating a mitered joint that is not a simple 45-degree angle, but rather a more complex angle designed to meet at a curved or irregular surface, such as the molding at the top of a cabinet or piece of furniture. This method allows for a seamless transition between two pieces of wood, even when they are not meeting at a right angle. An example would be joining two pieces of crown molding around a corner that is not perfectly square.
The value of employing this technique lies in its ability to produce visually appealing and structurally sound connections in complex woodworking projects. Historically, this joint construction has been crucial in creating ornate architectural details and high-quality furniture, requiring a high level of skill and precision. The resulting aesthetic contributes significantly to the overall perceived value and craftsmanship of the finished piece.
The subsequent sections of this article will delve into the specifics of preparing for, executing, and refining this complex joint. Topics covered include selecting appropriate wood, precise angle measurement, cutting techniques, and methods for achieving a seamless finish. Emphasis will be placed on practical application and the avoidance of common pitfalls.
Essential Guidance for Mitered Molding Application
The following points offer crucial insights for executing complex angled miter joints effectively, leading to professional-quality results.
Tip 1: Accurate Angle Measurement is Paramount: Precisely determine the corner angles involved. Inaccurate measurements will inevitably lead to gaps and misaligned joints. Utilize a protractor or angle finder for reliable data.
Tip 2: Employ a High-Quality Miter Saw: The precision of the miter saw directly impacts the quality of the resulting joint. A saw with fine-toothed blades is essential for clean, splinter-free cuts. Regular calibration of the saw is highly recommended.
Tip 3: Practice on Scrap Material: Before cutting the final pieces, practice the cuts on scrap wood of the same type. This allows for refining the angles and techniques without risking costly errors on the primary material.
Tip 4: Secure the Wood Properly: Ensure the wood is firmly clamped and supported during cutting. Movement during the cut will compromise accuracy and potentially damage the wood.
Tip 5: Use a Coping Saw for Intricate Profiles: When dealing with complex molding profiles, a coping saw can be used to refine the fit of the joint, removing small amounts of material for a tighter, more seamless connection.
Tip 6: Dry-Fit Before Gluing: Always perform a dry fit of the joint to ensure a proper fit before applying glue. This allows for final adjustments and corrections before the joint is permanently secured.
Tip 7: Use Appropriate Adhesive: Select a wood glue that is appropriate for the type of wood being used and that provides sufficient bonding strength. Ensure even application of the adhesive.
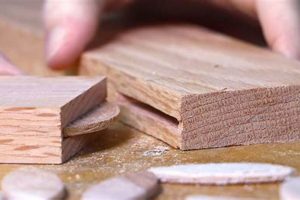
Tip 8: Reinforce the Joint: Consider reinforcing the joint with splines, biscuits, or other methods to increase its strength and durability, especially for applications that will bear significant weight or stress.
Adhering to these points promotes accuracy, efficiency, and a higher-quality outcome in the creation of mitered molding connections. They help to minimize waste and ensure a professional finish.
The subsequent sections will explore advanced techniques and considerations for complex mitered joints, including the use of specialized tools and the creation of custom profiles.
1. Precise Angle Measurement
Precise angle measurement forms a foundational element for successful construction involving complex mitered joints. The angular accuracy directly influences the integrity and aesthetic appeal of the finished product. Deviations from the true angle, even by fractions of a degree, accumulate along the length of a joint, leading to visible gaps, misalignment, and a weakened structural connection. The intricate nature of compound miter joints, frequently encountered in crown molding applications, amplifies the criticality of precise measurement. Failure to obtain accurate measurements cascades into errors during the cutting and assembly phases, ultimately compromising the intended outcome.
The impact of accurate angular assessment can be demonstrated in various scenarios. Consider the installation of crown molding around a room with imperfectly square corners. Assuming a standard 90-degree corner results in mitered cuts of 45 degrees. However, if the corner measures 88 degrees, the resulting joint will exhibit a noticeable gap. Similarly, in the fabrication of furniture with angled components, incorrect measurements render the assembly impossible or result in a structurally unsound product. Furthermore, utilizing specialized measuring tools like digital protractors and angle finders becomes imperative when working with complex angles or irregular shapes. These instruments minimize the risk of human error and ensure that accurate information informs the cutting process.
In summary, the link between accurate angular determination and competent crafting of mitered joints is inextricably linked. The precision with which angles are measured directly affects the quality of the final product. Recognizing this relationship enables woodworkers to mitigate potential errors, maintain the structural integrity of their constructions, and achieve a professional, aesthetically pleasing finish. Emphasizing careful measurement techniques is therefore essential for anyone seeking to master mitered joint work.
2. Blade Sharpness
Blade sharpness stands as a critical factor in the successful execution of crown joint woodworking. The condition of the blade directly impacts the quality of the cut, influencing the fit and overall aesthetic of the joint. A dull or improperly maintained blade leads to numerous issues that compromise the final product.
- Clean and Precise Cuts
A sharp blade cleanly severs wood fibers, producing smooth, splinter-free edges. This precision is vital for creating tight-fitting joints without gaps. In contrast, a dull blade tears the fibers, resulting in ragged edges that hinder a seamless connection. For instance, when crafting an intricate crown molding joint, a clean cut ensures the mitered pieces align perfectly, concealing the joint line.
- Reduced Tear-Out
Tear-out, the splintering of wood as the blade exits the cut, is significantly reduced with a sharp blade. This is especially crucial when working with delicate woods or intricate profiles. When making a compound miter cut on decorative molding, a sharp blade minimizes the risk of unsightly tear-out that necessitates extensive repairs or recutting.
- Improved Safety
A sharp blade requires less force to cut through wood, reducing the likelihood of kickback and other hazardous situations. When forcing a dull blade, the user is more prone to losing control of the material or the tool, increasing the risk of injury. Working on large pieces of crown molding requires a controlled and steady cut, which is best achieved with a sharp blade.
- Enhanced Efficiency
Sharp blades cut faster and more efficiently, saving time and effort. This is particularly important when dealing with multiple pieces of crown molding or large woodworking projects. The time saved by using a sharp blade allows for greater focus on accuracy and detail, resulting in a higher-quality finished product.
The relationship between blade sharpness and successful joinery work is undeniable. Maintaining sharp blades through regular sharpening and replacement ensures optimal cutting performance, leading to cleaner, more precise cuts, reduced tear-out, enhanced safety, and improved efficiency. The dedication to this aspect of tool maintenance directly translates into superior results in crown joint woodworking.
3. Grain Matching
Grain matching, the practice of aligning wood grain patterns across adjoining pieces, assumes significant importance in crown joint woodworking. This technique aims to create visual continuity, minimizing the appearance of the joint and enhancing the overall aesthetic appeal of the finished piece. Effective grain matching elevates craftsmanship from functional assembly to intentional design, contributing to a perception of higher quality.
- Visual Harmony
The primary role of grain matching is to establish visual harmony across the joined surfaces. When the grain flows seamlessly from one piece to the next, the joint becomes less conspicuous, almost disappearing to the casual observer. In crown molding applications, this is particularly important. For example, consider a large built-in cabinet with extensive crown molding; improperly matched grain draws undue attention to the joints, detracting from the overall design. Conversely, carefully aligned grain creates a unified and sophisticated look.
- Material Selection
Successful grain matching begins with careful material selection. Wood pieces intended for adjoining sections of a crown joint should ideally be sourced from the same board or a closely related section of timber. This ensures similarity in grain pattern, color, and texture. The selection process becomes critical when working with figured woods such as curly maple or burl, where variations in grain pattern are more pronounced. Selecting unrelated pieces of wood dramatically reduces the potential for effective grain matching.
- Cutting Strategy
The way in which wood pieces are cut from the source material directly influences the grain-matching outcome. Pieces should be cut in a manner that preserves the continuity of the grain pattern. This often requires strategic planning and careful consideration of the cut order. For instance, when creating a mitered corner in crown molding, the two pieces should be cut from the same length of molding, ensuring that the grain flows naturally around the corner. Improper cutting negates the potential for a visually pleasing joint, even with initially well-matched material.
- Joint Concealment
Beyond aesthetics, grain matching also contributes to the perception of a seamless joint. By creating visual continuity, the technique effectively conceals the presence of the joint itself. This is particularly advantageous in applications where the joint is highly visible or serves as a focal point. A well-executed grain match enhances the impression of solid construction and meticulous craftsmanship, obscuring the separation between individual pieces. In some historical designs, such mastery was used to deceive the eye, giving an impression of single piece constructions.
These facets highlight the importance of considering grain matching in all stages of crown joint woodworking. From initial material selection to the final cut, each decision influences the success of this technique. When implemented effectively, grain matching elevates both the aesthetic appeal and perceived quality of the finished work, demonstrating an advanced level of woodworking skill.
4. Joint Reinforcement
Joint reinforcement within crown joint woodworking constitutes a crucial factor in determining the longevity, stability, and structural integrity of the assembled pieces. Crown joints, by their very nature, often involve angled connections that present inherent weaknesses. The applied forces are not distributed evenly across the joint surface, leading to potential failure points, particularly under sustained load or environmental stress. Effective reinforcement mitigates these risks, bolstering the joint’s ability to withstand stress and maintain its form over time. The absence of adequate reinforcement is a common cause of joint failure in woodworking projects, ranging from furniture to architectural trim.
Various methods exist for reinforcing crown joints, each offering varying degrees of strength and complexity. Mechanical fasteners, such as screws or nails, provide immediate holding power, but may not offer long-term structural support, especially when subjected to repetitive stress or vibration. Glue, when applied properly, creates a strong adhesive bond, but relies on sufficient surface area and clamping pressure for optimal effectiveness. Splines or biscuits, inserted into slots cut across the joint, increase the bonding surface area and provide mechanical interlock, significantly enhancing joint strength. Real-world examples highlight the importance of reinforcement. Consider the installation of crown molding in a high-humidity environment; temperature changes and moisture fluctuations cause wood to expand and contract, placing stress on the joints. Without reinforcement, these cyclical stresses can lead to joint separation and eventual failure. Similarly, a large, ornate crown joint in a piece of furniture, supporting significant weight, requires robust reinforcement to prevent sagging or collapse.
The practical significance of understanding joint reinforcement lies in its ability to ensure the durability and safety of woodworking projects. Properly reinforced crown joints enhance the value of the piece, preventing premature failure and minimizing the need for costly repairs. The selection of appropriate reinforcement methods depends on factors such as the type of wood used, the size and complexity of the joint, the intended application, and the anticipated stress levels. Prioritizing joint reinforcement is not merely a matter of enhancing aesthetic appeal; it is a fundamental aspect of sound woodworking practice, ensuring that the finished product can withstand the test of time. Challenges involve striking a balance between strength and aesthetics, avoiding reinforcement methods that detract from the design or compromise the visual appeal of the joint. This understanding further links into choosing the proper wood as a material that would be suitable for this crown joint woodworking.
5. Coping Technique
The coping technique directly addresses challenges inherent in achieving precise and visually appealing inside corner joints in crown joint woodworking. The primary cause of difficulty in these joints arises from the often imperfect angles of walls and ceilings. While a miter saw provides accurate angled cuts, relying solely on mitering for inside corners is problematic because walls are rarely perfectly square. This variance inevitably leads to gaps and an unprofessional appearance. The coping technique, therefore, serves as a critical solution, enabling the creation of tight, seamless joints regardless of minor imperfections in the corner angles.
The process involves mitering one piece of the molding to fit the inside corner. The second piece is then cut square, and the profile of the mitered cut is traced onto the face of the second piece. Using a coping saw, the woodworker carefully removes material, following the traced profile. This creates a contoured edge that conforms precisely to the mitered piece, effectively accommodating any inconsistencies in the corner angle. A real-world example is a room with a slightly obtuse inside corner. Attempting to miter both pieces of molding at 45 degrees would result in a visible gap. However, by coping the second piece to fit the first, the woodworker can create a seamless joint that appears perfectly mitered, concealing the uneven corner. This also ensures that the crown joint looks aligned without any unaligned gap.
The practical significance of understanding and mastering the coping technique lies in the ability to consistently produce high-quality inside corner joints in crown joint woodworking projects. It allows for greater flexibility in installation, accommodating variations in wall and ceiling angles. While the technique requires practice and patience, the resulting improvement in the finished product is substantial. Furthermore, the challenge lies in developing the skill to accurately trace and cut the profile of the molding, requiring a steady hand and attention to detail. However, without mastering this technique, the achievement of professional-grade crown molding installations is significantly hindered. The crown joint is completely worth it with the use of coping technique.
6. Seamless Finish
Attaining a seamless finish in crown joint woodworking represents the culmination of careful planning, precise execution, and meticulous attention to detail. It transcends mere aesthetic appeal, signifying the mastery of techniques necessary to create visually unified and structurally sound joints. The pursuit of a seamless finish directly impacts the perceived value and professional quality of the finished product.
- Surface Preparation
Surface preparation forms the foundation of a seamless finish. This involves sanding to progressively finer grits, removing imperfections, and ensuring a smooth, even substrate. In crown joint applications, this process is crucial for eliminating any discrepancies between the joined pieces, ensuring that the finish coat is uniform and free from visible transitions. Failure to adequately prepare the surface results in an uneven finish that accentuates the joint line, undermining the desired seamless effect. For instance, a poorly sanded crown molding joint will exhibit visible scratches and imperfections under the finish, detracting from the overall appearance.
- Filler Application
Filler application plays a critical role in concealing minor gaps or imperfections that may remain after the initial joint assembly. The proper selection and application of wood filler ensures that the joint line is virtually invisible. The filler must match the color and texture of the surrounding wood to prevent conspicuous patches. In crown joint woodworking, this is particularly important when dealing with complex profiles or intricate carvings. An example is the use of tinted epoxy filler to seamlessly blend a joint in a highly figured piece of crown molding, effectively hiding any minor gaps or irregularities.
- Finishing Technique
The choice of finishing technique significantly influences the attainment of a seamless finish. Techniques such as careful brushwork, spray application, or the use of specialized finishing tools minimize the risk of streaks, drips, or uneven coverage. The goal is to apply a thin, even coat of finish that blends seamlessly across the joint line, effectively obscuring the transition between the joined pieces. For example, using a high-volume, low-pressure (HVLP) sprayer to apply a clear coat to a crown joint results in a smooth, uniform finish that hides the joint line, creating a seamless appearance.
- Color Matching and Blending
Effective color matching and blending are indispensable for achieving a seamless finish, particularly when working with stained or dyed wood. Discrepancies in color between the joined pieces can draw attention to the joint line, negating the desired effect. This involves carefully selecting stains or dyes that closely match the color of the wood and blending them seamlessly across the joint using techniques such as feathering or toning. A common example is the use of stain touch-up markers to subtly blend the color of a wood-filled crown joint, ensuring that the joint line remains virtually invisible.
These elements collectively contribute to the realization of a seamless finish in crown joint woodworking. Each facet is inextricably linked, and mastery of all elements is necessary to consistently achieve professional-quality results. This, in turn, elevates the value and aesthetic appeal of the crafted pieces. The link between these factors shows the final touches of the crown joint with seamless finish.
Frequently Asked Questions
The following questions address common concerns and misunderstandings regarding complex mitered joint construction.
Question 1: What distinguishes crown joint construction from a standard miter joint?
Crown joint construction typically involves more complex angles than a standard miter joint, frequently used to connect pieces meeting at non-right angles, or when joining to curved surfaces. Standard miter joints generally involve 45-degree cuts for 90-degree corners.
Question 2: What tools are indispensable for precise crown joint execution?
A high-quality miter saw with a fine-toothed blade, a protractor or angle finder, a coping saw, and various clamping devices are essential. Precise measuring and cutting are paramount for tight-fitting joints.
Question 3: Why is grain matching important, and how is it achieved?
Grain matching enhances visual continuity, making the joint less conspicuous. It is achieved by selecting wood pieces from the same source and strategically cutting them to preserve grain pattern flow across the joint.
Question 4: What are the common methods for reinforcing a crown joint?
Common reinforcement methods include splines, biscuits, dowels, or mechanical fasteners such as screws. The selection of reinforcement method depends on factors such as the joint size, wood type, and anticipated stress.
Question 5: How does the coping technique improve inside corner fitment?
Coping allows for a precise fit against uneven surfaces by removing material along the profile of one piece to match the contour of the adjacent piece, accommodating variations in wall angles.
Question 6: What steps are crucial for achieving a seamless finish on a crown joint?
Crucial steps involve thorough surface preparation through sanding, the application of appropriate wood filler to conceal gaps, and the use of suitable finishing techniques such as careful brushwork or spray application to blend the joint line.
Understanding these key aspects contributes significantly to the successful execution of visually appealing and structurally sound crown joints. Attention to each element is vital for producing professional-quality work.
The following section will provide detailed, step-by-step instructions for executing a complex crown joint from start to finish.
Conclusion
This exploration of crown joint woodworking has elucidated the techniques, considerations, and challenges inherent in creating complex mitered connections. From the fundamental importance of accurate angle measurement and sharp blade maintenance to the subtleties of grain matching, joint reinforcement, coping techniques, and seamless finishing, each element contributes critically to the final outcome. The effective application of these principles transforms a potentially weak and visually jarring joint into a robust and aesthetically pleasing feature of any woodworking project.
Therefore, the pursuit of excellence in crown joint woodworking necessitates a commitment to precision, a thorough understanding of materials and tools, and a willingness to embrace both traditional methods and innovative approaches. Continued exploration and dedicated practice will undoubtedly yield rewarding results, elevating both the craftsmanship and the enduring quality of woodworking endeavors.


