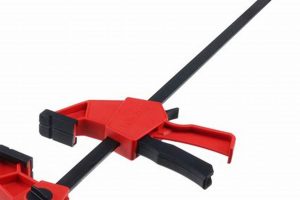
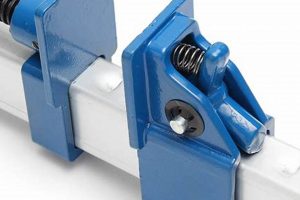
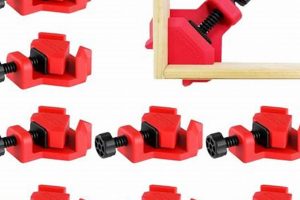
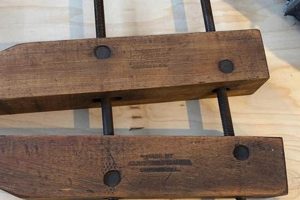
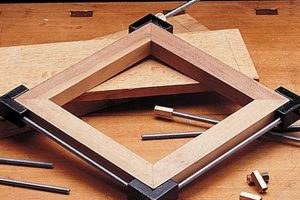
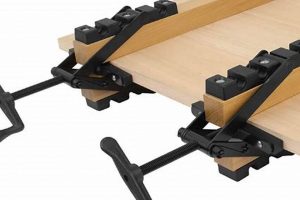
These tools are essential devices utilized within woodworking for securing workpieces together during the bonding process or while performing operations that require immobility. The design incorporates a long metal or composite bar, with adjustable clamping heads at either end, allowing for variable pressure application across a significant length. For instance, when assembling a tabletop from individual boards, these devices distribute force evenly, ensuring a flush and robust glue joint.
Their importance lies in providing consistent and reliable pressure, which is crucial for creating strong and aesthetically pleasing joints. This contributes to the longevity and structural integrity of finished wood projects. Historically, similar clamping methods have been employed for centuries, evolving from simple wedges and ropes to the sophisticated mechanisms available today, reflecting advancements in materials and manufacturing techniques.
The subsequent sections will delve into specific types of these devices, considerations for selecting the appropriate size and clamping force, and best practices for their effective utilization in a woodworking environment. This includes discussion of clamping strategies, maintenance procedures, and safety protocols to ensure optimal results and user well-being.
Tips for Effective Clamping
Optimizing the use of these tools requires careful attention to several key principles. Proper technique and selection contribute significantly to the quality and durability of woodworking projects.
Tip 1: Select Appropriate Length: Choosing the correct length is paramount. Insufficient reach compromises joint integrity; excessive length can hinder maneuverability. Measure the dimensions of the assembly prior to selecting these devices.
Tip 2: Distribute Pressure Evenly: Uneven clamping forces distort workpieces and weaken joints. Employ sufficient devices and ensure they are spaced equidistant along the joint line to guarantee uniform pressure distribution.
Tip 3: Protect Wood Surfaces: Direct contact with metal can mar wood. Utilize cauls or protective pads between the clamp jaws and the workpiece to prevent indentations and staining, particularly with softwoods.
Tip 4: Avoid Over-Tightening: Excessive force damages both the workpiece and the tool. Apply only enough pressure to achieve a tight joint. Monitor the wood for signs of compression and adjust accordingly.
Tip 5: Ensure Squareness: Monitor the assembly for squareness during the clamping process. Use a square or measuring diagonals to verify alignment and make necessary adjustments before the adhesive sets.
Tip 6: Apply Consistent Clamping Pressure: Maintain uniform pressure while the adhesive cures. Any changes in clamping pressure throughout this process compromise the joint’s strength.
Tip 7: Properly Maintain the Tools: Regularly clean and lubricate threads and moving parts. Inspect for damage, such as bent bars or worn pads, and replace components as needed to maintain optimal performance.
Mastering these techniques ensures robust and visually appealing woodworking results. Adherence to these principles minimizes defects and maximizes the lifespan of the finished product.
The following section will conclude this discussion, summarizing the key points and reinforcing the importance of these principles in successful woodworking.
1. Length Capacity
Length capacity is a fundamental characteristic of bar clamps for woodworking, directly influencing the size and scope of projects that can be accommodated. It dictates the maximum distance between the clamping jaws, thereby defining the largest workpiece dimension the clamp can secure.
- Workpiece Size Accommodation
The primary role of length capacity is to accommodate the dimensions of the workpiece. A bar clamp’s stated length capacity should exceed the longest dimension of the wood assembly being clamped. Failure to account for this leads to an inability to properly secure the material, resulting in weak or misaligned joints. Example: Clamping a 48-inch tabletop requires bar clamps with a length capacity exceeding 48 inches to ensure full coverage and consistent pressure.
- Clamping Efficiency and Stability
An appropriate length capacity is essential for efficient clamping. Using an excessively long clamp on a small workpiece can make maneuvering cumbersome and reduce clamping stability. Conversely, using a clamp that is too short renders it unusable. Optimal length capacity maximizes both the efficiency and stability of the clamping process, facilitating accurate alignment and even pressure distribution across the joint. Example: Using a 12-inch bar clamp for small box constructions promotes precise corner alignment and secure adhesion.
- Influence on Project Complexity
The available length capacity of bar clamps limits the complexity and scale of woodworking projects that can be undertaken. Projects involving large panels, wide tabletops, or extensive casework require clamps with substantial length capacity. The inability to properly clamp these large components can severely restrict design possibilities and construction methods. Example: The creation of a large dining table with breadboard ends necessitates clamps with the length to span the entire width of the tabletop plus the added width of the breadboard ends.
- Material Properties and Deflection
Length capacity indirectly affects the consideration of material properties. Longer clamps, when extended to near their maximum capacity, may exhibit some degree of bar deflection under load. This deflection can compromise the clamping force applied to the workpiece and potentially lead to uneven joints. Compensation for potential deflection, through the use of additional clamps or stiffer bar materials, becomes a critical consideration when selecting clamps with adequate length capacity for demanding projects. Example: A long, thin bar clamp used to glue up a wide panel might bow slightly in the middle, requiring additional clamps or a more rigid bar to maintain even pressure.
The selection of bar clamps with an appropriate length capacity is not merely a matter of fitting the workpiece; it is a fundamental aspect of ensuring project success. Considerations of clamping efficiency, project scope limitations, and potential material deflection must be factored into the selection process to ensure optimal results in woodworking endeavors.
2. Clamping Force
Clamping force, measured in pounds or kilograms, represents the compressive force exerted by a bar clamp onto workpieces, and is a critical determinant of joint integrity in woodworking applications.
- Adhesive Bond Strength
Clamping force directly influences the adhesive bond strength. Inadequate force results in gaps within the joint, leading to weakened adhesion. Excessive force, however, can starve the joint of adhesive or damage the wood fibers. Optimal clamping force ensures intimate contact between the mating surfaces, maximizing the effectiveness of the adhesive and producing a robust, long-lasting bond. For instance, hardwoods typically require greater force than softwoods to achieve a secure glue line.
- Wood Species and Density Considerations
The appropriate clamping force varies with the wood species. Denser woods like maple or oak necessitate higher clamping pressures to achieve proper adhesion compared to softer woods such as pine or cedar. Applying excessive force to softer woods can cause crushing of the fibers, resulting in surface indentations or weakened joints. Careful consideration of wood density is essential for selecting the appropriate clamping force to optimize joint strength without causing material damage.
- Clamp Mechanism and Leverage
The clamping mechanism of a woodworking bar clamp dictates the force it can exert. Different designs, such as screw-type, quick-release, or cam-action clamps, offer varying levels of leverage and force application. Screw-type clamps generally provide greater and more controlled clamping force, making them suitable for demanding applications. Quick-release clamps offer convenience but may sacrifice maximum force. Consideration of the clamp’s mechanical design is essential for matching the clamping force to the requirements of the specific woodworking task.
- Joint Type and Configuration
The type of joint being clamped influences the required clamping force. Complex joints, such as mortise and tenon or dovetail joints, may benefit from increased force to ensure tight and accurate alignment. Simpler butt joints require less clamping pressure. The configuration of the joint also affects force distribution; joints with larger surface areas require more evenly distributed clamping force to avoid localized stress concentrations. Example: When clamping a mortise and tenon joint, apply bar clamps near the mortise to ensure tight shoulder contact.
The interplay of adhesive type, wood species, clamp mechanism, and joint configuration dictates the optimum clamping force for a given woodworking task. Selecting the proper clamping tool and applying the appropriate force are essential skills for achieving robust and visually appealing wood joinery.
3. Jaw Width
Jaw width, in the context of woodworking bar clamps, denotes the surface area of the clamping faces that come into direct contact with the workpiece. This dimension is critical for distributing clamping force and preventing damage to the wood surface.
- Force Distribution and Pressure Minimization
Increased jaw width facilitates a broader distribution of clamping force, thus minimizing localized pressure points. This is particularly important when working with softwoods or delicate materials prone to indentation. Wide jaws reduce the risk of marring or crushing the wood fibers, ensuring a more even and controlled application of pressure. Example: When clamping a delicate veneer, wide-jawed clamps, often augmented with cauls, are preferred to prevent impression marks.
- Surface Contact and Alignment Stability
A wider jaw surface area enhances surface contact, providing improved stability and alignment, especially when clamping irregular or uneven workpieces. The increased contact surface minimizes the likelihood of slippage during the clamping process, contributing to more precise and accurate joint assembly. Example: Clamping rough-sawn lumber benefits from wider jaws that conform to surface irregularities and maintain consistent pressure.
- Material Compatibility and Finish Preservation
Jaw width is a factor in material compatibility, influencing the type of finish that can be safely applied prior to clamping. Wider jaws offer greater protection to pre-finished surfaces by minimizing the risk of scratching or damage. Protective pads or cauls are often used in conjunction with wide jaws to further safeguard the finish. Example: Clamping pre-finished cabinet components requires wide-jawed clamps with padding to prevent damage to the coating.
- Clamp Versatility and Application Range
The jaw width influences a bar clamp’s versatility across different woodworking applications. Clamps with interchangeable or adjustable jaw widths offer greater adaptability to varying workpiece thicknesses and shapes. This adjustability expands the clamp’s overall utility, making it suitable for a wider range of projects. Example: Bar clamps equipped with adjustable jaw pads can be configured for both flush surface clamping and for accommodating slight offsets in workpiece thickness.
The selection of bar clamps with an appropriate jaw width is integral to achieving secure and damage-free clamping in woodworking. Consideration of the material properties, joint configuration, and desired finish influences the optimal jaw width for each specific application, ensuring both structural integrity and aesthetic quality.
4. Throat Depth
Throat depth, concerning woodworking bar clamps, defines the distance from the bar to the clamping face. This dimension dictates how far a clamp can reach over an edge or around an obstruction to apply pressure. Inadequate throat depth prevents a clamp from engaging the workpiece effectively, rendering it unsuitable for the task. For example, when gluing trim onto a cabinet door, a bar clamp with insufficient throat depth would be unable to reach over the door’s thickness to apply clamping force to the trim.
The relationship between throat depth and workpiece geometry is critical. Complex assemblies with recessed areas or intricate profiles necessitate clamps with substantial throat depths to ensure proper engagement. Conversely, for simple, flat surfaces, a minimal throat depth suffices. A practical example is clamping a frame; a deep throat allows the clamp to apply force across the mitered corners without interfering with the frame’s interior.
Selection of a bar clamp with appropriate throat depth is crucial for successful woodworking outcomes. The dimension affects the clamp’s applicability to specific tasks, its ability to distribute pressure effectively, and ultimately, the strength and accuracy of the assembled workpiece. Ignoring this aspect can lead to compromised joints and project failure.
5. Parallel Alignment
Parallel alignment in woodworking bar clamps refers to the condition where the clamping faces remain parallel to each other throughout the clamping process. This aspect is critical because non-parallel alignment leads to uneven pressure distribution across the joint. Uneven pressure concentration results in weaker glue bonds and potential warping or distortion of the wood components. For example, if clamping a tabletop panel and the clamp faces are not parallel, one edge of the panel may receive significantly more clamping force than the other, creating an uneven surface or stressing the glue joints unevenly.
The design and construction of the bar clamp directly influence parallel alignment. High-quality clamps feature precisely machined heads and bars, minimizing play or flex that could cause misalignment. The clamping mechanism itself should apply force evenly to both jaws. When assembling a cabinet frame, using clamps with proven parallel alignment ensures that the frame remains square and true during glue-up, which is crucial for proper door and drawer installation. Furthermore, applying auxiliary cauls can help to distribute the clamping pressure more uniformly.
Achieving and maintaining parallel alignment during clamping presents several challenges. Wood movement due to humidity changes, variations in material thickness, and inherent imperfections in clamp construction can all contribute to misalignment. Addressing these challenges requires careful clamp selection, proper joint preparation, and the use of shims or cauls to compensate for inconsistencies. In essence, parallel alignment is not merely a desirable feature of woodworking bar clamps, but a fundamental requirement for producing high-quality, structurally sound woodworking projects.
6. Durability
Durability, in the context of woodworking bar clamps, represents the capacity of the tool to withstand prolonged and repeated use under expected operating conditions without significant degradation in performance. The inherent operational demands of woodworking, involving substantial clamping forces and potential exposure to moisture, solvents, and physical impacts, necessitate a high degree of resilience. Clamps constructed from inferior materials or lacking robust construction techniques will exhibit premature failure, rendering them unreliable and potentially hazardous. For instance, clamps with poorly cast heads may crack under pressure, while bars fabricated from low-grade steel may bend or deform, compromising their ability to maintain adequate clamping force.
The durability of these devices directly correlates with the quality of materials used and the manufacturing processes employed. Clamps manufactured from high-strength steel alloys, subjected to appropriate heat treatments, exhibit enhanced resistance to bending, cracking, and corrosion. The clamping mechanism itself must also demonstrate durability, with robust threads and pawls capable of withstanding repetitive engagement and disengagement cycles without stripping or wearing. The presence of protective coatings, such as powder coating or galvanization, further enhances durability by mitigating the effects of corrosion. A tangible example of the importance of durability is the experience of a professional woodworker who routinely uses clamps to assemble large furniture pieces; clamps lacking durability will fail under the necessary high clamping pressure, leading to wasted materials and project delays.
In summary, durability is a paramount consideration in the selection and utilization of woodworking bar clamps. The longevity and reliability of these tools directly impact the efficiency, safety, and quality of woodworking projects. Selecting clamps constructed from high-quality materials, manufactured with robust construction techniques, and properly maintained will ensure optimal performance and minimize the risk of premature failure. The economic and practical implications of prioritizing durability extend beyond the initial purchase price, encompassing reduced replacement costs, enhanced project reliability, and improved user safety, contributing to the broader success of woodworking endeavors.
Frequently Asked Questions
The following section addresses common inquiries and provides clarity regarding the selection and application of woodworking bar clamps. Understanding these points optimizes clamp usage and project outcomes.
Question 1: What is the optimal number of clamps required for a given woodworking project?
The requisite number of clamps is contingent upon the workpiece dimensions and joint complexity. As a general guideline, clamps should be spaced approximately 6-12 inches apart to ensure even pressure distribution along the joint line. Larger or more intricate assemblies necessitate a greater quantity of clamps.
Question 2: How should clamping pressure be determined for different wood species?
Hardwoods generally require higher clamping pressure than softwoods to achieve a secure bond. Over-tightening clamps can crush wood fibers, particularly in softer species. The goal is to achieve tight contact between mating surfaces without inducing material damage.
Question 3: What are the key differences between various types of woodworking bar clamps?
Common types include standard bar clamps, parallel jaw clamps, and pipe clamps. Standard bar clamps are versatile for general use, parallel jaw clamps ensure consistent pressure distribution, and pipe clamps offer extended reach for large projects. The selection depends on the project’s specific needs.
Question 4: How can wood surfaces be protected from damage during clamping?
Utilizing cauls or protective pads between the clamp jaws and the workpiece effectively prevents indentations and staining. These protective barriers distribute pressure evenly and safeguard the wood surface from direct contact with the metal clamp.
Question 5: What are the essential maintenance procedures for woodworking bar clamps?
Regular cleaning and lubrication of threads and moving parts are essential for maintaining clamp functionality. Inspection for damage, such as bent bars or worn pads, should be conducted periodically, with replacement of components as needed.
Question 6: How can I ensure that a workpiece remains square during clamping?
Monitoring the assembly for squareness throughout the clamping process is crucial. Utilizing a square or measuring diagonals facilitates verification of alignment, allowing for necessary adjustments before the adhesive sets. Minor adjustments can be made by gently tapping the workpiece into square.
Proper clamp selection, technique, and maintenance are vital for achieving successful woodworking results. By addressing these frequently asked questions, woodworkers can mitigate potential challenges and enhance the quality of their finished products.
The subsequent section will present a summary of key takeaways from the preceding discussion, consolidating essential concepts for optimal application.
Conclusion
The preceding exploration has underscored the critical role of bar clamps for woodworking. Considerations of length capacity, clamping force, jaw width, throat depth, parallel alignment, and overall durability have been addressed. The proper selection and application of these tools are not merely procedural; they are integral to the structural integrity and aesthetic quality of finished wood projects. Mastery of clamping techniques minimizes defects, maximizes joint strength, and contributes to the longevity of woodworking creations.
The informed utilization of bar clamps for woodworking represents a commitment to precision and enduring craftsmanship. Ongoing engagement with best practices and a discerning approach to tool selection will continue to define excellence in woodworking. As material science and manufacturing processes evolve, woodworkers should remain vigilant in adapting their techniques to ensure the continued application of optimal clamping principles.


