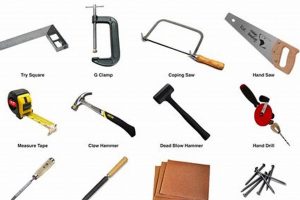
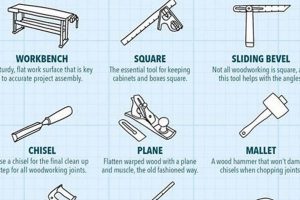
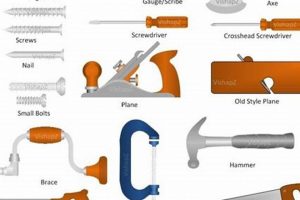
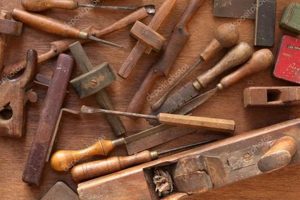
Essential implements employed in shaping wood, relying on manual power rather than electricity or automation, constitute a foundational element in the craft of woodworking. These instruments facilitate precise cutting, shaping, and joining of wood components. Examples include saws for creating linear cuts, chisels for refined shaping and removal of material, planes for smoothing surfaces, and measuring tools ensuring accuracy.
The utilization of these instruments provides a heightened degree of control and tactile feedback, enabling woodworkers to execute intricate designs and achieve superior finishes. Their enduring relevance stems from their portability, affordability, and versatility, making them indispensable for both seasoned artisans and novice enthusiasts. Furthermore, understanding the historical context of these implements provides insights into the evolution of woodworking techniques and the ingenuity of craftspeople throughout history.
The subsequent sections will delve into specific categories of these instruments, examining their functions, applications, and proper maintenance to maximize their lifespan and effectiveness. The discussion will encompass cutting tools, shaping tools, measuring and marking tools, and fastening tools, providing a comprehensive overview of essential equipment for woodworking projects.
Essential Usage and Maintenance Guidelines
The following guidelines offer essential information for maximizing the effectiveness and longevity of woodworking implements that rely on manual power.
Tip 1: Sharpening is Paramount: Maintain the sharpness of cutting edges, such as saws and chisels, through regular honing and sharpening. A dull tool requires more force, leading to potential inaccuracies and safety hazards. Utilize appropriate sharpening stones and techniques specific to each tool type.
Tip 2: Proper Storage Prevents Damage: Store implements in a dry environment to prevent rust and corrosion. Individual storage solutions, such as tool rolls or dedicated drawers, minimize contact between tools and prevent damage to delicate edges.
Tip 3: Wood Selection Impacts Tool Performance: Choose wood species appropriate for the task and the tools being employed. Harder woods may require more effort and sharper edges. Understand the grain direction to optimize cutting and shaping processes.
Tip 4: Regular Cleaning Extends Lifespan: After each use, clean tools thoroughly to remove sawdust and resin buildup. Apply a light coat of oil to metal surfaces to inhibit rust formation.
Tip 5: Mastering Basic Techniques is Crucial: Develop proficiency in fundamental techniques, such as sawing straight lines, chiseling accurately, and using a hand plane effectively. Practice these skills on scrap material before tackling finished projects.
Tip 6: Safe Usage is Non-Negotiable: Adhere to safety protocols at all times. Wear appropriate eye protection and ensure a stable working surface. Never force a tool beyond its designed capacity.
Tip 7: Handle Condition Affects Precision: Ensure handles are securely attached and free from cracks or splinters. Replace or repair damaged handles promptly to maintain control and prevent injury.
Adherence to these guidelines promotes efficiency, safety, and the preservation of valuable woodworking equipment.
Understanding these best practices provides a solid foundation for more advanced woodworking techniques.
1. Cutting
Cutting, a primary function within woodworking, is intrinsically linked to the utilization of manually-powered implements. This connection is evident in the broad range of saws, each designed for specific cutting tasks. For instance, a dovetail saw, characterized by its fine teeth and rigid back, facilitates precise cuts in creating intricate dovetail joints. Conversely, a rip saw, with its larger teeth and aggressive cutting action, efficiently removes material along the grain of the wood. The effectiveness of these tools hinges upon their sharpness and the user’s proficiency in applying appropriate techniques. Inadequate sharpness necessitates increased force, leading to potential inaccuracies and compromised safety.
The selection of the appropriate saw for a given task directly impacts the quality and efficiency of the woodworking process. Attempting to cut a curve with a saw designed for straight cuts, such as a back saw, will yield unsatisfactory results. Similarly, using a dull saw will result in tear-out and a rough surface finish. Understanding the relationship between tool design, wood properties, and cutting techniques is paramount for achieving desired outcomes. The hand saw, for example, needs to be held at the proper angle for the wood, with controlled pressure.
Mastery of cutting techniques with manual woodworking implements requires practice and attention to detail. The successful execution of a project, from initial material preparation to final shaping, relies heavily on the ability to make accurate and clean cuts. As such, proficiency in sawing is fundamental to woodworking.
2. Shaping
Shaping in woodworking involves refining the form and surface of wood using manually-powered implements. This process goes beyond simple material removal, focusing on achieving specific contours, smoothing surfaces, and creating decorative elements. A craftsman’s skill in shaping directly influences the aesthetic and functional quality of a finished piece.
- Planes for Surface Refinement
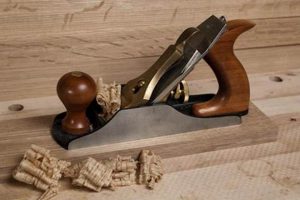
Hand planes, encompassing smoothing planes, jack planes, and block planes, are critical for achieving flat and consistent surfaces. Each type serves a specific purpose: the jack plane for initial stock removal, the smoothing plane for final surface preparation, and the block plane for end-grain work. Proper sharpening and adjustment of the blade are essential for optimal performance. Skilled use of planes allows for the correction of imperfections and the creation of exceptionally smooth surfaces, demonstrating direct application and effect of shaping.
- Chisels for Detailed Carving and Joinery
Chisels facilitate intricate shaping tasks, from carving decorative details to creating precise mortises for joinery. Bevel-edged chisels are versatile for general shaping, while mortise chisels are specifically designed for creating deep, square mortises. The angle at which a chisel is held and the force applied dictate the amount of material removed and the resulting shape. Proficiency with chisels enables the creation of complex forms and the execution of precise joinery, showcasing the significant role of shaping in woodworking.
- Spokeshaves for Curved Surfaces
Spokeshaves are specialized tools for shaping curved surfaces, such as chair spindles or the edges of tabletops. The blade is positioned between two handles, allowing for controlled removal of material along a curve. The shape and size of the spokeshave vary depending on the specific curvature being shaped. Mastery of the spokeshave is vital for crafting furniture pieces with flowing lines and ergonomic forms.
- Rasps and Files for Coarse to Fine Shaping
Rasps and files are abrasive tools used to remove material and refine shapes. Rasps, with their coarse teeth, are suitable for rapid material removal, while files, with their finer teeth, are used for smoothing and refining surfaces. Different shapes of rasps and files are available to accommodate various contours and shaping tasks. The progressive use of rasps and files allows for the gradual transformation of a rough form into a smooth and precisely shaped element, reinforcing the importance of shaping in the woodworking process.
The skillful application of these shaping instruments, coupled with an understanding of wood properties and grain direction, allows woodworkers to transform raw lumber into functional and aesthetically pleasing objects. The tangible results highlight the critical role these implements play in the shaping process.
3. Measuring
Accurate measurement forms the bedrock of successful woodworking, directly influencing the precision and integrity of the final product. Within the domain of implements reliant on manual power, measuring tools serve as indispensable guides, ensuring that cuts, joints, and overall dimensions conform to the intended design.
- Rulers and Measuring Tapes: Linear Dimension Establishment
Rulers and measuring tapes establish linear dimensions, providing a direct means of transferring measurements from plans or drawings to the workpiece. These tools, available in various lengths and materials, offer a consistent standard for determining the size and placement of elements. A ruler’s rigidity facilitates precise marking, while a tape measure allows for measuring longer distances or curved surfaces. Their implications are profound: inaccurate linear measurements inevitably lead to misaligned joints, ill-fitting components, and a compromised final product.
- Squares: Ensuring Right Angles and Parallelism
Squares, including try squares and combination squares, guarantee the establishment of right angles and parallelism, vital for structural stability and visual appeal. A try square provides a reliable reference for marking perpendicular lines, while a combination square offers adjustable features for setting angles and depths. The importance of squares lies in their ability to ensure that corners are square, edges are parallel, and surfaces are flat all essential for creating robust and aesthetically pleasing wooden structures. Failure to use a square accurately results in skewed frames, uneven surfaces, and a visually unappealing outcome.
- Marking Gauges: Consistent Parallel Line Scribing
Marking gauges facilitate the consistent scribing of parallel lines, particularly useful for marking mortise and tenon joints or establishing uniform thicknesses. This tool, featuring a sharp pin that etches a line as it is drawn along the wood’s surface, provides a precise and repeatable method for transferring dimensions. The marking gauge ensures that lines are parallel to the edge of the workpiece, which is crucial for creating tight-fitting joints and maintaining consistent material thickness. Deviations in parallel lines caused by inaccurate marking lead to weak joints and dimensional inconsistencies.
- Levels and Plumbs: Vertical and Horizontal Alignment Verification
Levels and plumb bobs verify vertical and horizontal alignment, ensuring that woodworking projects are stable and visually true. A level indicates whether a surface is perfectly horizontal, while a plumb bob determines verticality using gravity as a reference. These tools are especially critical when constructing structures or installing wooden components that must be aligned with the earth’s gravitational field. Failure to use levels and plumb bobs results in tilted structures, uneven surfaces, and a compromised overall appearance.
The interconnectedness of these implements and the function of precise dimensional verification is a defining factor in fine woodworking. Accurate measurement transcends mere dimensioning, impacting structural integrity, aesthetic appeal, and overall project success. The mastery of these manual measurement tools is crucial for creating high-quality and enduring wooden artifacts.
4. Jointing
Jointing, the process of uniting two or more pieces of wood, represents a critical phase in woodworking, inextricably linked to the function of manually-operated implements. The strength and aesthetic appeal of a wooden structure are directly determined by the precision and integrity of its joints. The choice and application of specific tools dictate the type of joint that can be achieved and its subsequent durability. Inaccurate joints compromise structural integrity, leading to instability and premature failure of the assembled object. Therefore, the effective employment of these implements in the creation of robust and aesthetically pleasing joints is paramount.
Mortise and tenon joints, examples of traditional woodworking, rely heavily on the chisel and mortise chisel for precise material removal. A mortise chisel, with its robust blade and rectangular profile, creates the mortise, the socket that receives the tenon. Chisels refine the mortise walls, ensuring a snug and accurate fit. The tenon, the projecting element, is shaped using saws and chisels to match the mortise precisely. Similarly, dovetail joints, prized for their strength and visual appeal, depend on the dovetail saw and chisel for their creation. The dovetail saw cuts the intricate dovetail pattern, while the chisel removes waste material to create the interlocking tails and pins. Hand planes serve to ensure faces are square to one another which is critical for precise joinery. In both cases, the tools are employed not only to create the joint components but also to fine-tune the fit and alignment, ensuring a strong and seamless connection.
The mastery of jointing techniques using manually-operated tools requires a deep understanding of wood properties, tool mechanics, and the principles of joinery. While automated processes can expedite joint creation, the use of implements affords a level of control and tactile feedback that allows for nuanced adjustments and the creation of truly bespoke joints. Skillful execution of jointing techniques is critical to the longevity and beauty of woodworking projects, cementing the connection between manual tools and jointing.
5. Sharpening
Sharpening represents an indispensable practice within woodworking, directly impacting the efficacy and precision of manually-operated implements. A dull tool necessitates increased force, leading to reduced control, potential damage to the workpiece, and elevated risk of injury. The maintenance of sharp cutting edges is, therefore, not merely a matter of convenience but a fundamental requirement for safe and effective woodworking.
- The Whetstone: Foundation of Edge Maintenance
The whetstone, a sharpening stone made from either natural or synthetic materials, serves as the primary means of restoring a cutting edge. Whetstones are available in various grits, ranging from coarse for initial shaping to fine for final polishing. The process involves lubricating the stone with oil or water and drawing the tool’s cutting edge across the surface at a consistent angle. Regular use of a whetstone maintains the sharpness of chisels, planes, and other edged tools, enabling smooth and controlled cuts and the prevention of tear-out.
- Honing: Refining the Cutting Edge
Honing refines a sharpened edge, removing microscopic burrs and achieving a razor-sharp finish. This process typically involves using a leather strop, often charged with a honing compound, to polish the cutting edge. Honing is performed after sharpening on a whetstone and significantly improves the tool’s cutting performance. A properly honed edge glides through the wood with minimal resistance, resulting in cleaner cuts and reduced effort.
- Grinding: Reshaping Severely Damaged Edges
Grinding is employed to reshape severely damaged or chipped cutting edges. This process utilizes a grinding wheel, either powered or manually operated, to remove significant amounts of material. Grinding generates heat, which can damage the tool’s temper if not carefully controlled. Consequently, it is essential to use appropriate grinding techniques and cooling methods to prevent overheating and preserve the tool’s hardness. Grinding is reserved for situations where sharpening alone is insufficient to restore the tool’s cutting ability.
- Sharpening Angle: A Critical Factor in Performance
The sharpening angle, the angle at which the tool’s cutting edge is sharpened, directly influences its performance. A steeper angle provides a more durable edge, suitable for heavy-duty tasks, while a shallower angle creates a sharper edge, ideal for delicate work. The optimal sharpening angle varies depending on the tool and its intended use. Maintaining the correct sharpening angle is essential for achieving optimal cutting performance and preventing premature wear. For example, a chisel used for paring typically requires a shallower angle than one used for mortising.
These facets underscore the intimate connection between implements designed for manual operation and the necessity for skillful maintenance. The implements discussed are more than just a piece of steel, or a handle, but tools that create objects, with an edge to ensure quality through proper sharpening.
Frequently Asked Questions
This section addresses common inquiries regarding implements designed for manual operation in woodworking. The information provided aims to clarify essential aspects related to their selection, usage, and maintenance.
Question 1: What constitutes a fundamental set of implements for a beginner woodworker?
A foundational set typically comprises a crosscut saw, a rip saw, a smoothing plane, a block plane, a set of chisels, a measuring tape, a try square, and a marking gauge. These implements enable basic cutting, shaping, and joining operations essential for initiating woodworking projects.
Question 2: How frequently should cutting implements be sharpened?
The frequency of sharpening depends on the intensity of use and the type of wood being worked. A noticeable decrease in cutting performance or the presence of tear-out indicates the need for sharpening. Regular honing between sharpening sessions can extend the life of the cutting edge.
Question 3: What distinguishes a jack plane from a smoothing plane?
A jack plane is longer and intended for initial stock removal and flattening, while a smoothing plane is shorter and designed for achieving a smooth, refined surface. The jack plane typically has a slightly curved blade, whereas the smoothing plane has a straight or slightly cambered blade.
Question 4: Why is it crucial to select the appropriate implement for a specific task?
Using the correct implement ensures efficiency, accuracy, and safety. Employing an inappropriate implement can lead to substandard results, increased effort, and potential damage to the workpiece or the implement itself. For example, using a rip saw to cut against the grain will result in a rough and uneven cut.
Question 5: What safety precautions should be observed when working with edged implements?
Safety measures include wearing eye protection, maintaining a firm grip, ensuring a stable work surface, and keeping implements sharp. Never force an implement beyond its intended capacity, and always cut away from the body. Secure workpieces with clamps or vises to prevent movement during cutting or shaping.
Question 6: How does the wood species influence implement selection and usage?
Harder wood species require sharper implements and increased force, while softer species are easier to cut and shape. Highly figured wood may require specialized techniques to prevent tear-out. The grain direction of the wood also dictates the optimal cutting direction and the appropriate implement for the task.
Understanding the principles outlined in these questions facilitates informed decision-making and promotes proficiency in manual woodworking techniques. Prioritizing safety, selecting appropriate implements, and maintaining sharp cutting edges are crucial for achieving high-quality results and ensuring a safe working environment.
The subsequent discussion will explore advanced techniques and specialized implements employed in fine woodworking, building upon the foundational knowledge presented herein.
Conclusion
The preceding discussion has detailed the function, maintenance, and application of common woodworking hand tools. Emphasis has been placed on the integral relationship between the selection of appropriate implements, the mastery of fundamental techniques, and the attainment of precise and aesthetically pleasing results within the craft. This exploration underscored cutting, shaping, measuring, and jointing with sharp, quality tools.
Understanding the principles outlined represents a foundational element for both novice and experienced woodworkers. Continued dedication to refining skills and expanding knowledge will undoubtedly contribute to the creation of enduring and functional wooden artifacts. It is with the effective use of these hand tools that woodworkers will produce high-quality pieces of art.


