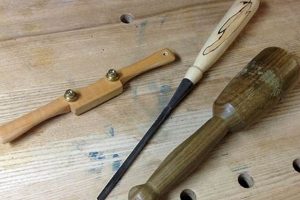
This instrument aids in creating consistent curves and arcs in woodworking projects. A typical example involves its use to round over the edge of a tabletop, producing a smooth, uniform profile. They come in various forms, from simple templates to more complex adjustable devices.
Precision and efficiency are significantly enhanced through the application of this device. Historically, achieving accurate curves relied on freehand techniques or cumbersome jigs. The advent of purpose-built tools streamlines the process, minimizing errors and improving the overall quality of the finished piece. It helps ensure uniformity when multiple pieces require identical curved elements. This is beneficial for furniture building and other projects requiring consistent design elements.
The subsequent sections will delve into the different types available, their specific applications, and factors to consider when selecting the appropriate device for a given task.
Tips on Employing a Woodworking Radius Tool
The following guidelines provide insights into maximizing the effectiveness and accuracy when utilizing this specialized tool in woodworking projects.
Tip 1: Select the Appropriate Tool Type: Different designs are available for various applications. Templates are suitable for repetitive, consistent radii. Adjustable versions offer flexibility for diverse curve requirements. Consider the project’s complexity and the range of radii needed before making a selection.
Tip 2: Ensure Secure Workpiece Fixture: The workpiece must be firmly secured during the cutting or shaping process. Movement or vibration can lead to inaccuracies and potentially damage the tool or the material. Clamps and vises should be used to rigidly hold the workpiece in place.
Tip 3: Employ Multiple Passes: Avoid attempting to remove excessive material in a single pass. Taking shallow, controlled passes reduces the risk of tear-out and ensures a smoother, more accurate curve. Incrementally increase the depth of cut with each subsequent pass.
Tip 4: Maintain Sharp Cutting Edges: A dull cutting edge can result in rough cuts, increased friction, and potential burning of the wood. Regularly inspect and sharpen the blades or cutting surfaces of the instrument to ensure optimal performance and extend its lifespan.
Tip 5: Use Proper Lubrication (If Applicable): For certain materials and tool types, lubrication can reduce friction and heat buildup. Consult the manufacturer’s recommendations for appropriate lubricants and application techniques.
Tip 6: Practice on Scrap Material: Before working on the final workpiece, practice using the instrument on scrap material of the same type and thickness. This allows for fine-tuning the setup and technique, minimizing the risk of errors on the finished piece.
Tip 7: Rout Direction: Always move the tool into the wood grain not against it.
Adhering to these suggestions will contribute to enhanced precision, improved efficiency, and reduced waste in woodworking projects involving curved elements.
The subsequent section will address maintenance and storage best practices.
1. Arc Consistency
Arc consistency is a cornerstone of precise woodworking when utilizing a specialized radius instrument. It denotes the degree to which the curve produced remains uniform and predictable across multiple instances or along a continuous edge. This consistency is paramount for both aesthetic appeal and structural integrity.
- Template Accuracy
The precision of templates directly influences arc consistency. Inaccuracies in the template, even minute ones, are replicated in the workpiece. High-quality templates constructed from stable materials are essential to avoid distortion and ensure repeatable results. Consider a situation where a template meant for a 1/4″ roundover is actually slightly off, producing a varying edge. This inconsistency significantly impacts the visual and tactile appeal of the project.
- Tool Setup and Calibration
The calibration of the instrument is crucial. Whether it is an adjustable trammel or a router equipped with a radius jig, accurate initial setup is essential. Improper adjustment can lead to deviations from the intended arc, compromising consistency across multiple components. An example would be a router bit not properly centered in its jig, resulting in asymmetrical cuts and inconsistent arcs on consecutive pieces.
- Material Properties
The characteristics of the wood being worked significantly impact arc consistency. Variations in density or grain direction can cause the instrument to behave unpredictably, leading to inconsistencies in the final curve. For example, working with a highly figured wood might cause tear-out or uneven shaping, necessitating extra care and potentially multiple passes to achieve the desired uniformity.
- Technique and Execution
Consistent application of pressure and speed during the cutting process is critical for maintaining arc consistency. Erratic movements or changes in feed rate can result in uneven curves and visible irregularities. An example includes hesitation during router pass that results in a slightly different curve at each point. This can cause the arc to look different than the planned arc.
The interplay of template accuracy, tool setup, material properties, and operator technique dictates the overall arc consistency achieved in woodworking. A holistic understanding of these factors, coupled with careful attention to detail, ensures predictable and repeatable results when creating curved elements.
2. Edge Profiling
Edge profiling, in woodworking, is the shaping of a material’s edge to achieve a specific aesthetic or functional result. Specialized radius tools are employed to create consistent and precise curves, rounds, or other decorative features along the edges of wooden workpieces.
- Rounding Over
This process creates a smooth, rounded edge, enhancing comfort and safety by eliminating sharp corners. A specialized tool with a roundover bit, removes the square edge, resulting in a curved profile. This is commonly applied to table tops, cabinet doors, and handrails to improve tactile feel and reduce the risk of splintering or damage.
- Creating Coves and Beads
Coves are concave curves, while beads are convex. Both profiles can be achieved with the appropriate cutting implement. Coves often add visual interest to molding or trim, while beads can provide a decorative edge to panels or frames. A radius tool, with a cove or beading bit, shapes the edge. This technique requires careful control and multiple passes for optimal results.
- Chamfering
Chamfering involves creating an angled edge, often at 45 degrees, to reduce sharpness or provide a decorative element. Although a chamfer is a straight angle and not a radius, it is still edge profiling, and the chamfering tool can sometimes be used to create a starting point for a radius. A chamfer bit creates this angled profile. It can be utilized on the edges of shelves, picture frames, or other components where a clean, beveled edge is desired.
- Ogee and Roman Ogee Profiles
Ogee profiles combine a concave and convex curve, while Roman ogee profiles feature a more pronounced S-shaped curve. These profiles are frequently found on decorative moldings, furniture components, and architectural trim. Achieving these intricate curves requires specialized tooling and precise control to maintain consistency and avoid tear-out.
The application of a woodworking radius instrument significantly expands the possibilities for edge profiling, enabling the creation of diverse and aesthetically pleasing edge treatments. The choice of profile depends on the design intent and the functional requirements of the finished piece.
3. Template Variety
The range of templates available for use with radius instruments directly influences the versatility and precision achievable in woodworking applications. A diverse selection enables the creation of varied curved profiles and caters to specific project requirements.
- Fixed Radius Templates
These templates, typically constructed from rigid materials such as acrylic or metal, provide a pre-defined curve. They are suited for repetitive tasks where a consistent radius is required. An example involves rounding the corners of multiple drawer fronts to an identical specification. The fixed nature ensures uniformity across all pieces.
- Adjustable Radius Templates
Adjustable templates offer flexibility in creating different radii using a single tool. These templates often consist of two sliding arms or a flexible metal strip that can be set to a desired curve. This type accommodates a wide range of designs without needing multiple fixed templates. A use case includes producing varying arcs for custom-shaped table legs.
- Specialty Templates
Certain templates cater to specific design elements, such as ellipses, French curves, or complex geometric shapes. These specialty templates expand the possibilities for decorative or intricate woodworking projects. Applications might encompass crafting curved inlays or replicating antique furniture details.
- Custom-Made Templates
In situations where standard templates do not suffice, custom-made options provide a solution. These templates are created to exact specifications, enabling the replication of unique or unusual curves. Examples include reproducing the curved profile of a historic building’s molding or matching an existing furniture component.
The availability of diverse templates, from fixed to adjustable and custom-made, broadens the scope of application for radius instruments in woodworking. Selection of the appropriate template type depends on the project’s complexity, the desired curve profile, and the need for repeatability and accuracy.
4. Precision Measurement
Precision measurement is integral to the effective utilization of a woodworking radius tool. The accuracy with which dimensions are determined directly impacts the fidelity and consistency of the resulting curved elements.
- Radius Determination
Accurately establishing the desired radius is fundamental. This necessitates the use of precise measuring instruments such as calipers, dividers, or radius gauges. An example involves measuring the existing curve on a piece of antique furniture to replicate it accurately. An incorrect radius will yield a curve that deviates from the intended design, compromising the aesthetic or functional integrity of the piece.
- Template Creation and Verification
Whether employing pre-made or custom-fabricated templates, precise measurement is crucial for their creation and verification. Any inaccuracies in the template will be directly transferred to the workpiece. For instance, creating a template for a curved tabletop requires meticulous measurement of the overall dimensions and curve profile to ensure a proper fit. Failure to do so can result in gaps or misalignment during assembly.
- Tool Setup and Adjustment
Many radius tools require precise setup and adjustment to achieve the intended results. This includes setting the depth of cut, calibrating adjustable trammels, or aligning the tool with the template. For example, when using a router with a radius jig, the distance between the bit and the pivot point must be precisely set to match the desired radius. Deviations from this setting will result in an incorrect curve.
- Verification of Results
After executing a cut or shaping operation, verifying the accuracy of the resulting curve is essential. This can be accomplished using radius gauges, contour gauges, or direct measurement with calipers or a ruler. For instance, after routing a roundover on a tabletop edge, a radius gauge can be used to confirm that the curve matches the intended specification. This ensures quality control and identifies any potential errors early in the process.
The relationship between precision measurement and the effective use of a woodworking radius tool is undeniable. Accuracy in radius determination, template creation, tool setup, and verification of results contributes directly to the creation of high-quality, consistent curved elements in woodworking projects. Neglecting precision measurement will inevitably lead to inaccuracies and compromised outcomes.
5. Material Compatibility
The selection of woodworking radius tools is intrinsically linked to the material being shaped. Different woods exhibit varying densities, grain structures, and hardness levels, impacting the choice of tool and cutting technique. A mismatch between tool and material can result in tear-out, splintering, or inefficient cutting. For instance, attempting to use a high-speed router with a delicate radius template on a brittle hardwood like maple without proper support can cause the template to shatter. Conversely, a dull or inappropriate tool used on a softwood like pine may compress the fibers rather than cut cleanly, producing a fuzzy or uneven profile.
Material compatibility dictates several key aspects of radius tool usage. The type of cutting edge, such as a carbide-tipped router bit for hardwoods versus a high-speed steel bit for softer woods, is a primary consideration. Furthermore, feed rate and cutting speed must be adjusted based on the material. A slower feed rate is generally required for hardwoods to prevent burning or excessive stress on the tool, while a faster feed rate may be suitable for softwoods. Lubrication may be necessary with certain materials to reduce friction and heat buildup. For example, lubricating a metal radius cutter used on aluminum prevents galling and ensures a smoother cut. These practical considerations highlight the critical role of material knowledge in achieving desired results.
A thorough understanding of material properties is essential for successful woodworking with radius tools. Recognizing the cause-and-effect relationship between material characteristics and tool performance enables informed decision-making, leading to cleaner cuts, reduced material waste, and extended tool life. The challenge lies in accurately assessing material properties and selecting the appropriate tool and technique to achieve the desired outcome. By prioritizing material compatibility, woodworkers can minimize risks and optimize the quality of their curved components.
Frequently Asked Questions
This section addresses common inquiries regarding the selection, application, and maintenance of radius instruments in woodworking.
Question 1: What distinguishes a radius template from an adjustable radius trammel?
Radius templates offer pre-determined, fixed curves, suitable for repetitive tasks demanding consistency. An adjustable radius trammel provides flexibility in creating various radii with a single instrument, accommodating diverse curve requirements. The choice depends on project complexity and the range of curves needed.
Question 2: How does material hardness influence the selection of a cutting instrument for use with a radius tool?
Harder materials, such as maple or oak, necessitate cutting instruments with robust cutting edges, often carbide-tipped, to resist wear and maintain precision. Softer materials, like pine or cedar, may be adequately addressed with high-speed steel cutters. Matching the cutter material to the wood hardness optimizes cutting efficiency and minimizes tool wear.
Question 3: What precautions mitigate tear-out when routing a curved edge with a radius jig?
Employing climb cutting techniques, where the cutter moves in the same direction as the wood grain, can reduce tear-out. Taking shallow passes and using a backing board to support the edge of the workpiece are also effective preventative measures. Sharp cutting edges are crucial for minimizing fiber disruption.
Question 4: How is a consistent radius maintained across multiple workpieces?
Employing a precisely fabricated template or an accurately calibrated adjustable trammel ensures consistent arc creation. Secure workpiece fixturing is crucial to prevent movement during the cutting operation. Regular verification of dimensions throughout the process confirms uniformity.
Question 5: What are appropriate storage practices to extend the lifespan of radius templates?
Templates should be stored flat and protected from direct sunlight and extreme temperature fluctuations to prevent warping or distortion. Hanging templates on a wall or storing them in a dedicated rack maintains their shape and prevents damage. Proper storage ensures continued accuracy.
Question 6: How frequently should the cutting edges of radius instrument bits be sharpened?
The frequency of sharpening depends on the type of material being worked and the usage intensity. Inspection for dullness or damage should be performed regularly. A noticeable decrease in cutting efficiency or a visible degradation of the cut quality indicates the need for sharpening. Proactive sharpening extends the tool’s life and maintains optimal performance.
Accurate measurement, template selection, and tool maintenance are critical in optimizing outcomes with radius instruments. Precise application of these concepts leads to results.
The concluding section will summarize key concepts and provide concluding remarks.
Conclusion
This exploration of the woodworking radius tool clarifies its role in shaping precise curves and arcs. The discussion encompasses template types, material compatibility, and the necessity of accurate measurement. Proficiency in these facets dictates the quality and consistency of curved elements in woodworking projects. A solid foundation ensures accuracy and streamlines workflow.
Mastery of the woodworking radius tool yields aesthetic and structural advantages. Continuous refinement of technique, coupled with informed tool selection, remains paramount. Through diligent practice, woodworkers can unlock the full potential of the radius tool. The future of this specialized tool will continue to be a staple in woodworking.


![Top Picks: Best Small Woodworking Tools [Guide] Step-by-Step Guides, Tools & Inspiration to Build Beautiful Wooden Decor on a Budget Top Picks: Best Small Woodworking Tools [Guide] | Step-by-Step Guides, Tools & Inspiration to Build Beautiful Wooden Decor on a Budget](https://woodfromhome.com/wp-content/uploads/2026/02/th-275-300x200.jpg)


