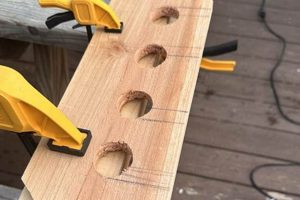
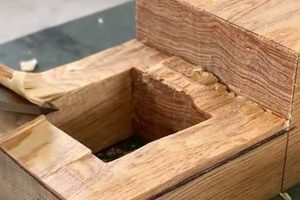
The craft of shaping wood using a lathe and specialized tools, resulting in symmetrical, three-dimensional forms, is a time-honored practice. Examples of such creations include bowls, spindles, pens, and decorative objects characterized by their rotational symmetry.
This method offers unique advantages, enabling the creation of intricate designs and smooth, flowing curves not easily achievable through other woodworking techniques. Historically, it has been integral to producing essential household items and artistic expressions across various cultures, contributing significantly to both functional and aesthetic aspects of daily life.
The subsequent discussion will delve into the materials suitable for this craft, the fundamental techniques employed, and a selection of projects to illustrate the breadth of possibilities within this skilled practice.
Guidance for Lathe-Based Wood Forming
The following guidelines offer valuable insights for achieving successful and safe outcomes in rotary wood shaping.
Tip 1: Material Selection: Appropriate timber selection is critical. Denser hardwoods generally yield cleaner cuts and finer finishes compared to softwoods. Consider grain orientation to maximize visual appeal and structural integrity.
Tip 2: Tool Sharpness: Consistently maintain exceptionally sharp tools. Dull tools necessitate increased force, raising the risk of catches and tear-out, negatively impacting surface quality and dimensional accuracy.
Tip 3: Lathe Speed: Adjust rotational velocity according to the work piece size and balance. Larger, unbalanced pieces require lower speeds to minimize vibration and potential hazards. Gradually increase speed as the piece becomes more balanced.
Tip 4: Stance and Tool Control: Adopt a stable stance, maintaining firm control over the tool. Use the body for leverage, minimizing strain on the hands and wrists. This promotes accuracy and reduces fatigue.
Tip 5: Light Cuts: Employ shallow, controlled cuts to avoid over stressing the wood and tools. Multiple passes, gradually approaching the desired shape, generally result in a superior finish and minimize the risk of catches.
Tip 6: Dust Control: Implement effective dust collection measures. Wood dust poses respiratory hazards and can obscure visibility. A dedicated dust collection system or a well-fitted respirator is highly recommended.
Tip 7: Finishing Techniques: Preparation is paramount for achieving a professional finish. Sand the surface through progressively finer grits before applying stains, oils, or lacquers. Consider the compatibility of the finish with the chosen wood species.
These recommendations emphasize safety, precision, and quality, contributing to consistent and satisfying results in rotary shaping projects.
The subsequent section will address common problems encountered during rotary shaping and propose effective solutions.
1. Material Selection
Material selection is a cornerstone of successful rotary wood forming. The physical properties of the chosen wood species dictate the ease of cutting, the quality of the finished surface, and the long-term stability of the crafted object. Strategic consideration of material attributes directly influences the outcome of all wood-turning endeavors.
- Density and Hardness
The density and hardness of wood influence its resistance to cutting forces and its ability to hold fine detail. Denser hardwoods, such as maple or ebony, generally allow for cleaner cuts and superior surface finishes, making them suitable for intricate forms. Softer woods, like pine or basswood, are easier to shape but may be more prone to tear-out and require careful handling. Examples include using dense hardwoods for delicate spindle work and softer woods for practice pieces.
- Grain Orientation and Figure
Grain orientation and the presence of figure (e.g., burl, curl, or spalting) can significantly enhance the aesthetic appeal of the finished product. However, these features also introduce challenges during the shaping process. Wood with highly figured grain may be more prone to tear-out or require specialized cutting techniques. Careful consideration of grain direction and the potential for instability is essential. A quarter-sawn board showcases the grain pattern prominently, whereas a plain-sawn board may warp more easily.
- Moisture Content
Moisture content profoundly affects the stability of wood and its susceptibility to warping or cracking after shaping. Wood should be properly seasoned or kiln-dried to a stable moisture content before shaping to minimize dimensional changes. Working with “green” wood (unseasoned wood) can be advantageous for certain projects, but it requires specialized techniques and an understanding of the wood’s shrinkage characteristics. The moisture content impacts the final product’s structural integrity and longevity.
- Species Characteristics
Different wood species possess unique characteristics, including color, texture, and natural oils, that influence the final appearance and feel of the crafted object. Some species are naturally resistant to decay, while others require protective finishes. Understanding these characteristics allows for informed selection based on the intended use and aesthetic goals of the project. For instance, cedar is prized for its aromatic properties and resistance to insects, making it suitable for chests, while walnut is valued for its rich color and grain, ideal for decorative items.
In summary, thoughtful selection is fundamental to successful rotary wood forming. By carefully evaluating factors such as density, grain orientation, moisture content, and species characteristics, the craftsman can optimize the shaping process, enhance the aesthetic qualities of the piece, and ensure its long-term durability. These choices define the project as much as the techniques applied.
2. Tool Sharpening
The relationship between tool sharpening and rotary wood shaping is a critical determinant of project success. Improperly sharpened tools directly impede the ability to execute clean, controlled cuts, resulting in a range of adverse effects. These effects include increased risk of “catches,” which are sudden, forceful grabs of the tool by the wood, potentially damaging the work piece and posing a safety hazard. Furthermore, dull tools tear the wood fibers rather than severing them cleanly, leading to a rough, uneven surface requiring extensive sanding. Consider the example of shaping a delicate finial; a sharp skew chisel is imperative for creating crisp, refined details. A dull tool, conversely, will crush the fibers, obscuring the intended form and demanding excessive corrective measures.
The frequency of tool sharpening depends on the wood species being processed and the duration of use. Harder woods, such as maple or ebony, dull cutting edges more quickly, necessitating more frequent attention. Regular honing, a process of lightly re-aligning the cutting edge, can extend the lifespan of a sharpened tool. Conversely, neglecting tool maintenance inevitably leads to diminished performance and compromised project quality. Sharpening jigs are often utilized to ensure consistent and accurate edge angles, which directly correlate to the effectiveness of the cutting action. Ignoring these details increases the likelihood of substandard results, regardless of the craftsman’s skill.
In conclusion, tool sharpness is not merely a procedural step but a fundamental prerequisite for achieving precise and aesthetically pleasing outcomes in rotary wood shaping. The consequences of using dull tools range from compromised surface quality to increased safety risks. Diligent and consistent attention to tool sharpening is therefore paramount for realizing the full potential of both the craft and the materials involved. The investment in proper sharpening equipment and techniques yields dividends in efficiency, safety, and the overall quality of finished pieces.
3. Lathe Speed
Rotational velocity is a critical parameter in lathe-based wood forming. The speed at which the work piece rotates directly impacts cutting efficiency, surface finish, and operator safety. An improperly selected speed can lead to a range of undesirable consequences, including tool chatter, tear-out, or even catastrophic work piece failure. For instance, turning a large, unbalanced bowl blank at excessive speed generates significant vibration, increasing the risk of a catch and potential injury. Conversely, attempting to shape a small, delicate spindle at too low a speed may result in inefficient cutting and a ragged surface.
The optimal speed is contingent upon several factors, including the diameter and balance of the work piece, the type of wood being shaped, and the tool being employed. Larger diameter objects require lower speeds to minimize centrifugal force and vibration. Harder woods generally benefit from slightly higher speeds, while softer woods may require lower speeds to prevent tear-out. Different tools, such as roughing gouges, spindle gouges, and scrapers, also perform optimally within specific speed ranges. A roughing gouge, designed to remove large amounts of material, typically operates at a lower speed than a spindle gouge used for refining details. Practical application involves starting at a low speed and gradually increasing it until the cut is smooth and controlled, adjusting as necessary throughout the process.
In summary, appropriate lathe speed is not a fixed value but a dynamic adjustment dependent on various project-specific parameters. Failure to carefully consider these factors can compromise the quality of the work and potentially lead to hazardous situations. A thorough understanding of the relationship between rotational velocity and wood behavior is therefore essential for safe and successful project execution. Mastering lathe speed control contributes significantly to achieving optimal results, improving efficiency, and enhancing the safety of all rotary wood shaping activities.
4. Project Design
The conceptualization phase exerts a profound influence on the ultimate success of any lathe-based wood forming endeavor. Careful planning dictates dimensions, form, and functionality, directly impacting material selection, tool choices, and the sequence of shaping operations. A well-defined design minimizes waste, reduces the potential for errors, and maximizes the aesthetic appeal of the finished piece. Conversely, a poorly considered plan can lead to dimensional inaccuracies, structural weaknesses, and a compromised final appearance. For instance, crafting a complex segmented bowl requires meticulous pre-calculation of segment angles and dimensions to ensure proper fit and structural integrity. Without a precise design, the assembly may fail, resulting in significant material loss and wasted effort.
The design process should incorporate a comprehensive understanding of wood properties and shaping techniques. Consideration must be given to grain orientation, wood movement, and the limitations of available tooling. For example, designing a hollow form vessel necessitates knowledge of wall thickness and the accessibility of hollowing tools to achieve the desired internal shape without compromising structural integrity. Digital modeling software can aid in visualizing complex forms and identifying potential design flaws before the shaping process begins. Practical application involves sketching the design, creating a detailed drawing with dimensions, and potentially building a prototype to test the design’s feasibility.
In summation, effective project design serves as the blueprint for successful rotary wood forming. It is a critical component that integrates material properties, shaping techniques, and aesthetic considerations. The challenges inherent in this phase are mitigated through meticulous planning, informed material selection, and a thorough understanding of the craft. By prioritizing design, woodworkers can enhance the efficiency of their process, reduce waste, and elevate the quality of their finished pieces, ultimately contributing to a more satisfying and rewarding crafting experience.
5. Finishing Methods
Surface treatments applied to lathe-shaped wooden articles significantly influence their aesthetic appeal, durability, and resistance to environmental factors. The selection and application of appropriate finishing methods are crucial stages in the creation of enduring and visually compelling artifacts.
- Surface Preparation
Proper surface preparation is fundamental to achieving a satisfactory finish. This involves sanding through progressively finer grits to remove imperfections and create a smooth, uniform surface. Failure to adequately prepare the surface results in uneven absorption of the finish and visible defects. Example: A poorly sanded bowl will exhibit swirl marks and scratches that are amplified by the application of a glossy finish.
- Types of Finishes
A diverse array of finishes exists, each imparting distinct characteristics. Oil finishes, such as linseed or tung oil, penetrate the wood, enhancing its natural grain and providing a subtle sheen. Varnish and lacquer finishes form a protective film on the surface, offering increased durability and water resistance. Example: A delicate wooden pen may benefit from the subtle enhancement of an oil finish, while a functional bowl might require the robust protection of a lacquer.
- Application Techniques
The method of finish application impacts its final appearance and performance. Brushing, spraying, and wiping are common techniques, each suited to different types of finishes and project scales. Improper application can result in runs, drips, or uneven coverage. Example: Applying lacquer with a spray gun provides a smooth, even coat on a large platter, while brushing may be more appropriate for intricate details on a smaller item.
- Considerations for Wood Species
Different wood species react differently to various finishes. Woods with open pores, such as oak, may require a filler to achieve a smooth surface, while oily woods, such as teak, may repel certain finishes. Example: Applying a water-based finish to cherry can accentuate its natural figure, whereas using the same finish on pine might require a sealant to prevent blotching.
The synergy between surface treatments and lathe shaping is intrinsic to the production of lasting and aesthetically pleasing wooden objects. The selected approach will affect the perception of the piece. Consideration of wood type, finish type and surface preparation is essential.
Frequently Asked Questions
This section addresses common inquiries related to lathe-based wood crafting, offering concise and authoritative answers.
Question 1: What types of wood are most suitable for rotary wood forming?
Denser hardwoods, such as maple, cherry, and walnut, generally provide superior results due to their tighter grain structure and ability to hold fine details. Softer woods, like pine, can be used, but may require greater care to prevent tear-out.
Question 2: How frequently should rotary wood forming tools be sharpened?
Sharpening frequency depends on wood hardness and usage. Tools should be sharpened whenever the cutting edge becomes dull, typically after several hours of use on hardwoods. Regular honing can extend the time between sharpenings.
Question 3: What lathe speed is appropriate for a given work piece?
Optimal lathe speed depends on the diameter and balance of the work piece. Larger diameters require lower speeds to minimize vibration and prevent dangerous situations. Starting at a lower speed and gradually increasing it is recommended.
Question 4: What safety precautions are essential during rotary wood forming?
Eye protection is mandatory. A properly fitted face shield or safety glasses protect against flying debris. Additionally, dust collection systems or respirators are essential to mitigate the health risks associated with airborne wood dust. Secure clothing and removal of jewelry prevent entanglement with rotating machinery.
Question 5: What are the common causes of tear-out in rotary wood forming?
Tear-out commonly results from dull tools, excessive lathe speed, or improper cutting techniques. Ensuring sharp tools, appropriate speeds, and employing shearing cuts can minimize tear-out.
Question 6: What are some effective methods for finishing rotary wood-formed objects?
Surface preparation is critical. Sanding through progressively finer grits creates a smooth base for finishes. Oil-based finishes enhance natural wood grain, while film-forming finishes like lacquer provide greater protection. The selected finish should be compatible with the wood species.
These answers provide foundational guidance for addressing common challenges in rotary wood forming. Employing diligence, these factors significantly contribute to successful and safe project outcomes.
The ensuing discussion will address specific project examples.
Conclusion
The preceding exploration has elucidated essential aspects of woodworking turning projects, emphasizing material selection, tool maintenance, speed control, design considerations, and finishing techniques. Mastery of these elements is fundamental to achieving precision, safety, and aesthetic quality within this craft. Understanding these concepts defines a clear path to refined results.
Continued diligence in applying these principles, along with ongoing refinement of skills, will enable craftsmen to realize increasingly complex and sophisticated designs. Woodworking turning projects represent a fusion of artistry and technical proficiency; dedication to both realms is necessary for sustained growth and significant contributions to the field.


