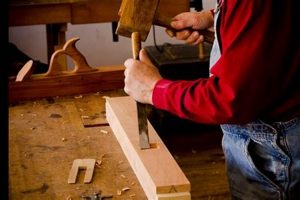
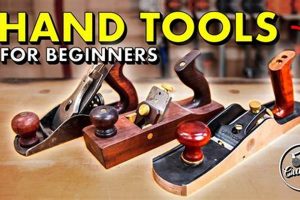
The practice involves shaping wood using manual tools designed with a blade set within a body, requiring physical effort to achieve smooth, even surfaces or specific profiles. This technique, employed for centuries, demonstrates control and precision in manipulating timber. Examples include flattening boards, creating joinery, and refining edges.
The discipline offers several advantages, from enhanced tactile feedback and reduced reliance on powered machinery to a heightened connection with the material. Historically, this method represented the primary means of preparing lumber for construction and furniture making. It fosters skill development and allows for intricate adjustments difficult to replicate with automated processes.
The following sections will delve into the different types of tools utilized, proper maintenance procedures, essential techniques for effective usage, and methods for achieving optimal results in various applications. Considerations for selecting the appropriate tool for specific tasks will also be addressed.
Essential Techniques for Optimal Results
Maximizing the effectiveness of these tools requires a thorough understanding of correct usage and maintenance procedures. The following guidelines provide a foundation for achieving superior outcomes.
Tip 1: Blade Sharpness: A razor-sharp blade is paramount. Dull edges tear fibers, leading to rough surfaces and increased effort. Regular honing and sharpening are essential.
Tip 2: Depth of Cut Adjustment: Precise adjustment of the blade’s projection is critical. Minute increments allow for controlled material removal, preventing gouging or chatter.
Tip 3: Consistent Body Pressure: Maintaining even pressure throughout the stroke ensures uniform thickness. Concentrating force at the beginning or end can cause unevenness.
Tip 4: Grain Direction Awareness: Working with the grain reduces tear-out and produces a smoother finish. Identifying the grain’s orientation before starting each stroke is crucial.
Tip 5: Body Angle Maintenance: Keeping the body flat on the wood’s surface prevents uneven cuts. Any tilt will result in angled or tapered results.
Tip 6: Chipbreaker Adjustment: The chipbreaker, or cap iron, should be set close to the cutting edge. This minimizes tear-out, particularly with difficult or figured wood.
Tip 7: Proper Lubrication: Applying a thin coat of oil or wax to the sole reduces friction and facilitates smooth movement. This is especially important on denser woods.
Mastery of these tools hinges on meticulous attention to detail and consistent practice. Proper blade maintenance, controlled adjustment, and awareness of grain direction are cornerstones of effective utilization.
The subsequent sections will explore specific applications and advanced techniques for experienced practitioners.
1. Blade Sharpness
Blade sharpness is intrinsically linked to the effectiveness and quality of results achieved. The tool’s ability to sever wood fibers cleanly, rather than tear them, is directly proportional to the keenness of the blade. A dull blade requires significantly more force to move, increasing the risk of errors, such as gouges or uneven surfaces. For example, attempting to flatten a wide board with a dull blade will result in a choppy, inconsistent plane and considerable physical strain. Sharpness represents a foundational element of achieving the desired smooth, even finish.
The direct impact of blade sharpness also extends to the types of wood that can be worked effectively. Hardwoods, with their dense and tightly packed grain structures, demand extremely sharp edges. Attempting to work hardwoods with a less-than-optimally sharp blade can lead to significant tear-out, rendering the piece unusable for its intended purpose. Conversely, with a properly honed blade, even highly figured or difficult-to-work woods can be successfully shaped and refined. Regular honing and sharpening are thus not merely best practices; they represent critical prerequisites for effective material manipulation.
In conclusion, understanding and maintaining blade sharpness is paramount. It influences the ease of use, the quality of the resulting surface, and the range of wood species that can be successfully worked. Neglecting blade sharpness creates a cascade of potential problems, increasing the risk of errors and compromising the finished product. Therefore, dedication to honing and sharpening forms the cornerstone of competent practice, ensuring predictable and high-quality outcomes.
2. Wood Grain Direction
The orientation of wood fibers, commonly referred to as grain direction, presents a crucial determinant in successful implementation. The directionality directly influences the tool’s interaction with the material and the quality of the resulting surface. Ignoring this fundamental aspect leads to undesirable outcomes, such as tear-out and unevenness, and can compromise the structural integrity of the workpiece.
- Preventing Tear-Out
Tear-out occurs when the blade catches the upward-sloping fibers, causing them to chip or break away from the surface instead of being cleanly severed. Understanding grain direction allows one to plane “with the grain,” that is, in the direction that lays the fibers down, thus minimizing the chance of tear-out. An example is observing a section of lumber where the growth rings curve upwards; planing in the direction of that curve prevents the tool from digging into the rising fibers.
- Achieving Smooth Surfaces
Planing against the grain creates a rough, uneven surface, even with a sharp blade. The resulting surface can be difficult to sand smooth and will not reflect light evenly. Conversely, working with the grain yields a smooth, polished surface that requires minimal sanding. An illustrative instance involves planing a piece of curly maple; altering the direction during the stroke causes immediate and visible roughness, whereas consistent alignment with the grain results in a glass-like finish.
- Identifying Grain Patterns
Accurate determination of grain direction requires careful observation of the wood. The angle of the growth rings, the presence of knots, and the overall figure of the wood provide visual cues. Experience allows for the rapid identification of grain direction in various wood species and forms. A common example is the “cathedral” pattern in flat-sawn lumber, where the grain changes direction significantly across the width of the board, necessitating adjustments in planing direction.
- Impact on Jointing
When creating joints, such as those for drawers or frames, the directionality of the grain is essential for a successful outcome. In long grain-to-long grain joints, the direction of the grain should be considered for both pieces to achieve structural integrity and prevent potential splitting or movement of the wood over time. For example, in a dovetail joint, alternating the grain direction in adjacent pieces adds significant strength.
These facets underscore the critical role of wood grain direction. It impacts not only the aesthetics of the finished piece but also its structural integrity and the overall efficiency of the woodworking process. Neglecting this consideration inevitably leads to diminished results and wasted materials, solidifying its position as a fundamental principle in this discipline.
3. Depth of Cut
The projection of the blade beyond the sole, known as the depth of cut, represents a critical adjustment directly influencing the efficiency and outcome of hand planing operations. Precise control over this parameter allows for controlled material removal and the attainment of desired surface qualities.
- Initial Stock Removal
During the initial stages of stock preparation, a heavier depth of cut facilitates rapid material removal, expediting the flattening or thicknessing process. Excessive depth, however, increases the risk of tear-out and requires significantly more physical effort. For example, when flattening a rough-sawn board, a moderate depth setting allows for efficient material removal while minimizing the likelihood of blade chatter or surface imperfections.
- Achieving a Fine Finish
Subsequent passes demand a progressively shallower depth of cut to refine the surface and eliminate imperfections left by previous passes. Micro-adjustments are essential for achieving a smooth, glass-like finish. A common technique involves setting the blade to remove shavings so thin they are nearly transparent, ensuring minimal surface disruption and maximum smoothness.
- Addressing Grain Direction Variations
Localized changes in grain direction may necessitate adjustments to the depth of cut to mitigate tear-out. Reducing the depth in areas where the grain reverses can prevent chipping and ensure a consistent surface. Visual inspection and tactile feedback are essential for identifying these areas and making appropriate adjustments.
- Tool Condition and Sharpness Influence
The optimal depth of cut is also contingent on the sharpness of the blade and the overall condition of the tool. A dull blade requires a shallower setting to prevent excessive force and ensure a clean cut. Similarly, a poorly tuned tool may exhibit chatter or vibration, necessitating a reduction in the depth of cut to maintain control and accuracy.
Mastery of depth of cut adjustment is fundamental to effective hand planing. It directly impacts the rate of material removal, the quality of the finished surface, and the overall ease of use. Proficiency in this skill requires careful observation, tactile sensitivity, and a thorough understanding of the interplay between tool condition, wood properties, and desired outcome.
4. Body Alignment
Effective execution in hand planing necessitates precise body alignment. Deviation from proper posture introduces inconsistencies in pressure and stroke direction, directly impacting surface quality. Suboptimal alignment can manifest as uneven thickness, angled surfaces, or increased effort due to inefficient force application. An example is maintaining a straight spine and level shoulders while planing a long board; this ensures even distribution of pressure along the tool’s length. Improper alignment, such as leaning excessively to one side, leads to a tapered cut.
The connection between body positioning and tool performance extends beyond surface aesthetics. Incorrect posture can rapidly induce fatigue, reducing concentration and increasing the likelihood of errors. Furthermore, sustained misalignment may contribute to musculoskeletal strain, potentially leading to long-term physical discomfort. Consider the scenario of flattening a large tabletop; consistent, balanced stance allows for prolonged, accurate work, whereas a hunched or twisted position quickly results in back and shoulder pain, diminishing both speed and precision. The physical demands necessitate a conscious effort to establish and maintain optimal biomechanics.
In summary, body alignment represents a crucial element in hand planing, influencing both the immediate quality of the work and the long-term physical well-being of the practitioner. Prioritizing proper posture and movement patterns reduces fatigue, minimizes the risk of errors, and fosters a sustainable approach to this demanding craft. Recognizing the interdependence between physical form and tool control is essential for achieving consistent, high-quality results and preserving physical health over time.
5. Tool Maintenance
The ongoing preservation of edged hand tools is integral to effective and predictable outcomes. Neglecting maintenance impairs performance, reduces lifespan, and increases the risk of errors. Proper upkeep encompasses several key aspects, each contributing to sustained optimal functionality.
- Blade Sharpening and Honing
The sharpness of the blade directly dictates the quality of the cut. Regular sharpening, using stones or abrasive papers, restores the cutting edge. Honing, a finer process, refines the edge to a razor-like state. A dull blade requires more force, leading to tear-out and uneven surfaces. An example is using a series of progressively finer water stones to maintain a consistent, acute cutting angle on the blade’s bevel. Insufficient sharpness renders the tool less effective, regardless of other adjustments.
- Sole Flattening and Preparation
The sole, or bottom surface, must be perfectly flat for consistent contact with the wood. Irregularities in the sole cause uneven planing and make precise depth-of-cut adjustments difficult. Flattening involves lapping the sole on a flat abrasive surface. Applying wax or oil reduces friction and facilitates smooth movement. A concave sole, for instance, would result in a rounded or scalloped surface, hindering the ability to achieve a uniformly flat plane.
- Adjustment Mechanism Calibration
The mechanisms that control blade depth and lateral alignment must be properly calibrated. Looseness or imprecision in these mechanisms leads to inconsistent cuts and difficulty in maintaining accuracy. Regular cleaning and lubrication prevent corrosion and ensure smooth operation. A binding or unresponsive depth adjustment screw prevents precise control over material removal.
- Rust Prevention and Protection
Metal components are susceptible to rust, particularly in humid environments. Rust degrades performance, corrodes critical surfaces, and shortens the tool’s lifespan. Regular cleaning and application of rust-inhibiting compounds are essential. Storing tools in a dry environment further mitigates corrosion. An example includes applying a thin coat of paste wax to all exposed metal surfaces after each use to prevent oxidation.
These facets highlight the critical role of ongoing maintenance. Proper sharpening, flattening, calibration, and protection ensure predictable, high-quality results and extend the usable life of the tool. Neglecting these procedures compromises performance and diminishes the value of the tool.
6. Material Support
Adequate support for the workpiece during hand planing directly influences the efficiency and precision of the process. Insufficient or unstable support introduces vibration, impedes smooth tool movement, and compromises the accuracy of the cut. Material support, therefore, constitutes a foundational element in achieving desired outcomes. For instance, attempting to flatten a long, thin board unsupported along its length results in flexing and uneven planing. This is because the force exerted by the tool deflects the unsupported section, making it impossible to achieve a consistent plane. Proper support ensures the workpiece remains rigid and stable, enabling uniform material removal.
The specific type of support required varies based on workpiece dimensions, material properties, and the nature of the operation. Larger or more flexible materials necessitate multiple points of support to prevent sagging or movement. Jigs and fixtures designed to securely hold irregular shapes allow the process to proceed unimpeded. The absence of adequate support manifests in several ways, including chatter marks on the planed surface, increased physical exertion required to maintain tool control, and a higher likelihood of dimensional inaccuracies. A practical example is planing the edge of a narrow strip; clamping the strip securely to a stable surface prevents it from shifting during the stroke, resulting in a straight, square edge.
In summary, material support stands as an indispensable component of effective hand planing. Its absence leads to compromised surface quality, increased effort, and potential inaccuracies. The provision of stable, consistent support ensures the workpiece remains rigid, allowing for precise material removal and the achievement of desired dimensional and surface characteristics. Understanding and implementing appropriate support strategies contributes significantly to the successful execution of hand planing tasks.
7. Consistent Technique
The effective utilization of edged hand tools fundamentally relies on consistent technique. Deviations from established best practices introduce variability and compromise the quality of the resultant surfaces and forms. Mastery of these tools necessitates a deliberate and repeatable approach.
- Stroke Angle Maintenance
The angle at which the tool is presented to the material directly influences the cutting action. Maintaining a uniform angle throughout each stroke ensures consistent material removal. Variations in stroke angle result in uneven surfaces and can promote tear-out. For instance, altering the angle during a long stroke while flattening a board creates a noticeable undulation. Consistent adherence to the desired stroke angle contributes directly to a smooth, uniform surface.
- Pressure Distribution Control
The application of force must be evenly distributed along the length of the tool. Uneven pressure results in localized material removal and a non-planar surface. Applying excessive pressure at the beginning or end of the stroke creates a tapered cut. Controlled pressure distribution necessitates a balanced stance and a mindful approach to force application. Maintaining equal pressure throughout each stroke while jointing the edge of a board ensures a straight, square edge.
- Rhythm and Cadence Establishment
Developing a consistent rhythm and cadence promotes fluidity and reduces the likelihood of errors. A jerky or erratic stroke pattern leads to unevenness and fatigue. Establishing a steady pace allows for better control of the tool and more predictable results. Maintaining a consistent stroke rate allows for precise and efficient material removal.
- Overlapping Stroke Methodology
Strategic overlapping of each stroke ensures uniform material removal and eliminates ridges or valleys between adjacent passes. Failing to overlap adequately leaves noticeable imperfections on the planed surface. A properly executed overlapping stroke blends seamlessly with the previous stroke, creating a continuously smooth surface. This technique requires precise control and awareness of the tool’s trajectory.
These facets underscore the importance of consistent technique. Proficiency necessitates dedicated practice and a conscious effort to internalize proper movement patterns. The application of these techniques ensures predictable and high-quality results. Ultimately, consistent technique provides the foundation for efficient and precise manipulation of the wood.
Frequently Asked Questions
The following represents answers to commonly encountered inquiries regarding the principles and practices associated with shaping wood using manual tools. These responses aim to provide clarity and address potential misconceptions.
Question 1: What distinguishes different types of edged wood-shaping tools, and how should the selection process be approached?
Variations exist in size, blade angle, and intended application. Bench models are general-purpose, while block models are suitable for end-grain work. The selection process should prioritize the specific task, the material being worked, and the desired level of precision.
Question 2: How frequently should the blade be sharpened, and what indicators suggest the need for resharpening?
Sharpening frequency depends on usage and the type of wood being worked. A dull edge is indicated by increased resistance, tearing of the wood fibers, and difficulty achieving a smooth surface. Regular honing between sharpening sessions extends the time between full resharpening procedures.
Question 3: What are the primary causes of tear-out, and how can it be effectively prevented?
Tear-out is primarily caused by planing against the grain or using a dull blade. Prevention involves careful assessment of grain direction, ensuring blade sharpness, and reducing the depth of cut in susceptible areas.
Question 4: How does the adjustment of the chipbreaker (cap iron) impact the tool’s performance?
The chipbreaker, when properly positioned close to the cutting edge, reduces tear-out by preventing the wood fibers from lifting ahead of the blade. Adjusting its position is crucial, particularly when working with figured or difficult woods.
Question 5: What are the recommended practices for storing edged tools to prevent corrosion?
Storage in a dry environment is essential. Coating metal surfaces with a rust-inhibiting compound, such as paste wax or oil, provides an additional layer of protection. Avoid storing tools in damp or humid conditions.
Question 6: How can one accurately assess the flatness of a surface prepared using manual methods?
Straightedges and winding sticks are used to detect deviations from a true plane. These tools reveal high and low spots, allowing for targeted correction and refinement of the surface.
Mastery of these principles requires dedicated practice and a thorough understanding of material properties. The proper execution of these techniques guarantees predictability and efficiency.
The following sections will delve into advanced techniques and specialized applications.
Hand Planers Woodworking
The preceding sections have comprehensively explored the nuanced art of shaping wood through manual means. Key aspects, ranging from blade maintenance and material support to wood grain awareness and consistent technique, have been detailed. Mastery of these elements dictates the quality and precision achievable in this field. The presented information underscores the necessity of dedicated practice and a thorough understanding of material properties for successful execution.
The acquisition of skills related to shaping wood using manual methods requires ongoing commitment and a willingness to refine technique. This detailed exploration seeks to empower both novice and experienced practitioners to elevate their craft, fostering a deeper appreciation for the discipline. Through continuous learning and meticulous application, superior results and enduring satisfaction can be attained.


