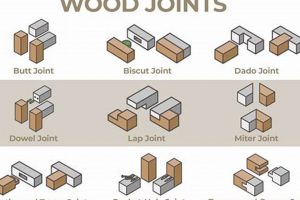
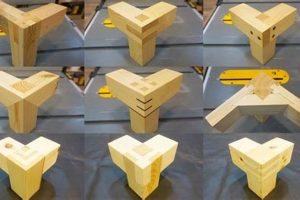
The utilization of threaded fasteners to connect pieces of wood forms a crucial category within joinery. These connections, characterized by their mechanical strength and ease of assembly, involve the insertion of a specialized screw into the wood to create a secure hold. A common example includes attaching a table leg to the tabletop apron using this method.
This method of assembly offers advantages such as relative simplicity, the ability to disassemble and reassemble the joint if needed, and the capacity to create strong, lasting bonds between wood components. Historically, the use of such fasteners in furniture making and construction has revolutionized woodworking practices, allowing for more complex and robust designs.
The following sections will delve into the various types, proper selection criteria, and best practices for creating durable and aesthetically pleasing assemblies with these fasteners.
Essential Considerations for Fastened Wood Assemblies
Achieving reliable and durable connections requires careful attention to several key factors. The following guidelines outline critical aspects of the process.
Tip 1: Pilot Hole Preparation: Drilling a pilot hole corresponding to the root diameter of the screw is essential to prevent splitting, particularly in hardwoods. Omission of this step can compromise the structural integrity of the joint.
Tip 2: Countersinking and Counterboring: Employing countersinking techniques allows the head to sit flush with the surface, enhancing aesthetics and preventing obstructions. Counterboring provides space to conceal the head entirely with a wood plug.
Tip 3: Screw Selection: Choose the appropriate type based on the wood’s density, the joint’s loading, and the desired finish. Factors include screw length, thread type (coarse or fine), and head style (flat, round, pan).
Tip 4: Torque Management: Avoid over-tightening, which can strip the threads or damage the surrounding wood. Use a torque-limiting driver or exercise caution when applying manual force.
Tip 5: Edge Distance: Maintain adequate distance from the edge of the wood to prevent splitting. The recommended distance is generally at least twice the diameter of the screw.
Tip 6: Screw Angle: Driving the screw at a slight angle can increase its holding power, particularly in situations where the screw is subject to shear forces.
Tip 7: Lubrication: Applying wax or soap to the screw threads can significantly reduce friction during insertion, preventing damage and simplifying the process.
Adherence to these guidelines will result in strong, visually appealing, and long-lasting joined wooden components. A well-executed method ensures structural integrity and enhances the overall quality of the project.
The subsequent section will address common troubleshooting issues encountered when constructing these assemblies and propose effective solutions.
1. Pilot Hole
The implementation of a pilot hole is a fundamental prerequisite for achieving robust and enduring woodworking screw joints. Its function is not merely preparatory, but integral to the mechanical integrity of the connection. The pilot hole facilitates controlled screw insertion and mitigates the risk of material failure.
- Reduced Splitting
Drilling a pilot hole alleviates radial stress exerted by the screw threads as they penetrate the wood. This reduction in stress significantly decreases the likelihood of splitting, particularly in hardwoods or when working near the edge of a board. The diameter of the pilot hole should correspond closely to the root diameter of the screw being used.
- Optimized Thread Engagement
A properly sized pilot hole ensures that the screw threads engage the wood fibers without excessive force. This allows for maximum thread contact and holding power. Without a pilot hole, the screw may simply force its way through the wood, resulting in weakened thread engagement and a less secure joint.
- Controlled Screw Alignment
The pilot hole serves as a guide for the screw, ensuring that it is driven straight and true. This is particularly important when joining pieces at an angle or when working with long screws. Deviations in screw alignment can weaken the joint and create visual imperfections.
- Decreased Driving Effort
Inserting screws into wood without a pilot hole requires significant force, which can lead to user fatigue and increased risk of tool slippage. Drilling a pilot hole reduces the effort required to drive the screw, making the process more efficient and less prone to errors.
The absence of a correctly sized pilot hole compromises the structural integrity of the assembly. Therefore, precision in pilot hole creation is essential for achieving optimal performance and longevity in woodworking screw joints.
2. Screw Selection
The selection of the appropriate screw is paramount to the performance and longevity of any fastened wood assembly. It directly influences the joint’s strength, appearance, and resistance to failure. Failure to consider screw characteristics relative to the wood species and application can result in compromised structural integrity. For instance, using coarse-threaded screws in hardwoods may strip the threads, while using fine-threaded screws in softwoods might not provide sufficient grip. This choice is a critical component of sound practice.
Several factors dictate optimal screw selection. Wood density dictates thread pitch; softwoods benefit from coarse threads, and hardwoods from fine threads. Screw length must adequately penetrate both joining members to ensure a robust connection, usually about two-thirds into the receiving piece. Head type, whether flat, round, or pan, affects aesthetics and functionality, with flat heads often countersunk for a flush surface. Material composition matters, with corrosion-resistant screws essential for outdoor applications. For example, deck projects require coated or stainless-steel screws to withstand weathering, while indoor furniture may use blued or brass screws.
In summary, appropriate screw selection is integral to the creation of reliable and visually acceptable woodworking screw joints. It demands considering the physical properties of the materials being joined, the environmental conditions to which the assembly will be exposed, and the desired aesthetic outcome. This understanding minimizes the risk of joint failure and ensures the enduring quality of the woodworking project.
3. Torque Control
Precise regulation of rotational force, termed “Torque Control,” is crucial in the creation of robust woodworking screw joints. Excessive torque can result in stripping of screw threads within the wood, particularly in softer species or when screws are driven close to the material’s edge. This compromise diminishes the joint’s load-bearing capacity and overall structural integrity. Conversely, insufficient torque yields a joint that lacks full engagement and may loosen over time due to vibrations or applied stress. The correct application of torque ensures the screw is firmly seated without exceeding the wood’s capacity to withstand the force, establishing a durable connection. For example, when attaching a hinge to a cabinet door, over-tightening can lead to screw failure and a loose hinge, while under-tightening leaves the hinge susceptible to premature wear and tear.
The implementation of calibrated tools, such as torque-limiting screwdrivers or drills with adjustable clutch settings, offers a practical means of achieving consistent torque application. These tools allow the user to preset the maximum torque applied, preventing over-driving of screws and mitigating the risk of damage. Furthermore, understanding the screw’s material properties and the wood’s density helps in determining the appropriate torque level. Pilot holes are also instrumental, as they reduce the effort required to drive the screw and minimize the risk of splitting, thus influencing the optimal torque setting. Projects involving hardwoods typically demand more torque than those using softwoods, and the proper pilot hole size will also have an effect on the amount of force needed for a secure connection.
In summary, effective torque control is a prerequisite for achieving durable and reliable woodworking screw joints. The careful management of rotational force, informed by tool selection, material properties, and proper technique, directly impacts the joint’s ability to withstand applied stress and maintain structural integrity over time. Recognizing this critical connection is crucial for any woodworker seeking to create lasting and high-quality projects.
4. Countersinking
Countersinking, in the context of woodworking screw joints, refers to the creation of a conical recess around the pilot hole. This recess is designed to accommodate the head of the screw, enabling it to sit flush with, or slightly below, the surface of the wood. The primary benefit is the elimination of protrusions that might impede functionality or detract from the aesthetic quality of the finished piece. For example, the screws attaching drawer slides to a cabinet must be countersunk to ensure smooth drawer operation. The absence of countersinking would result in the screw heads interfering with the movement of the drawer.
The process typically involves using a specialized drill bit, known as a countersink bit, after the pilot hole has been drilled. The bit is designed to create a clean, consistent recess that matches the angle of the screw head. The depth of the countersink must be carefully controlled to avoid over-drilling, which can weaken the surrounding wood and diminish the screw’s holding power. When installing hardware such as hinges or latches, countersinking is vital for secure and unobtrusive attachment. The screw heads must be flush to allow the hardware to function correctly and prevent snagging or damage to other components.
In summary, countersinking constitutes an integral step in achieving high-quality and functional woodworking screw joints. Its proper execution not only enhances the visual appeal of the project but also ensures that fasteners do not interfere with the intended operation of the constructed item. Neglecting this process can lead to both practical and aesthetic shortcomings in the final product.
5. Edge Distance
In the context of woodworking screw joints, edge distance refers to the minimum space maintained between the center of a screw and the nearest edge of the wooden component. This parameter is critical to the joint’s structural integrity, as inadequate edge distance can precipitate splitting or fracture of the wood along the grain. When a screw is driven too close to the edge, the compressive forces exerted by the threads can exceed the wood’s tensile strength perpendicular to the grain, resulting in a compromised connection. A practical example involves fastening a shelf support too close to the edge of a cabinet side panel, which is a failure caused by the screw splitting the side panel. The result is an unstable shelf support that cannot bear the intended load.
Recommended edge distances vary based on wood species, screw size, and the applied load. Softer woods generally require greater edge distances than hardwoods due to their lower tensile strength. A common rule of thumb is to maintain an edge distance equal to at least twice the screw’s diameter. In situations where high loads are anticipated, or when working with brittle wood, increasing this distance is advisable. Mitigating factors, such as pre-drilling pilot holes and using screws with non-split shanks, can also reduce the risk of edge failure, but adequate distance remains essential. Additionally, when attaching multiple screws in close proximity, staggering their positions can distribute stress and minimize the likelihood of splitting.
In conclusion, understanding and adhering to appropriate edge distance guidelines constitutes a fundamental element of constructing reliable woodworking screw joints. Failure to account for this parameter can lead to premature joint failure, compromising the structural integrity and longevity of the woodworking project. Careful planning, appropriate screw selection, and meticulous execution are necessary to ensure the creation of durable and aesthetically sound wood assemblies. Proper edge distance ultimately balances screw placement with the risk of splitting or fracturing the wood.
6. Thread Engagement
Thread engagement, in the context of fastened wood assemblies, defines the extent to which the screw threads penetrate and interact with the wood fibers of the receiving material. This interaction is the primary mechanism by which the screw imparts clamping force and resists withdrawal. Adequate thread engagement is essential for creating strong and reliable connections, preventing joint failure under load.
- Screw Length and Material Thickness
The length of the screw, relative to the thickness of the materials being joined, directly determines the amount of thread engagement. A screw that is too short will not adequately penetrate the receiving material, resulting in insufficient holding power. Conversely, a screw that is excessively long may protrude through the backside of the material or interfere with other components. Calculating the required screw length to achieve optimal engagement is critical to the joint’s success. As an example, when attaching a thin tabletop to a thicker frame, care must be taken to select screws long enough to firmly engage the frame without penetrating the tabletop surface.
- Wood Density and Thread Pitch
The density of the wood influences the thread pitch required for effective engagement. Softwoods, with their lower density, generally benefit from coarse-threaded screws, which provide greater surface area for gripping the wood fibers. Hardwoods, with their higher density, often require fine-threaded screws to prevent splitting and ensure consistent engagement. The selection of the correct thread pitch ensures that the screw can effectively grip the wood fibers without damaging the material. For example, using fine-threaded screws in dense hardwoods like maple or oak prevents the screw from stripping the wood, leading to a stronger and more durable joint.
- Pilot Hole Size and Preparation
The size and preparation of the pilot hole significantly impact thread engagement. A pilot hole that is too small can make it difficult to drive the screw and may cause the threads to strip the wood. A pilot hole that is too large will reduce the amount of thread engagement, weakening the joint. Drilling the pilot hole to the correct diameter, matching the root diameter of the screw, ensures optimal thread contact. Additionally, countersinking the hole allows the screw head to sit flush with the surface without interfering with the thread engagement. Proper pilot hole preparation allows the screw to bite into the wood cleanly and firmly, maximizing the holding power of the joint.
- Blind Joints and Hidden Fasteners
In blind joints, where the screw is not visible from the exterior of the assembly, achieving adequate thread engagement can be challenging. Special techniques, such as using pocket screws or dowel screws, are often employed to maximize the holding power of the joint. Pocket screws are driven at an angle into a pre-drilled pocket, allowing for substantial thread engagement in a hidden location. Dowel screws, with threads on both ends, are used to connect two pieces of wood with concealed fasteners. These methods provide the necessary thread engagement to create strong and aesthetically pleasing joints without visible screws. An example of this is in furniture construction, where pocket screws are frequently used to join aprons to table legs, creating a strong, invisible joint.
Ultimately, the effectiveness of any woodworking screw joint hinges on achieving sufficient thread engagement between the screw and the wood. By carefully considering factors such as screw length, wood density, pilot hole preparation, and joint type, it is possible to create robust and durable assemblies that withstand the test of time. The proper execution of this aspect is essential for ensuring both the structural integrity and the aesthetic appeal of the finished woodworking project. The knowledge of thread engagement ensures the success of woodworking projects.
Frequently Asked Questions
This section addresses prevalent inquiries regarding fastened wood assemblies, providing concise, fact-based answers to enhance understanding and ensure successful construction practices.
Question 1: What factors determine the appropriate screw length for a given wood joint?
Screw length is primarily determined by the thickness of the materials being joined and the desired degree of thread engagement in the receiving piece. A general guideline is to ensure that the screw penetrates at least two-thirds of its length into the second piece of wood to establish a secure hold.
Question 2: How critical is the pilot hole size in relation to the screw being used?
Pilot hole size is paramount. The hole should match the root diameter of the screw, not the thread diameter. A hole too small risks splitting the wood; a hole too large reduces thread engagement and holding power.
Question 3: What distinguishes coarse-threaded screws from fine-threaded screws, and when should each be used?
Coarse-threaded screws are designed for use in softwoods or less dense materials, where their widely spaced threads can effectively grip the wood fibers. Fine-threaded screws are more suitable for hardwoods, offering greater thread engagement and reducing the risk of splitting the wood.
Question 4: Why is countersinking a necessary step in many woodworking projects?
Countersinking allows the screw head to sit flush with or below the surface of the wood, preventing interference with other components and enhancing the aesthetic appeal of the finished project. It also prevents the screw head from protruding and potentially causing injury.
Question 5: What measures can prevent screws from stripping in wood, particularly in softer species?
Several techniques can mitigate screw stripping, including using the correct pilot hole size, employing screws with deeper threads, applying appropriate torque, and using lubrication (such as wax or soap) on the screw threads.
Question 6: How does edge distance affect the integrity of a fastened wood joint?
Insufficient edge distance can lead to splitting or cracking of the wood, weakening the joint. A general rule is to maintain a distance of at least twice the screw diameter from the edge of the wood to prevent failure.
These answers provide foundational knowledge for constructing sound, reliable woodworking joints. Attention to detail in each of these aspects is key.
The next section will cover advanced methods in constructing specialized joinery.
Conclusion
This exploration has detailed critical aspects of creating secure, reliable wooden assemblies. Emphasis has been placed on pilot hole preparation, fastener selection, torque control, countersinking techniques, edge distance considerations, and the importance of thread engagement. Each element directly impacts the structural integrity and longevity of completed projects.
Mastering these techniques provides a foundation for advanced woodworking. Continued study and disciplined application are essential for those seeking to achieve consistent, professional-quality results. The understanding of these methods equips woodworkers to create durable and aesthetically pleasing pieces that stand the test of time.


