The activity constitutes the creation of a robust, flat work surface designed specifically for woodworking tasks. It involves selecting appropriate materials, precisely cutting and assembling those materials according to a plan, and ensuring the final structure is stable, level, and capable of withstanding significant force. An example would be constructing a 4-foot by 6-foot workbench with a solid wood top and sturdy leg supports using mortise-and-tenon joinery.
Such a construction provides a stable and dedicated space for executing woodworking projects. It enhances efficiency, precision, and safety compared to working on makeshift surfaces. Historically, these dedicated workspaces have evolved from simple saw benches to complex platforms integrating vises, dog holes, and storage solutions, reflecting the continuous refinement of woodworking practices.
The subsequent sections will detail the crucial considerations in the design phase, the selection of materials, the necessary tools and equipment, step-by-step instructions for construction, and essential finishing techniques to ensure durability and longevity of the resulting structure.
Essential Considerations for Optimal Construction
The following guidelines offer critical advice for achieving a durable, functional, and safe woodworking platform.
Tip 1: Plan Thoroughly: Prioritize a detailed plan before commencing work. A scaled drawing specifying dimensions, material types, and joinery methods minimizes errors and material waste. For example, accurately calculating the required lumber for the frame reduces the need for costly additional purchases.
Tip 2: Material Selection is Key: Choose hardwoods like maple or beech for the workbench top due to their density and resistance to wear. Softwoods may be more economical for the base, but ensure sufficient bracing is incorporated for stability. For instance, avoid using solely pine for the top, as it dents easily.
Tip 3: Employ Robust Joinery: Opt for strong joinery techniques such as mortise-and-tenon or dovetail joints for connecting the legs and frame. These joints provide superior strength and longevity compared to relying solely on screws. Example: Mortise-and-tenon joints significantly enhance the structural integrity.
Tip 4: Ensure a Flat and Stable Surface: A level and flat work surface is paramount. After assembly, use a hand plane or belt sander to correct any imperfections. Regularly check for flatness over time as the wood acclimatizes. Example: Using a long straightedge to check the surface for high spots.
Tip 5: Incorporate a Vise: A sturdy vise is an indispensable component. Select a vise appropriate for the anticipated workload and securely mount it to the workbench top. Example: A quick-release vise facilitates rapid workpiece clamping.
Tip 6: Add Dog Holes for Versatility: Dog holes increase functionality by allowing for various clamping and fixturing options. Precisely drill these holes in a grid pattern across the workbench top. Example: Standard 3/4-inch dog holes accommodate a wide range of accessories.
Tip 7: Prioritize Stability: Address potential racking by incorporating diagonal bracing into the base. This prevents the workbench from wobbling under load. Example: Installing cross braces between the legs significantly improves stability.
These tips facilitate a more efficient and enjoyable woodworking experience. A well-constructed platform becomes an invaluable asset in any woodworking endeavor.
The subsequent section will provide detailed instructions on finishing, maintenance, and potential customizations.
1. Design Dimensions
The dimensional planning stage is fundamental to the success of constructing a functional and efficient woodworking surface. Accurate dimensional choices dictate the workspace available and directly influence the type and scale of projects that can be undertaken.
- Overall Footprint
The overall length and width of the workbench determine its suitability for the available workspace and the size of projects anticipated. A compact surface may suffice for small-scale tasks, while larger projects necessitate a more substantial footprint. Example: A cabinetmaker might require a table exceeding eight feet in length to accommodate casework components.
- Workbench Height
The workbench height should be ergonomically appropriate for the user. An incorrect height can lead to discomfort, fatigue, and reduced precision. The optimal height typically aligns with the user’s elbow height when standing. Example: A height of 36 inches might suit a user of average stature, while taller individuals may require a 38-inch or higher surface.
- Top Thickness
The thickness of the work surface impacts its rigidity and ability to resist warping. A thicker top provides a more stable platform for woodworking operations, particularly those involving hammering or planing. Example: A top constructed from laminated hardwood at least 3 inches thick provides significant stability.
- Apron Dimensions
The dimensions of the apron, the structure beneath the workbench top, contribute to the overall strength and stability of the assembly. An adequately sized apron provides substantial support for the top and resists racking. Example: A 4-inch deep apron provides significant resistance to deflection.
These dimensional considerations collectively define the character and capabilities of the resulting woodworking platform. Optimizing these parameters ensures a comfortable, efficient, and productive woodworking environment. Ignoring these fundamental considerations can result in a workspace that is inadequate or even hazardous.
2. Material Selection
Material selection represents a critical phase in the creation of a robust and functional woodworking surface. The choice of materials directly influences the workbench’s stability, durability, resistance to wear, and overall lifespan. Thoughtful material selection is thus paramount to the successful completion of this construction project.
- Work Surface Composition
The work surface, or table top, bears the brunt of woodworking activities. Hardwoods, such as maple, beech, or birch, are commonly favored due to their density and resistance to denting and scratching. Alternatively, softwood species like Douglas fir may be laminated to achieve a cost-effective, thick work surface. The work surface material dictates the ability of the structure to withstand the rigors of daily use. For instance, a softwood top might quickly develop indentations from clamping forces, while a hardwood surface will maintain its integrity over a longer period.
- Frame and Leg Construction
The frame and legs provide the structural support for the workbench. While hardwoods offer superior strength, softwoods like pine or fir are often utilized for these components due to their lower cost and ease of workability. When employing softwoods, careful attention must be paid to joint design and reinforcement to ensure adequate stability. Example: Using pine for the frame necessitates incorporating robust joinery techniques and ample bracing to prevent racking.
- Fastener Selection
The selection of fasteners, including screws, bolts, and nails, is integral to the strength and longevity of the connections within the workbench. High-quality screws and bolts should be used in critical joints to ensure a secure and lasting bond. For example, using drywall screws instead of wood screws can lead to premature failure of the joints, jeopardizing the integrity of the table.
- Finishing Materials
The application of a suitable finish protects the woodworking surface from moisture, stains, and wear. Oil-based finishes, varnishes, and polyurethane coatings are commonly used to seal the wood and provide a durable, easy-to-clean surface. Example: Applying several coats of polyurethane to the top helps prevent water damage and facilitates the easy removal of glue and other woodworking residues.
The judicious selection of materials, considering both performance characteristics and cost considerations, is crucial for the creation of a functional and enduring woodworking platform. The long-term usability and effectiveness of the table hinge on these initial choices.
3. Joint Strength
Joint strength is a paramount consideration in constructing a woodworking table, as it directly determines the structure’s load-bearing capacity, stability, and long-term durability. Inadequate joint strength compromises the integrity of the entire platform, rendering it unsuitable for demanding woodworking operations.
- Mortise and Tenon Joints
Mortise and tenon joints are a traditional and highly effective method for joining wooden components. The tenon, a projecting element, fits precisely into the mortise, a corresponding recess. This interlocking connection provides substantial resistance to shear and tensile forces. An example is the connection between the legs and the apron of a woodworking table. Failure to execute this joint correctly results in a weak point prone to failure under stress, rendering the table unstable.
- Dovetail Joints
Dovetail joints, known for their interlocking, fan-shaped tenons, offer exceptional strength in resisting tensile forces. They are commonly employed in drawer construction but can also be utilized in joining aprons to the tabletop for added strength and aesthetic appeal. A properly executed dovetail joint distributes stress effectively, preventing separation. A poorly cut dovetail compromises this strength, leading to potential joint failure.
- Screw Joints with Reinforcement
While simpler to execute than traditional joinery, screw joints can provide adequate strength when properly reinforced. This involves using high-quality screws of appropriate length and diameter, coupled with techniques such as gluing and the use of dowels or biscuits to increase surface area and mechanical interlocking. For example, securing the tabletop to the apron solely with screws may result in a weak connection, whereas adding glue and dowels significantly enhances its load-bearing capacity.
- Glue Selection and Application
The type of glue and its application technique are critical factors in joint strength. Wood glue, specifically formulated for woodworking applications, provides a strong and durable bond. Proper surface preparation, including cleaning and clamping, is essential for maximizing glue adhesion. Insufficient glue application or improper clamping pressure results in a weak bond, compromising the overall strength of the joint.
The integrity of a woodworking table hinges on the effective implementation of strong and appropriate jointing techniques. Failure to prioritize joint strength results in a structure prone to failure under load, ultimately diminishing its utility and lifespan. Therefore, meticulous attention to joint design, execution, and material selection is crucial for a robust and reliable woodworking platform.
4. Surface Flatness
Surface flatness is a critical attribute of any functional woodworking table. Deviation from a perfectly level plane introduces inaccuracies into woodworking tasks. These inaccuracies propagate through a project, leading to misaligned joinery, uneven surfaces on finished pieces, and dimensional errors. For example, attempting to plane a board flat on a non-planar table results in a board that conforms to the imperfections of the table rather than achieving true flatness. The causal relationship is clear: a non-flat surface inevitably leads to imprecise work.
Achieving and maintaining surface flatness on a woodworking table requires meticulous attention to detail during construction. This includes selecting dimensionally stable materials, employing robust joinery techniques to minimize warping, and utilizing precision measuring tools to ensure the top is as level as possible. Furthermore, ongoing maintenance is necessary, as wood is susceptible to changes in humidity and temperature, which can induce warping or cupping. An example of practical application is the use of a long straightedge and feeler gauges to identify and correct any deviations from flatness with a hand plane or specialized leveling tools. Surface flatness is not merely an aesthetic concern; it is a functional necessity.
In summary, surface flatness is an indispensable component of a well-constructed woodworking table. Its absence introduces errors that compromise the accuracy and quality of woodworking projects. While achieving perfect flatness presents challenges due to the inherent nature of wood, diligent construction practices and ongoing maintenance are essential. The consequences of neglecting surface flatness extend beyond mere inconvenience; they directly impact the precision and success of any woodworking endeavor conducted on the table.
5. Vise Integration
The integration of a vise is a fundamental consideration in the design and construction of a functional woodworking table. The vise provides a secure clamping mechanism essential for a multitude of woodworking operations, enhancing precision and efficiency. The absence of a properly integrated vise significantly limits the table’s utility.
- Vise Selection Based on Application
The type of vise chosen directly impacts the table’s suitability for specific woodworking tasks. Face vises, leg vises, and shoulder vises each offer unique clamping capabilities. A face vise is versatile for general workholding, while a leg vise excels at clamping long boards. A shoulder vise offers vertical clamping. Selecting an inappropriate vise diminishes the table’s overall functionality. An example is choosing a small face vise when the anticipated workload involves primarily edge-jointing wide boards.
- Mounting Stability and Rigidity
The method by which the vise is attached to the woodworking table is crucial for maintaining clamping force and preventing movement during use. A poorly mounted vise compromises the stability of the workpiece, leading to inaccurate cuts and potentially dangerous situations. Through bolts, heavy-duty screws, and reinforced mounting plates are necessary to ensure a secure connection. The structure around the vise may also need additional support. For instance, a vise mounted to a thin tabletop without reinforcement will likely flex under pressure, reducing its effectiveness.
- Vise Placement and Accessibility
The location of the vise on the woodworking table influences its accessibility and ease of use. A vise positioned too far from the user or in an awkward location diminishes its practical value. Ergonomic considerations dictate that the vise should be easily accessible from the primary working area. For example, placing a vise on the far corner of a large workbench may require excessive reaching, hindering efficient workflow. The location must also consider the placement of dog holes and other table features for maximum clamping versatility.
- Material Compatibility
The materials used in the vise’s construction should be compatible with the woodworking environment. Cast iron vises are common due to their durability and clamping force, but wooden vises offer a traditional aesthetic and can be easier to repair. The jaws of the vise should be faced with a material that protects the workpiece from damage, such as leather or cork. Using a vise with hard metal jaws directly on delicate wood can leave unsightly marks and dents.
In summary, vise integration is an integral aspect of constructing a practical woodworking table. The selection, mounting, placement, and material compatibility of the vise directly impact the table’s utility and the precision of woodworking tasks. A well-integrated vise transforms a simple table into a versatile and indispensable woodworking tool. Neglecting these factors leads to a less efficient and potentially hazardous workspace.
6. Dog Hole Placement
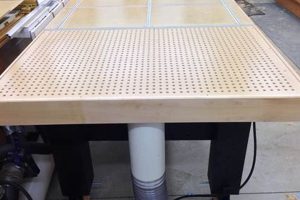
Dog hole placement represents a critical design element in the construction of a woodworking table, directly influencing its versatility and workholding capabilities. These precisely drilled holes, typically arranged in a grid pattern across the table surface, facilitate the use of bench dogs, clamps, and other workholding accessories. The strategic positioning of dog holes enables the secure clamping of workpieces of various shapes and sizes, promoting precision and efficiency during woodworking operations. For example, the ability to use bench dogs to prevent a long board from slipping while edge-jointing exemplifies the direct cause-and-effect relationship between thoughtful dog hole placement and improved woodworking outcomes. Failure to consider optimal dog hole placement during table construction results in a diminished capacity for secure and versatile workholding, thereby reducing the overall utility of the finished table.
The practical application of well-planned dog hole placement extends to numerous woodworking scenarios. Complex joinery tasks, such as dovetailing and mortise-and-tenon construction, often require intricate clamping setups. Properly positioned dog holes provide anchoring points for specialized clamps and jigs, ensuring accurate alignment and secure workpiece retention. Moreover, dog holes can be used in conjunction with a vise to accommodate oversized or irregularly shaped objects that cannot be directly clamped in the vise jaws. The standardized spacing of dog holes allows for the use of commercially available bench accessories, further expanding the table’s functional capabilities. In essence, dog hole placement transforms a basic woodworking surface into a highly adaptable work station.
In conclusion, dog hole placement is an integral component of woodworking table design, directly impacting its workholding capabilities and overall utility. The strategic positioning of these holes facilitates secure clamping and the use of specialized jigs, enabling a wide range of woodworking operations. While the specific arrangement of dog holes may vary depending on individual needs and preferences, the underlying principle remains constant: thoughtful dog hole placement enhances the precision, efficiency, and versatility of the woodworking table. Challenges in achieving optimal placement involve balancing the density of holes with the structural integrity of the tabletop and ensuring accurate drilling to maintain consistent spacing and alignment. Ultimately, a well-executed dog hole system is a hallmark of a high-quality woodworking table.
7. Base Stability
Base stability is a foundational element in constructing a woodworking table. The integrity of the entire structure hinges on a stable base, influencing precision, safety, and overall usability. An unstable base compromises the effectiveness of all woodworking operations performed on the table.
- Leg Construction and Material
The materials used for the legs and the method of their construction directly impact stability. Hardwoods, such as maple or oak, provide greater rigidity compared to softwoods. Robust joinery techniques, such as mortise-and-tenon or dovetail joints, further enhance leg stability. A table constructed with flimsy legs and weak joints is prone to wobbling, hindering accurate work. In contrast, a table with sturdy legs and solid joinery provides a stable platform for planing, sawing, and other demanding tasks.
- Bracing and Support Structures
The incorporation of bracing elements, such as stretchers or aprons, adds significant stability to the base. These elements connect the legs, preventing racking and distributing weight more evenly. Diagonal bracing provides further resistance to lateral forces. A table lacking adequate bracing is susceptible to movement, particularly when subjected to uneven loads. Properly designed bracing transforms a wobbly structure into a solid and reliable workstation.
- Foot Design and Floor Contact
The design of the feet and their interaction with the floor surface contribute to overall stability. Wide feet provide a larger contact area, reducing the likelihood of sinking into soft surfaces. Adjustable feet allow for leveling the table on uneven floors. A table with inadequate feet or poor floor contact is prone to instability, making precise work difficult. Properly designed feet ensure a solid and level foundation, regardless of the floor conditions.
- Weight Distribution and Load Capacity
Even weight distribution across the base is crucial for preventing tipping or sagging. The placement of heavy items on the tabletop should be considered in relation to the base’s support structure. Reinforcements may be necessary to accommodate heavy loads. A table with uneven weight distribution is at risk of collapse, particularly when subjected to concentrated pressure. A well-designed base distributes weight evenly, providing a safe and stable work surface.
These facets collectively underscore the critical role of base stability in building a functional and safe woodworking table. Ignoring these considerations results in a compromised work surface, diminishing precision, increasing the risk of accidents, and ultimately hindering woodworking endeavors. A stable base is an investment in quality and long-term productivity.
Frequently Asked Questions Regarding Woodworking Table Construction
This section addresses common inquiries concerning the design, construction, and utilization of woodworking tables. The answers provided aim to clarify key aspects and mitigate potential issues.
Question 1: What constitutes the ideal dimensions for a woodworking table?
The optimal dimensions are dictated by the user’s height and intended use. A table height approximately aligning with the user’s wrist when standing is generally recommended. Table length and width depend on the size of typical projects. A larger surface accommodates larger workpieces, while a smaller surface conserves space.
Question 2: Which wood species are most suitable for the table top?
Hardwoods such as maple, beech, and birch offer superior durability and resistance to wear. Softwoods like fir or pine may be used but require a thicker construction to achieve comparable rigidity. Lamination techniques can also enhance the stability of softwood tops.
Question 3: How can one ensure the table surface is perfectly flat?
Surface flatness is achieved through careful milling of the table top components, precise assembly, and the use of a long jointer plane to remove any imperfections. Regular checks with a straightedge are recommended to maintain flatness over time.
Question 4: What are the benefits of incorporating dog holes into the design?
Dog holes provide versatile clamping options, allowing for the secure fixation of workpieces using bench dogs, clamps, and other accessories. Strategically positioned dog holes facilitate a wide range of woodworking tasks.
Question 5: How important is the stability of the table base?
Base stability is paramount. A wobbly or unstable base compromises precision and safety. Robust leg construction, strong joinery, and the incorporation of bracing elements are essential for ensuring a stable and reliable work surface.
Question 6: What type of finish is recommended for a woodworking table?
A durable finish protects the wood from moisture, stains, and wear. Oil-based finishes, varnishes, and polyurethane coatings are commonly used. The choice of finish depends on the desired level of protection and aesthetic preference.
In summary, careful planning, material selection, and attention to detail are critical for creating a functional and durable woodworking table. Prioritizing stability, flatness, and versatile workholding options enhances the table’s utility and contributes to successful woodworking outcomes.
The subsequent section explores advanced customization options for optimizing the woodworking table to meet specific needs.
Conclusion
The foregoing exploration of building a woodworking table underscores the multifaceted nature of this undertaking. Critical consideration must be given to dimensional planning, material selection, joint strength, surface flatness, vise integration, dog hole placement, and base stability. Each of these elements directly influences the functionality, durability, and overall effectiveness of the resulting structure.
Mastery of these principles facilitates the creation of a workspace conducive to precision and efficiency. Careful application of the information presented herein enables the construction of a robust and reliable woodworking table, thereby enhancing the quality and longevity of woodworking projects. The cultivation of skill and attention to detail remains paramount in achieving optimal outcomes.


![Perfect Woodworking Table Top with Holes [DIY Plans] Step-by-Step Guides, Tools & Inspiration to Build Beautiful Wooden Decor on a Budget Perfect Woodworking Table Top with Holes [DIY Plans] | Step-by-Step Guides, Tools & Inspiration to Build Beautiful Wooden Decor on a Budget](https://woodfromhome.com/wp-content/uploads/2026/02/th-351-300x200.jpg)
