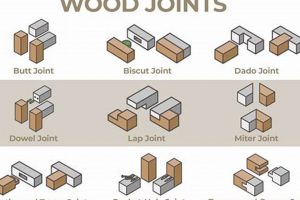
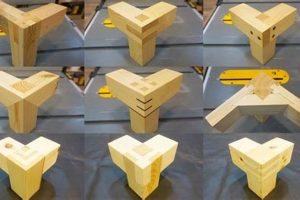
A method for joining two pieces of material lengthwise, angling the ends and overlapping them to create a continuous surface, is fundamental to extending stock beyond available lengths. For instance, creating a long structural beam from shorter lumber pieces utilizes this technique to maintain strength and appearance.
Employing this joint offers several advantages over simple butt joints, primarily by increasing the gluing surface area and distributing stress more evenly. This results in a stronger, more durable connection. Historically, this approach has been vital in shipbuilding, furniture making, and construction, allowing for the creation of large, stable structures from smaller components.
Further discussion will delve into specific applications, optimal angle selection, appropriate adhesives, and clamping techniques to ensure a successful and long-lasting bond. Subsequent sections will address variations of the technique and their suitability for different project requirements.
Essential Guidance
Achieving a robust and aesthetically pleasing connection demands careful consideration and precise execution. The following guidance addresses key aspects to maximize the effectiveness of this technique.
Tip 1: Angle Selection: The scarf angle significantly impacts joint strength. A shallower angle (e.g., 1:8) yields a larger gluing surface and increased mechanical strength but requires more material. Balance strength requirements with material conservation.
Tip 2: Surface Preparation: Mating surfaces must be perfectly flat and clean. Mill the angles precisely, ensuring they are free of saw marks or imperfections. A smooth, consistent surface promotes optimal adhesive bonding.
Tip 3: Adhesive Selection: Choose an adhesive appropriate for the material and application. Epoxy resins offer superior strength and gap-filling capabilities, while PVA glues are suitable for tighter-fitting joints in interior applications. Follow the manufacturer’s instructions for mixing and application meticulously.
Tip 4: Clamping Pressure: Apply consistent and even clamping pressure across the entire joint during the curing process. Excessive pressure can squeeze out all the adhesive, resulting in a weak bond. Distribute clamping force with cauls to prevent indentation and ensure uniform contact.
Tip 5: Alignment: Maintain accurate alignment during clamping. Misalignment compromises structural integrity and detracts from the finished appearance. Employ jigs or fixtures to ensure proper registration and prevent slippage.
Tip 6: Moisture Content: Ensure the moisture content of the wood pieces is similar before joining. Disparate moisture levels can lead to warping, cracking, or joint failure as the wood equilibrates.
Tip 7: Grain Direction: Orient the grain direction of the mating pieces for optimal strength and aesthetics. Aligning the grain patterns can minimize visible seams and enhance the overall appearance of the finished piece.
Proper execution is paramount. Careful angle selection, surface preparation, adhesive selection, clamping, alignment, and moisture content management are all essential for a durable and visually appealing result. Neglecting these factors can compromise the integrity of the joint and the longevity of the project.
The subsequent sections will examine specific applications and advanced techniques to enhance the understanding and practical application of this valuable woodworking skill.
1. Angle Precision
Angle precision is paramount in achieving a structurally sound and visually appealing scarf joint. The accuracy of the cut angles directly influences the glue surface area, the distribution of stress, and the overall integrity of the resulting joint.
- Maximized Glue Surface Area
Precise angles ensure maximum contact between the mating surfaces. Inaccurate angles reduce the glue surface, weakening the joint. A consistent angle across both pieces is necessary for uniform adhesion.
- Even Stress Distribution
Accurate angles contribute to even stress distribution throughout the joint. Irregular angles create stress concentrations, making the joint prone to failure under load. Consistent angles ensure that the load is distributed evenly, improving its lifespan.
- Seamless Aesthetic Integration
Precise angles permit seamless integration of the joined pieces, which maintains the original grain appearance along the entire length. Lack of precision causes visible discontinuities in the visual of the combined surface, undermining the woodworking project.
- Minimized Material Waste
When angles are cut precisely, material waste is minimized. Inaccurate angles require additional material to correct, increasing expenses. Accurate angles reduce the chances of mistakes and maximize resources.
In summary, precise angles within this joint correlate directly with its strength, longevity, and aesthetic quality. By prioritizing accuracy in angle preparation, woodworkers can ensure successful and visually pleasing results, thereby increasing the success of the woodworking project.
2. Surface Preparation
Surface preparation is a non-negotiable prerequisite for a successful scarf joint. The integrity of the bond relies directly on the quality of the surfaces being joined. Contaminants, irregularities, or improperly prepared surfaces impede adhesive penetration, significantly reducing the joint’s strength. For instance, if joining two pieces for a long table leg, any residual saw marks or dust on the angled faces will create voids, weakening the glue line and potentially leading to joint failure under load. Conversely, meticulous sanding and cleaning of the surfaces create an optimal bonding environment.
The process of surface preparation involves several critical steps. First, the surfaces must be uniformly flat and free from imperfections. Planing or jointing the wood ensures a perfectly flush fit. Next, sanding removes any remaining mill marks and creates a slightly roughened surface, increasing the mechanical keying of the adhesive. Finally, the surfaces must be thoroughly cleaned to remove dust, oils, or any other contaminants that could interfere with adhesion. A solvent wipe-down immediately before applying adhesive is often recommended. Ignoring these steps may lead to premature joint failure, requiring costly and time-consuming repairs or replacements.
In conclusion, adequate surface preparation is not merely a preliminary step but an integral component of this type of woodworking joint. It is the foundational element upon which the entire joint’s strength and longevity rest. A commitment to proper surface preparation mitigates the risk of failure, ensures optimal adhesive performance, and ultimately, results in a durable and aesthetically pleasing outcome. Therefore, surface preparation warrants meticulous attention, with no shortcuts taken, in order to maximize the effectiveness of the final wood joint.
3. Adhesive Selection
In scarf joint woodworking, adhesive selection transcends simple bonding; it becomes a crucial determinant of the joint’s overall strength and longevity. The chosen adhesive must withstand both internal stresses within the wood and external forces applied to the finished piece. Its properties dictate the joint’s capacity to resist separation and maintain structural integrity.
- Viscosity and Gap Filling
The viscosity of the adhesive influences its ability to penetrate the wood fibers and fill any minor gaps inherent in the joint. A higher viscosity adhesive is beneficial where the joint fit is not perfect, offering gap-filling properties. However, excessive viscosity can hinder complete surface contact, leading to a weaker bond. In contrast, lower viscosity adhesives excel at penetrating tight-fitting joints but offer minimal gap-filling capabilities. Selecting the appropriate viscosity ensures optimal contact and adhesion.
- Open Time and Cure Time
Open time, the duration the adhesive remains workable after application, dictates the time available for assembly and clamping. A longer open time is advantageous for complex joints requiring meticulous alignment. Cure time, the duration required for the adhesive to reach its full strength, influences project timelines and clamping requirements. Rapid-curing adhesives expedite the process but offer limited adjustment time. Matching the open time and cure time to the complexity of the joint is critical.
- Material Compatibility
Adhesive compatibility with the wood species being joined is fundamental. Some wood species, particularly those with high oil content, may inhibit adhesion with certain adhesives. For instance, gluing oily hardwoods, such as teak, often requires surface preparation to remove oils and specialized adhesives designed for such applications. Incompatibility leads to weakened bonds and potential joint failure. Therefore, understanding the specific properties of the wood is imperative.
- Strength and Durability
The ultimate strength and long-term durability of the adhesive are essential considerations. Adhesives vary significantly in their tensile, shear, and compressive strength. Applications subject to high stress or environmental exposure necessitate adhesives with exceptional strength and resistance to moisture, temperature fluctuations, and ultraviolet radiation. Selecting an adhesive with appropriate strength characteristics guarantees the joint’s resilience under intended operating conditions.
Thus, in scarf joint woodworking, selecting the appropriate adhesive is not a mere afterthought but rather a strategic decision that must account for viscosity, working times, material compatibility, and desired strength. Only through careful consideration of these factors can woodworkers ensure a robust and lasting joint, realizing the full potential of this technique.
4. Clamping Pressure
Clamping pressure serves as a critical variable in scarf joint woodworking, directly influencing the integrity and longevity of the bond. Insufficient pressure compromises adhesive contact, fostering weak points susceptible to failure under stress. Conversely, excessive pressure can express excessive adhesive, leading to a glue-starved joint, equally prone to premature degradation. The objective is to achieve uniform distribution of moderate clamping force across the entire angled surface, ensuring optimal adhesive transfer and maximizing the bonding area. Real-world examples, such as improperly clamped structural beams, reveal the devastating consequences of inadequate clamping. A seemingly sound initial bond can delaminate over time, jeopardizing structural stability. The practical significance of understanding this dynamic is evident in projects demanding high strength-to-weight ratios, where a well-executed joint is paramount for performance and safety.
Consider the fabrication of a long, curved handrail for a staircase. The scarf joint, employed to extend the length of the material, necessitates controlled clamping to conform to the complex curvature. Applying uneven clamping forces can distort the shape, create internal stresses, and ultimately weaken the joint. Alternatively, incorporating custom-shaped cauls, specifically designed to distribute pressure evenly across the curved surface, mitigates these risks. Furthermore, adhesive choice interacts with clamping pressure; certain adhesives, particularly those with higher viscosities, may require increased pressure to achieve adequate spread, whereas low-viscosity adhesives may be vulnerable to excessive squeeze-out. The combination of appropriate adhesive and controlled clamping ensures optimal bond line thickness and maximizes joint strength.
In conclusion, the relationship between clamping pressure and scarf joint woodworking demands meticulous attention. The challenge lies in balancing sufficient force for proper adhesive transfer with the avoidance of starvation or distortion. While advanced techniques and specialized tools can aid in achieving optimal clamping, the underlying principle remains constant: consistent and controlled pressure is essential for creating durable and reliable scarf joints. Ignoring this aspect compromises structural integrity and diminishes the potential benefits of this valuable woodworking technique.
5. Grain Alignment
Grain alignment represents a critical factor in scarf joint woodworking, significantly impacting the joint’s structural integrity and aesthetic outcome. Misalignment of grain direction across the joint creates inherent weaknesses. When stress is applied, the wood is more likely to split or separate along the grain lines, especially if they diverge significantly at the joint. This is because wood is generally stronger along the grain than perpendicular to it. Conversely, aligning the grain patterns creates a more homogenous structure, allowing for more even distribution of stress and enhancing the joint’s overall resistance to breakage.
The practical significance of grain alignment is evident in applications where the joint is subjected to substantial loads or environmental stresses. For example, consider a long wooden mast constructed from multiple sections joined with scarf joints. If the grain is misaligned in one or more of these joints, the mast is more likely to fail under wind load. Aligning the grain minimizes stress concentrations and ensures that the wood fibers act in unison to resist bending and twisting. Moreover, proper grain alignment also contributes to the aesthetic appeal of the finished piece. When the grain patterns flow seamlessly across the joint, the seam becomes less noticeable, creating a more visually pleasing and professional-looking result.
In conclusion, grain alignment in scarf joint woodworking is not merely a cosmetic consideration but a structural imperative. Achieving optimal grain alignment requires careful planning, precise cutting, and meticulous attention to detail during assembly. While challenges may arise in matching grain patterns perfectly, the benefits of prioritizing grain alignment improved strength, durability, and aesthetics far outweigh the effort required. Understanding this connection is essential for any woodworker seeking to create robust and visually appealing scarf joints.
Frequently Asked Questions About Scarf Joint Woodworking
This section addresses common questions regarding techniques, applications, and considerations related to creating this joint.
Question 1: What scarf angle is recommended for optimal strength?
The appropriate scarf angle is contingent upon the specific application and materials involved. A shallower angle (e.g., 1:8) offers a greater gluing surface area, enhancing joint strength. However, a steeper angle (e.g., 1:5) may be suitable where material conservation is paramount. Consulting engineering guidelines is prudent for structural applications.
Question 2: Which adhesive type is most suitable?
Adhesive selection must consider wood species, environmental conditions, and anticipated stress levels. Epoxy resins generally provide superior strength and water resistance, rendering them appropriate for exterior applications. Polyvinyl acetate (PVA) glues are often suitable for interior projects where moisture exposure is minimal.
Question 3: How does one ensure proper alignment during clamping?
Maintaining accurate alignment is critical to preventing joint failure and achieving desired aesthetics. Jigs, fixtures, and clamping cauls may be employed to maintain registration during the curing process. Regular monitoring and adjustment are essential to counteract slippage.
Question 4: What steps are necessary to prepare the surfaces?
Surface preparation is vital for maximizing adhesion. Surfaces must be flat, clean, and free from contaminants. Planing or jointing ensures flatness, while sanding creates a textured surface for enhanced mechanical bonding. A solvent wipe-down immediately prior to adhesive application removes residual oils and dust.
Question 5: How much clamping pressure is appropriate?
Clamping pressure should be sufficient to ensure uniform contact between the mating surfaces without squeezing out excessive adhesive. Testing the selected adhesive and materials before assembly is prudent to determine appropriate compression. Cauls are used to distribute pressure evenly.
Question 6: Is grain alignment important?
Grain alignment significantly impacts joint strength and aesthetic appearance. Matching the grain patterns minimizes stress concentrations and creates a more visually cohesive seam. Divergent grain patterns weaken the joint and detract from the overall appearance.
Mastering the nuances of scarf joint woodworking enhances the craftsman’s capabilities, enabling the creation of enduring, visually refined woodworking projects.
Further exploration into advanced techniques will deepen the understanding of scarf joint methodology.
Conclusion
This article has detailed fundamental aspects, applications, and considerations pertaining to scarf joint woodworking. Topics explored include angle precision, surface preparation, adhesive selection, clamping pressure, and grain alignment. Each factor contributes uniquely to the strength, durability, and aesthetic quality of the final product.
The effective execution of scarf joint woodworking is not merely a technical skill, but a critical component in producing stable, visually appealing wood structures. Continued refinement of these techniques will ensure enduring performance of any woodworking project. Therefore, adherence to rigorous standards remains paramount in every application.


