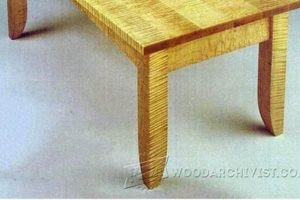
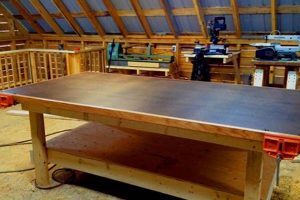
The creation of a robust, functional surface for shaping wood represents a fundamental endeavor in the craft. This construction typically involves joining a flat work area to a supporting structure, resulting in a stable platform optimized for tasks such as sawing, planing, and assembly. An example would be a solid maple top affixed to a base constructed of mortise-and-tenon joinery, designed to withstand significant force and provide a reliable reference surface.
A well-executed construction of this kind provides numerous advantages. It offers a dedicated space, improving efficiency and organization within a workshop. Moreover, the stability and precision it affords contribute directly to the quality of the final product. Historically, these structures have evolved alongside woodworking techniques, reflecting changes in available materials and construction methods, and underscoring their enduring significance to the discipline.
The subsequent discussion will delve into specific aspects of design, material selection, joinery techniques, and finishing processes essential for achieving a professional and durable result. The aim is to provide clear guidance for both novice and experienced woodworkers seeking to enhance their capabilities and expand their workshop resources.
Essential Considerations for Fabrication
Achieving a high-quality result requires careful planning and execution across multiple phases. The following points offer key insights to optimize the process and ensure a stable, functional, and enduring construction.
Tip 1: Material Selection: Prioritize dense hardwoods such as maple or beech for the work surface. These species offer superior resistance to wear and deformation compared to softwoods. For the base, consider cost-effective yet sturdy options like construction-grade lumber, ensuring proper drying to minimize movement.
Tip 2: Joinery Precision: Employ robust joinery techniques like mortise-and-tenon or dovetail joints for the base. Precise execution is critical for structural integrity and long-term stability. Test fits and dry assemblies are essential before final glue-up.
Tip 3: Flattening the Work Surface: Absolute flatness of the work surface is paramount. After assembly, use hand planes or a flattening jig with a router to achieve the desired level of precision. Employ winding sticks and a straightedge to assess progress and identify inconsistencies.
Tip 4: Incorporate a Vise: Integration of a high-quality vise significantly enhances functionality. A face vise and a tail vise provide versatile clamping options for various woodworking tasks. Ensure the vise is securely mounted and flush with the work surface.
Tip 5: Add Dog Holes: Strategic placement of dog holes allows for secure workpiece positioning using bench dogs and clamps. Standardize hole spacing to accommodate commonly available accessories. Consider both round and square dog holes for increased versatility.
Tip 6: Consider Storage Solutions: Incorporate drawers or shelves into the base to optimize workshop organization. Strategically placed storage compartments reduce clutter and improve workflow efficiency.
Tip 7: Apply a Durable Finish: Protect the work surface with a durable finish that resists moisture and abrasion. Boiled linseed oil or a specialized workbench finish provides adequate protection without compromising the work surfaces tactile qualities. Reapply the finish periodically to maintain its protective properties.
Adhering to these principles promotes both efficiency and longevity. A well-executed project enhances the woodworking experience and contributes to the creation of high-quality finished goods.
The next section will discuss advanced techniques and customization options to further refine the process.
1. Design and dimensions
The initial design phase dictates the functional parameters and physical attributes of a woodworking surface. Careful consideration of dimensions is crucial, as it directly impacts usability, material requirements, and overall stability of the structure.
- Working Surface Area
The size of the work surface determines the range of projects that can be accommodated. A larger surface allows for handling larger components and complex assemblies. Conversely, a smaller surface may be preferable for smaller workshops or specialized tasks. Dimensions must be balanced against available space and the intended scope of work.
- Table Height
Ergonomics dictates the optimal table height. A height that is too low can induce back strain, while a height that is too high can compromise control and precision. The appropriate height depends on the user’s stature and typical working posture. A height adjustable is an alternative for shared workspace.
- Base Dimensions and Stability
The dimensions of the base directly influence the stability of the entire structure. A wider base provides greater resistance to tipping and racking. The base must be designed to support the weight of the work surface and any tools or materials placed upon it. Inadequate base dimensions can compromise safety and precision.
- Material Thickness and Span
The thickness of the work surface material must be sufficient to resist deflection under load. The span between support members in the base must be minimized to prevent sagging. Material thickness and span are interdependent; a thinner material requires closer support spacing, while a thicker material can span greater distances.
The interplay between design and dimensions is fundamental to the successful fabrication of a woodworking surface. Careful planning, accounting for ergonomic factors, structural integrity, and the intended scope of work, is essential for a functional and durable result. Neglecting these initial considerations can lead to a workspace that is inefficient, unsafe, or structurally unsound.
2. Material selection
Material selection is a paramount consideration in the construction process, directly influencing its durability, stability, and functionality. The choice of materials significantly impacts the finished product’s resistance to wear, its ability to maintain a flat surface, and its overall suitability for various woodworking tasks.
- Hardwood Species
Dense hardwoods like maple, beech, and birch are commonly selected for work surfaces due to their resistance to denting and abrasion. These species provide a stable, durable platform for hand planing, sawing, and assembly. Conversely, softer woods such as pine or fir are generally less suitable for work surfaces due to their susceptibility to damage and deformation under load. A hardwood surface ensures longevity and precision in woodworking activities.
- Softwood Alternatives and Structural Components
While hardwoods are ideal for the work surface, softwoods can be effectively used for the base and supporting structure. Cost-effective options like construction-grade lumber can provide sufficient strength and stability for the base. The key is to ensure proper drying and seasoning of the softwood to minimize warping or movement after assembly. A well-constructed softwood base provides a stable foundation without the increased cost associated with using hardwoods throughout the entire project.
- Plywood and Engineered Wood Products
High-quality plywood, particularly Baltic birch plywood, can be used for certain components, such as drawer boxes or shelving within the base. Plywood offers dimensional stability and resistance to warping, making it a suitable alternative to solid wood in specific applications. However, plywood is generally not recommended for the work surface itself, as it lacks the density and durability of solid hardwood.
- Fasteners and Adhesives
The selection of appropriate fasteners and adhesives is critical for ensuring the structural integrity of the completed . Screws, bolts, and high-quality wood glue should be chosen based on the specific joints being constructed and the anticipated loads. The use of incorrect or substandard fasteners can compromise the strength and stability of the . Careful consideration of these elements is essential for long-term reliability.
The diverse array of material options necessitates a thorough understanding of their respective properties and limitations. The optimal choice of materials for any depends on a careful evaluation of budget constraints, desired durability, and the specific tasks for which the is intended. Thoughtful selection of materials is the cornerstone of a successful and enduring .
3. Joinery methods
The selection and execution of joinery methods are critical determinants of structural integrity and longevity in construction. The joints that connect individual components must withstand substantial stress and maintain dimensional stability over time. Therefore, the careful consideration of joinery techniques is paramount to achieving a stable and functional work surface.
- Mortise and Tenon Joints
Mortise and tenon joints, characterized by a projecting tenon fitting snugly into a mortise, are frequently employed in base construction. This joint offers exceptional strength and resistance to racking forces, particularly when reinforced with pegs or wedges. Examples include connecting table legs to aprons or stretchers, providing a robust framework capable of supporting significant weight and resisting deformation. The proper execution of mortise and tenon joints is crucial for preventing wobble and ensuring the longevity of the structure.
- Dovetail Joints
Dovetail joints, recognized for their interlocking design, are commonly used in constructing drawers and connecting aprons. These joints provide exceptional resistance to pulling forces, making them ideal for applications where components are subjected to repeated stress. A properly executed dovetail joint requires precise cutting and fitting to ensure a strong, gap-free connection. Their utilization in drawers and aprons contributes to overall structural stability and prevents separation under load.
- Lap Joints
Lap joints, formed by overlapping two pieces of wood and securing them with adhesive and fasteners, are suitable for joining stretchers or creating a flush surface. While not as strong as mortise and tenon or dovetail joints, lap joints offer simplicity and ease of construction. They are frequently employed in situations where strength requirements are moderate and ease of assembly is prioritized. Examples include connecting stretchers between table legs or creating a seamless transition between adjacent boards in the work surface.
- Dado Joints
Dado joints, characterized by a channel cut into one piece of wood to receive another, are used for attaching shelves or dividers within the base structure. These joints provide a secure and stable connection, preventing shelves from sagging or shifting under load. Dado joints can be cut using a router or a table saw with a dado blade, requiring precise measurements and accurate execution. Their application in shelving and dividers contributes to organization and structural reinforcement.
The selection of appropriate joinery methods depends on several factors, including the specific components being joined, the anticipated loads, and the skill level of the woodworker. The successful integration of these techniques is essential for constructing a stable, durable, and functional that will provide years of reliable service. The precision and care with which these joints are executed directly correlate to the quality and longevity of the finished piece.
4. Surface Flatness
Surface flatness constitutes a critical attribute of a functional woodworking table. The degree to which the work surface deviates from a true plane directly impacts the accuracy and efficiency of woodworking operations. A non-planar surface introduces inaccuracies in layout, joinery, and assembly, ultimately compromising the quality of the finished product.
- Accuracy of Reference Plane
The work surface serves as a primary reference plane for measuring, marking, and establishing consistent dimensions. Deviations from flatness introduce cumulative errors, particularly when working with larger pieces or complex joinery. For example, if the surface exhibits a slight bow, measurements taken across its length will be skewed, leading to misaligned components and compromised structural integrity. Maintaining a consistent reference plane is essential for precision woodworking.
- Stability During Machining
A flat surface provides stable support for workpieces during machining operations, such as planing, routing, and sanding. Uneven surfaces can cause workpieces to rock or shift, resulting in inconsistent depths of cut and uneven finishes. For instance, attempting to hand plane a board on an uneven surface will lead to gouging and uneven material removal. A stable, flat surface is necessary for achieving consistent and predictable results.
- Efficient Assembly and Glue-Up
Flat surfaces facilitate accurate alignment and clamping during assembly and glue-up. Gaps or inconsistencies caused by an uneven surface can compromise the strength and appearance of joints. When assembling a frame, for example, an uneven surface may prevent tight joints, resulting in weak connections and visible gaps. A flat surface ensures uniform pressure distribution during clamping, promoting strong and seamless joints.
- Ease of Tool Calibration
A flat surface simplifies the calibration and setup of woodworking tools, such as squares, levels, and marking gauges. A reliable reference plane allows for accurate alignment and adjustment of tools, ensuring consistent and precise results. If the surface is uneven, tool calibration becomes unreliable, leading to inaccurate measurements and compromised work. Accurate tool calibration, facilitated by a flat surface, is essential for achieving precision in woodworking operations.
The correlation between surface flatness and the overall utility of a woodworking table is undeniable. Deviation from a true plane introduces inaccuracies that propagate throughout the woodworking process, impacting precision, efficiency, and the quality of finished projects. Achieving and maintaining a flat surface is therefore a fundamental aspect of constructing a functional and reliable woodworking table.
5. Vise integration
The incorporation of a vise is a critical enhancement to a woodworking table, transforming it from a simple surface into a versatile workstation. The vise functions as a clamping mechanism, securely holding workpieces in place during a range of woodworking operations, from sawing and planing to joinery and assembly. Without a vise, securing material often relies on makeshift clamping arrangements, which can be unstable, inefficient, and potentially dangerous. Vise integration elevates the table’s utility, enabling greater precision, control, and safety. A practical example illustrates this point: attempting to hand-plane the edge of a long board without a vise requires significant physical effort to restrain the workpiece, potentially leading to inconsistent results and increased risk of injury. A well-mounted vise eliminates this instability, allowing the woodworker to focus solely on the planing process.
The benefits extend beyond basic clamping. Different types of vises face vises, tail vises, and leg vises offer specialized clamping capabilities. A face vise, typically mounted on the front apron, provides versatile clamping for a wide range of workpiece shapes and sizes. A tail vise, integrated into the end of the table, allows for long stock to be clamped using bench dogs, creating a secure and stable platform for operations like dovetailing. The choice of vise and its precise integration directly impact the range of tasks the table can effectively accommodate. Furthermore, the quality of the vise itself is a significant factor. A robust vise with smooth operation and minimal racking ensures consistent clamping pressure and reduces the likelihood of workpiece slippage. Examples of poor vise integration include vises that are loosely mounted, exhibit excessive play, or provide insufficient clamping force, all of which undermine the table’s functionality.
In summary, vise integration is not merely an optional addition but an essential component of a fully functional woodworking table. It provides stability, control, and safety, enabling a wider range of woodworking operations to be performed with greater precision and efficiency. Challenges in vise integration typically involve selecting the appropriate vise type, ensuring proper mounting, and maintaining the vise’s smooth operation. Overcoming these challenges results in a significant enhancement to the woodworking experience and the quality of finished projects, underscoring its importance to the broader theme of efficient and precise woodworking.
6. Finishing process
The finishing process represents the final stage in the fabrication of a woodworking table, serving to protect the material, enhance its aesthetic properties, and contribute to its long-term durability. Careful selection and application of finishes are integral to preserving the integrity of the wood and optimizing the functionality of the table.
- Protection Against Environmental Factors
Finishes act as a barrier against moisture, UV radiation, and physical abrasion. Moisture absorption can lead to warping, swelling, and eventual decay of the wood. UV radiation can cause discoloration and degradation of the wood’s surface. Finishes like varnish, lacquer, and polyurethane create a protective layer that mitigates these effects. For example, a woodworking table exposed to fluctuating humidity levels in a garage benefits significantly from a moisture-resistant finish, preventing distortion and extending its lifespan.
- Enhancement of Aesthetic Qualities
Finishes can accentuate the natural grain and color of the wood, enhancing its visual appeal. Options range from clear finishes that preserve the wood’s natural appearance to tinted stains that add color and depth. Oil-based finishes often impart a warm, rich tone, while water-based finishes tend to maintain a more neutral color. A carefully chosen finish can transform a utilitarian woodworking table into a visually appealing piece of workshop furniture. This contributes to a more pleasant and inspiring work environment.
- Improvement of Surface Durability
The finish layer provides a sacrificial surface that resists scratches, dents, and other forms of physical damage. Harder finishes, such as catalyzed lacquer or epoxy resin, offer superior protection against abrasion and impact. A durable finish ensures that the woodworking table maintains its smooth, flat surface over time, preventing damage that could compromise its accuracy and functionality. This is particularly important for tables used for tasks involving sharp tools or heavy objects.
- Facilitation of Cleaning and Maintenance
A properly applied finish creates a smooth, non-porous surface that is easy to clean and maintain. Spills and debris can be readily wiped away without penetrating the wood. Finishes like polyurethane are resistant to many common solvents and chemicals, making them suitable for use in a workshop environment. A well-finished woodworking table can be quickly cleaned after use, preventing the accumulation of dirt and grime and ensuring its longevity.
In summation, the finishing process is not merely a cosmetic step but a critical phase in the fabrication of a woodworking table, contributing significantly to its protection, aesthetic appeal, durability, and ease of maintenance. The careful selection and application of finishes are essential for maximizing the table’s lifespan and ensuring its continued functionality as a valuable tool in the workshop.
Frequently Asked Questions About Making a Woodworking Table
The following addresses common inquiries regarding the design, construction, and maintenance of woodworking tables. These answers are intended to provide clarity and guidance for those undertaking such a project.
Question 1: What is the ideal material for a woodworking table surface?
Hardwoods, such as maple or beech, are generally considered optimal due to their density and resistance to wear. These species provide a stable, durable platform suitable for various woodworking tasks.
Question 2: How flat does the woodworking table surface need to be?
The surface should be as flat as reasonably achievable. Deviations from flatness introduce inaccuracies in layout, joinery, and assembly. A tolerance of within 1/16″ over a 4-foot span is generally acceptable for most applications.
Question 3: What joinery techniques are most appropriate for a woodworking table base?
Mortise and tenon joints offer exceptional strength and stability, particularly for connecting legs and aprons. Dovetail joints are suitable for drawer construction and situations requiring resistance to pulling forces.
Question 4: How important is it to incorporate a vise into the design?
A vise significantly enhances the functionality of the woodworking table by providing a secure clamping mechanism for workpieces. The type of vise should be selected based on the intended applications and personal preferences.
Question 5: What type of finish should be applied to a woodworking table surface?
A durable finish, such as boiled linseed oil or a specialized workbench finish, provides adequate protection against moisture and abrasion without compromising the surface’s tactile qualities. Regular reapplication is recommended.
Question 6: How can I maintain the flatness of the woodworking table surface over time?
Maintaining consistent humidity levels in the workshop helps to minimize warping or movement. Regular inspection and correction of any surface imperfections, using hand planes or other flattening techniques, is also advisable.
These FAQs provide a foundation for understanding key aspects of the construction and maintenance process. Further investigation into specific techniques and materials is encouraged.
The subsequent section will explore advanced considerations and customization options.
Conclusion
The preceding discussion has explored essential aspects of constructing a woodworking table, encompassing design considerations, material selection, joinery techniques, surface flatness, vise integration, and finishing processes. Each element contributes critically to the functionality, stability, and longevity of the finished product. Successfully integrating these elements necessitates careful planning, precise execution, and a thorough understanding of woodworking principles. Furthermore, the customization options and advanced techniques provide means to refine the construction process.
The knowledge shared aims to empower woodworkers to construct a reliable tool optimized for precision and efficiency. The continued exploration and refinement of these techniques will contribute to the advancement of the craft. The principles of robust construction and attention to detail represent the enduring values within woodworking, ensuring the creation of objects that serve both functional and aesthetic purposes. Further research and experimentation are crucial to achieving optimal woodworking table construction.


