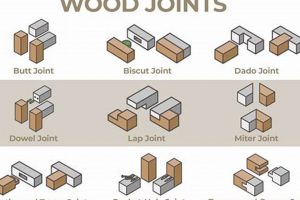
A fundamental technique in woodworking involves uniting two or more boards along their long grain edges to create wider panels. This process allows woodworkers to construct surfaces exceeding the width of commercially available lumber. A common application is in crafting tabletops, cabinet doors, and larger panels for furniture construction.
This method’s significance lies in its capacity to provide stability and create visually appealing surfaces. Historically, it has been essential for projects requiring expansive, solid wood elements. Well-executed connections ensure strength and longevity, preventing warping or separation over time. The result is a seamless appearance that highlights the natural beauty of the wood grain.
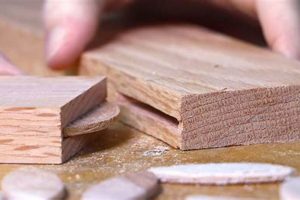
The following sections will explore various methods for achieving these connections, focusing on techniques like glue-ups, biscuit joinery, and the use of specialized woodworking tools. We will also delve into best practices for surface preparation, clamping strategies, and finishing techniques to achieve optimal results.
Essential Considerations for Woodworking Joints
Achieving successful and durable wide panels requires careful attention to several critical factors during the creation of these woodworking joints. Implementing the following tips will contribute significantly to the strength, stability, and aesthetic quality of the final product.
Tip 1: Material Selection and Acclimation: Choose lumber with compatible grain orientation and moisture content. Allow the wood to acclimate to the workshop environment for several days prior to assembly. This minimizes the risk of warping or cracking after the project is completed.
Tip 2: Joint Preparation is Paramount: Ensure that board edges are perfectly straight and square. Employ a jointer or a hand plane to achieve a seamless fit. Gaps in the joint compromise structural integrity and visual appeal.
Tip 3: Glue Selection and Application: Utilize a high-quality wood glue specifically designed for strong bonds. Apply an even layer of glue to both surfaces, ensuring complete coverage. Insufficient glue leads to weak bonds and potential failure.
Tip 4: Clamping Strategy and Pressure: Implement a well-planned clamping strategy to apply uniform pressure along the entire length of the joint. Use enough clamps to prevent slippage or movement during the glue-drying process. Excessive clamping pressure can starve the joint of glue; moderate pressure is ideal.
Tip 5: Addressing Misalignment During Glue-Up: Use caulspieces of wood placed perpendicular to the jointto maintain a flat, even surface during clamping. This minimizes the need for extensive planing or sanding after the glue has cured. Regular checks with a straightedge are advised.
Tip 6: Allowing Adequate Cure Time: Adhere to the glue manufacturer’s recommended cure time before removing clamps or applying stress to the joint. Premature removal can weaken the bond and compromise the long-term durability of the panel.
Tip 7: Subsequent Surface Preparation: After the glue has cured, carefully remove any excess glue and plane or sand the surface to achieve a smooth, consistent finish. Avoid aggressive sanding that can alter the panel’s flatness. Progress through progressively finer grits of sandpaper.
By meticulously attending to these critical considerations, woodworkers can reliably produce high-quality panels that are both structurally sound and aesthetically pleasing. The investment of time and effort in these practices ensures a superior final product.
The subsequent section will address advanced techniques and common pitfalls in edge-to-edge joint construction, furthering our understanding of this essential woodworking skill.
1. Joint preparation
The success of any edge-to-edge joint hinges critically on the quality of joint preparation. This stage directly influences the strength, stability, and visual appeal of the resulting panel. Poorly prepared edges result in inconsistent glue lines, reduced surface area for adhesion, and ultimately, a weaker joint that is prone to failure. The relationship between joint preparation and joint integrity is thus a direct cause-and-effect relationship.
Consider the construction of a large tabletop. If the edges of the individual boards are not perfectly straight and square, gaps will be present along the glue line. These gaps compromise the structural integrity of the tabletop and detract from its visual appeal. In practical terms, improperly prepared joints lead to increased sanding to level the surface, potential for wood splitting, and a reduction in the overall lifespan of the piece. Another example is found in cabinet door construction, where edge joints must be flawless to maintain squareness and prevent racking. Mismatched edges prevent proper door closure and require ongoing maintenance.
In summary, meticulous joint preparation is non-negotiable for achieving high-quality edge-to-edge joints in woodworking. The time and effort invested in this initial step yield significant returns in terms of structural integrity, aesthetic quality, and long-term durability. While modern tools can aid in this process, the underlying principles of straightness, squareness, and surface cleanliness remain paramount. Neglecting these principles undermines the entire project.
2. Glue Selection
The selection of an appropriate adhesive directly influences the structural integrity and longevity of edge-to-edge joints. Different adhesives exhibit varying properties, including open time, clamp time, water resistance, and strength. These properties directly affect the woodworker’s ability to create strong, durable bonds. For example, Polyvinyl Acetate (PVA) glues are commonly employed for general woodworking tasks due to their ease of use and relatively short clamp times. However, they may not be suitable for applications requiring high moisture resistance, such as outdoor furniture. Casein glue, on the other hand, provides superior creep resistance, making it ideal for joints under constant stress. Therefore, an understanding of adhesive characteristics is fundamental for successful woodworking.
Consider the example of constructing a solid wood tabletop using edge-to-edge joints. If a PVA glue with a short open time is selected and the woodworker is joining multiple boards simultaneously, the glue may begin to set before all the clamps can be applied. This results in a weaker bond. In contrast, utilizing a glue with a longer open time or applying the glue in stages would mitigate this risk. Similarly, for outdoor projects where the edge joints are exposed to moisture, using a water-resistant glue such as polyurethane or epoxy is essential. Failure to do so can lead to joint failure and wood rot. Proper glue selection also minimizes the potential for glue line visibility. Darker glues may contrast unfavorably with lighter woods, requiring careful consideration of adhesive color.
In summary, glue selection is not a mere afterthought, but rather an integral component of sound edge-to-edge joint construction. It requires consideration of the specific project requirements, environmental conditions, and the properties of the wood being joined. The informed selection and proper application of an appropriate adhesive will contribute significantly to the strength, durability, and overall quality of the finished piece, thereby justifying the increased time and effort required for research and planning.
3. Clamping Pressure
Clamping pressure represents a crucial element in the successful execution of edge-to-edge joints. Consistent and adequate pressure is essential to ensure proper adhesion and joint integrity, influencing both the short-term stability and long-term durability of joined wood panels.
- Adhesive Distribution and Contact
Clamping pressure facilitates the uniform distribution of adhesive along the joint line. Proper pressure forces the glue into the pores of the wood, establishing a strong mechanical bond. Insufficient pressure leads to starved joints, characterized by a lack of adhesive in certain areas, resulting in weaker bonds and potential failure. Overly excessive pressure, conversely, can squeeze out too much adhesive, also leading to a starved joint. This facet directly affects the joint’s overall strength and resistance to stress.
- Surface Alignment and Flatness
Application of clamping pressure is instrumental in maintaining proper alignment and flatness between the boards being joined. Uneven pressure can induce cupping, bowing, or twisting within the panel. Use of cauls auxiliary pieces of wood distributed along the surface helps ensure a level plane during the clamping process. Deviations from flatness necessitate additional machining to correct, potentially weakening the joint or altering desired dimensions.
- Joint Closure and Gap Minimization
Adequate clamping pressure serves to close any minor gaps that may exist between the joined edges. Perfectly mated edges are ideal, but slight imperfections are common. Clamping pressure forces the boards together, ensuring maximum surface contact and minimizing any potential void spaces. Unaddressed gaps weaken the joint and create opportunities for moisture ingress, accelerating degradation and potential failure.
- Prevention of Joint Creep
Clamping pressure plays a critical role during the curing process of the adhesive. It prevents joint creep, a phenomenon where the wood fibers shift under sustained stress, leading to misalignment. By maintaining a constant compressive force, clamping minimizes the risk of creep, thereby preserving the integrity of the joint throughout the curing phase. This is particularly important when joining wood species with differing expansion and contraction rates.
In summary, clamping pressure is not merely a step in the joint-making process, but an active force shaping the final outcome. Proper execution of this aspect is integral to producing robust, stable, and visually appealing edge-to-edge joints, a cornerstone of many woodworking projects. Careful consideration of pressure distribution, alignment, and adhesive properties is critical to ensure lasting performance.
4. Surface Alignment
Surface alignment is a critical determinant of quality in edge-to-edge joints. Misalignment introduces structural weaknesses and detracts from the aesthetic appeal of the finished product. Ensuring surfaces are coplanar during the joining process directly impacts the uniformity and strength of the glue bond. When adjoining boards exhibit uneven planes, stress concentrations develop, leading to premature failure or warping over time. Without proper alignment, efforts to create a seamless, continuous surface are compromised, resulting in a visually disjointed appearance. Proper edge-to-edge joints depend on effective surface alignment. For example, tabletop construction necessitates meticulous attention to surface planarity; misalignment creates an uneven surface, necessitating excessive sanding or planing that alters the dimensions of the final piece. Alternatively, consider constructing a cabinet door where poor alignment leads to uneven gaps and a compromised aesthetic, along with potential functional issues such as racking or difficulty closing.
Techniques for achieving optimal surface alignment encompass several methods. Employing cauls auxiliary pieces of wood or metal positioned across the joint during clamping distributes pressure evenly and helps maintain a flat plane. Similarly, using a jointer to mill the edges of the boards ensures consistent thickness and straightness, facilitating easier alignment during assembly. Vacuum pressing offers an alternative method, applying uniform pressure across the entire surface and minimizing the risk of misalignment during the glue-up process. Effective techniques for ensuring surface alignment are important components of edge-to-edge joints in woodworking.
In summary, surface alignment is an indispensable aspect of edge-to-edge joinery. Its impact spans structural integrity, aesthetic quality, and functional performance. Challenges associated with achieving and maintaining surface planarity underscore the need for precision in both preparation and execution. Neglecting surface alignment introduces significant risks to the longevity and usability of the resulting woodworking project, while prioritizing it contributes to a professional, lasting outcome. The effective integration of alignment strategies into the edge joining process is crucial for high-quality results.
5. Wood Acclimation
Wood acclimation represents a critical stage in woodworking, directly affecting the stability and longevity of edge-to-edge joints. Failure to properly acclimate wood before joining significantly increases the risk of warping, cracking, and joint failure, undermining the structural integrity and aesthetic appeal of the final product.
- Moisture Content Equilibrium
Wood is hygroscopic, meaning it absorbs and releases moisture from the surrounding environment until it reaches equilibrium. Before joining, wood must acclimate to the relative humidity of the workshop where it will reside. If wood with a higher moisture content is joined, it will shrink as it dries, creating stress within the joint. Conversely, wood with lower moisture content will expand, potentially causing the joint to buckle. In tabletop construction, using non-acclimated lumber often results in cupping or bowing months after completion.
- Dimensional Stability
Wood acclimation ensures that the dimensions of each board are stable before the joint is created. Changes in moisture content lead to dimensional changes, primarily across the width of the board. If boards are joined before acclimation, these dimensional changes can cause significant stress along the joint line, leading to glue failure or wood splitting. Imagine constructing a wide panel for a cabinet side. If the boards have not acclimated, the panel will likely develop cracks or gaps as the wood adjusts to its environment.
- Joint Integrity
Acclimation improves the long-term integrity of edge-to-edge joints. Joints created with acclimated wood are less susceptible to movement and stress, maintaining their strength and alignment over time. Proper acclimation minimizes the risk of joint separation, which can compromise the structural integrity of the entire piece. An example would be in furniture construction, where unacclimated wood can lead to wobbly legs or drawers that no longer fit properly.
- Finishing Quality
Acclimation also impacts the quality of the final finish. Wood that continues to shrink or expand after finishing can cause the finish to crack or peel, particularly along the joint lines. Proper acclimation ensures that the finish remains intact and protects the wood from further moisture fluctuations, thus extending the lifespan of the piece. This is especially noticeable in painted finishes, where cracks along joints are highly visible and detract from the overall appearance.
Therefore, wood acclimation is not a mere suggestion but a necessary prerequisite for creating durable and aesthetically pleasing edge-to-edge joints. Ignoring this crucial step introduces significant risks and compromises the longevity of woodworking projects. The time invested in acclimation translates directly into enhanced stability, improved joint integrity, and a higher quality final product.
6. Grain direction
Grain direction, the alignment of wood fibers within a board, critically influences the structural performance and aesthetic outcome of edge-to-edge joints. The orientation of grain impacts wood’s response to stress, moisture absorption, and its susceptibility to warping or splitting. When joining boards along their edges, failing to consider grain direction can lead to structural weaknesses or visually unappealing results. For instance, alternating the grain direction in adjacent boards can mitigate cupping, a distortion caused by differential shrinkage. Conversely, joining boards with opposing grain directions can create internal stresses, potentially leading to joint failure. Therefore, the understanding and proper management of grain direction are fundamental aspects of reliable and attractive edge-to-edge joints.
A practical example illustrates the importance of grain direction. Consider constructing a wide tabletop from several boards. If the grain direction of each board is oriented in the same direction, the table may be prone to cupping or bowing across its width as the wood expands and contracts with changes in humidity. By alternating the grain direction i.e., having the growth rings curve upwards in one board and downwards in the next the tendency for each board to cup in the same direction is counteracted, resulting in a more stable and flatter tabletop surface. This technique is widely employed by experienced woodworkers to enhance the dimensional stability of wide panels and minimize the risk of distortion over time. The direction of the grain should always be matched in Edge-to-edge joints.
In summary, grain direction is not merely an aesthetic consideration; it is a crucial factor in determining the structural integrity and long-term stability of edge-to-edge joints. By understanding the principles of grain orientation and employing appropriate techniques, woodworkers can minimize the risk of warping, splitting, and joint failure, thereby ensuring a high-quality, durable finished product. While challenges remain in predicting wood’s exact behavior, a mindful approach to grain direction is paramount in achieving successful edge-to-edge joint construction.
7. Cure Time
Cure time, the period required for adhesives to achieve their full strength and stability, is a critical factor in the successful execution of edge-to-edge joints. Insufficient cure time compromises joint integrity, potentially leading to premature failure and rendering the woodworking project structurally unsound. Proper adherence to recommended cure times, therefore, is paramount.
- Development of Bond Strength
The primary function of cure time is to allow the adhesive to fully polymerize, developing its maximum bonding strength. Premature stress on the joint before complete polymerization can weaken the adhesive bond, leading to reduced long-term durability. For instance, clamping pressure removed before the adhesive has fully cured can allow the joint to shift, creating internal stresses and compromising its integrity.
- Minimizing Joint Movement
During the cure time, wood may continue to expand or contract due to environmental factors. Maintaining clamping pressure throughout the recommended cure period helps resist these movements, ensuring a stable and aligned joint. Releasing clamps prematurely can allow the wood to move, creating gaps or misalignment that compromise the aesthetic and structural integrity of the joint. Consider a tabletop constructed with edge-to-edge joints; premature clamp removal can result in a warped or uneven surface.
- Resistance to Environmental Factors
Full cure time is necessary for many adhesives to develop resistance to moisture and temperature fluctuations. Applying finishes or exposing the joint to environmental stress before full cure can hinder the development of these protective properties, leading to premature degradation of the adhesive bond. For example, exterior furniture constructed with edge-to-edge joints requires an adhesive that is fully cured to withstand exposure to rain, sunlight, and temperature changes.
- Long-Term Joint Stability
Proper cure time significantly contributes to the long-term stability of edge-to-edge joints. A fully cured adhesive bond is better equipped to withstand the stresses and strains of normal use, preventing joint separation, cracking, or other forms of failure over time. High-value furniture pieces, intended for generations of use, rely on the long-term stability achieved through proper adhesive cure.
The interplay between cure time and edge-to-edge joint integrity underscores the importance of patience and precision in woodworking. While rushing the curing process may seem expedient, the resulting compromises in joint strength and stability can have significant long-term consequences. Adherence to recommended cure times is, therefore, a fundamental principle in achieving durable and aesthetically pleasing edge-to-edge joints.
Frequently Asked Questions
The following section addresses common inquiries and misconceptions surrounding edge-to-edge joints in woodworking. This information aims to clarify best practices and optimize outcomes.
Question 1: What constitutes proper joint preparation prior to assembly?
Prior to adhesive application, boards must exhibit straight, square edges. A jointer or hand plane facilitates achieving this precision. Deviations from straightness or squareness compromise glue surface contact and joint integrity. The edges should be smooth and free of any debris.
Question 2: Does glue type significantly impact the strength of an edge-to-edge joint?
Yes, adhesive selection is crucial. Polyvinyl Acetate (PVA) glues are commonly used, but specific formulations cater to different wood species and applications. For moisture-prone environments, water-resistant adhesives are mandatory. Consider open time and clamp time when selecting the glue for a particular project.
Question 3: How much clamping pressure is optimal for edge-to-edge joints?
Adequate and uniform clamping pressure is essential. Insufficient pressure results in starved joints; excessive pressure deprives the joint of adhesive. The goal is consistent contact across the entire joint line. Cauls can aid in distributing pressure evenly and maintaining planarity.
Question 4: Why is wood acclimation necessary before creating edge-to-edge joints?
Wood acclimation allows lumber to reach equilibrium with the surrounding environment’s moisture content. Joining unacclimated wood can lead to warping, cracking, or joint failure as the wood adjusts post-assembly. Allowing sufficient time for acclimation is critical to ensuring stability.
Question 5: How does grain direction influence the integrity of an edge-to-edge joint?
Grain direction affects wood’s response to stress and moisture. Alternating grain patterns can mitigate cupping in wide panels. Consistent grain alignment contributes to a more visually harmonious appearance. Attention to grain direction contributes to both the structural and aesthetic quality of the joints.
Question 6: What happens if clamps are removed before the adhesive’s recommended cure time?
Premature clamp removal can compromise bond strength and joint stability. Adhesives require sufficient time to fully polymerize and develop their maximum holding capacity. Stressing the joint before full cure can lead to joint movement or failure.
These are the keys to Edge-to-edge joints in woodworking.
The subsequent discussion will explore advanced techniques and troubleshooting strategies related to edge-to-edge joinery.
Conclusion
This exploration has detailed the core principles of achieving sound edge to edge joints in woodworking. Emphasis has been placed on material preparation, adhesive selection, controlled clamping pressure, and the critical role of wood acclimation. Further, the discussion underscored the influence of grain direction and the necessity of adhering to specified adhesive cure times. A comprehensive understanding of these variables is foundational to constructing robust and visually appealing solid wood panels.
Mastery of these techniques empowers woodworkers to create durable and aesthetically pleasing projects. The pursuit of excellence in edge to edge joints in woodworking is a continual process of refinement and learning. Diligence in applying these principles elevates the quality and longevity of woodworking endeavors, ensuring lasting value and satisfaction.


