These shaped inserts, often resembling butterflies or dovetails, are employed to reinforce or stabilize wood pieces. They serve as a structural element, bridging cracks, preventing further splitting, or joining boards end-to-end, particularly where aesthetic considerations preclude the use of more conventional fasteners.
The application of these inlays provides both structural integrity and visual appeal to woodworking projects. Historically, their use reflects a craftsman’s commitment to preserving valuable timber while simultaneously enhancing the design. The practice ensures longevity of the workpiece, preventing catastrophic failure along weakened grain lines and adding a decorative aspect that highlights the repair rather than concealing it.
Consequently, the subsequent discussion will focus on the practical considerations involved in selecting appropriate wood species for these reinforcing elements, techniques for precise mortise creation, and best practices for achieving a seamless, durable, and aesthetically pleasing integration into a variety of woodworking endeavors.
Practical Guidance
The following section presents practical recommendations for effectively utilizing reinforcing inlays in woodworking projects. Adherence to these suggestions will contribute to structurally sound and visually appealing results.
Tip 1: Wood Selection: Choose a wood species for the inlay that complements the primary material in both color and hardness. A contrasting wood can provide visual interest, but ensure it possesses adequate strength to fulfill its reinforcing role. Species such as walnut, cherry, or maple are frequently employed.
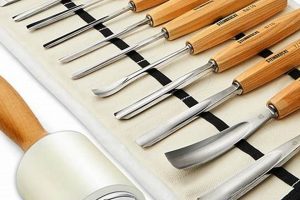
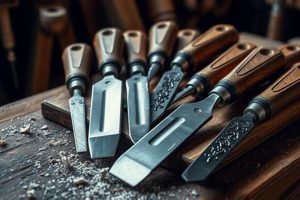
Tip 2: Mortise Precision: Accurate mortise creation is paramount. Employ sharp chisels, marking gauges, and potentially a router with a template to achieve clean, precisely sized mortises that accommodate the inlay snugly without excessive force. A well-fitted inlay maximizes structural support.
Tip 3: Grain Orientation: Consider the grain direction of both the parent wood and the inlay. Aligning the grain of the inlay perpendicular to the crack or weakness it is intended to reinforce provides maximum resistance to splitting.
Tip 4: Adhesive Application: Utilize a high-quality wood adhesive appropriate for the selected wood species. Apply the adhesive liberally to both the mortise and the inlay surfaces, ensuring complete coverage. Clamping pressure is critical to achieve a strong, lasting bond.
Tip 5: Clamping Technique: Employ clamps strategically to apply even pressure across the inlay during the adhesive curing process. Protect the surrounding wood surface with cauls to prevent clamp marks. Adequate clamping time is essential for bond strength development.
Tip 6: Flush Trimming: After the adhesive has cured completely, carefully trim the inlay flush with the surrounding wood surface. Utilize sharp hand planes, chisels, or a flush-trim router bit to achieve a smooth, seamless transition. Avoid aggressive sanding that may damage the surrounding surface.
Tip 7: Sanding and Finishing: Sand the inlay and surrounding wood to a consistent grit level to prepare for finishing. Select a finish that complements both wood species and protects the repair from moisture and environmental factors. Multiple coats of finish may be required to achieve the desired appearance and level of protection.
Implementing these guidelines enhances the efficacy and aesthetic integration of reinforcing inlays. Proper material selection, precise execution, and meticulous attention to detail are critical for achieving lasting and visually pleasing repairs or augmentations.
The following section will delve into various design considerations and aesthetic applications, illustrating the versatility of these inlays beyond purely structural repairs.
1. Material Selection
The selection of appropriate wood species exerts a significant influence on the structural integrity and aesthetic character of inlaid reinforcements in woodworking. This choice transcends mere visual preference; it directly affects the longevity and performance of the repair or augmentation.
- Hardness and Durability
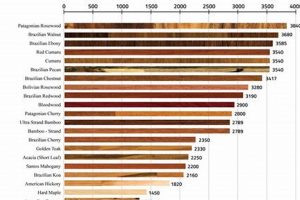
The relative hardness of the selected wood determines its resistance to wear and tear, its ability to withstand stress, and its overall durability. Harder woods, such as maple or oak, are often preferred for structural applications requiring significant reinforcement, as they resist crushing and deformation under load. Conversely, softer woods may be suitable for purely decorative inlays or in situations where the primary function is cosmetic rather than structural. In applications involving the latter, care must be taken to accommodate differential movement.
- Grain Pattern and Figure
The grain pattern and figure of the selected wood contribute significantly to the visual appeal of the inlay. Matching or contrasting the grain pattern with the surrounding wood can create subtle or dramatic effects. Highly figured woods, such as curly maple or burl, can add a touch of elegance and visual interest, but must be handled with care during the shaping and fitting process due to their inherent complexity. In contrast, straight-grained woods provide a more understated appearance and are generally easier to work with.
- Dimensional Stability
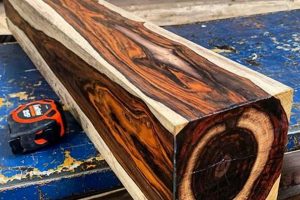
Dimensional stability refers to a wood’s resistance to shrinking or swelling in response to changes in humidity. Woods with high dimensional stability are preferred for inlaid reinforcements, as they minimize the risk of the inlay separating from the surrounding wood due to differential expansion or contraction. Species such as mahogany and walnut exhibit relatively good dimensional stability, making them suitable choices for applications in environments with fluctuating humidity levels. Incompatibility of movement can cause failure.
- Color and Tone
The color and tone of the selected wood contribute to the overall aesthetic harmony of the piece. Contrasting colors can be used to create visual accents, while similar tones can blend seamlessly with the surrounding wood. Factors such as the age of the wood, exposure to sunlight, and the application of finishes can all affect the color and tone of the inlay. Careful consideration of these factors is essential for achieving a cohesive and visually appealing result. Example: Wenge and Maple is visually contrasting.
The interplay of these considerationshardness, grain, dimensional stability, and colordirectly influences the success of inlaid wooden reinforcements. Thoughtful material selection not only ensures structural integrity but also elevates the aesthetic quality of the woodworking project, transforming a functional repair into a deliberate design element. Failures often arise when these principles are not carefully regarded.
2. Grain Orientation
Grain orientation, in the context of wooden inlays, assumes critical importance due to its direct influence on structural integrity and long-term performance. Incorrect alignment introduces stress concentrations and weakens the reinforcement. The primary objective is to orient the inlay’s grain perpendicular to the crack or potential failure point it is designed to bridge. This orthogonal arrangement leverages the wood’s inherent strength along the grain to resist tensile forces acting on the compromised area. For example, in repairing a split tabletop, a bow-tie inlay with its grain running across the crack prevents further propagation by mechanically locking the adjacent wood fibers together. Failure to adhere to this principle diminishes the inlay’s effectiveness, rendering it largely cosmetic and potentially accelerating failure due to induced stress.
The practical application extends beyond simple crack repair. In end-grain joinery, where glue surfaces are limited and inherently weak, inlays with strategically oriented grain patterns provide a robust mechanical connection. Specifically, consider a mitered corner weakened by short grain; an inlay spanning the joint, with its grain running diagonally across the miter, resists the tendency for the corner to pull apart under stress. Similarly, when reinforcing a knot or void, aligning the inlay’s grain to counter the surrounding wood’s grain deviations enhances stability and prevents localized weakness. Ignoring grain direction in these scenarios can lead to joint failure, warping, or the complete separation of components. A practical example includes installing shelf supports; a correctly oriented inlay can significantly increase load-bearing capacity.
In summary, proper grain orientation is a non-negotiable factor in the effective use of these inlays. While aesthetic considerations may influence wood species selection, they should never supersede the imperative of aligning the inlay’s grain to maximize its reinforcing capabilities. The consequences of neglecting this principle range from compromised structural integrity to accelerated component failure. Achieving optimal performance necessitates a thorough understanding of wood anatomy and a deliberate approach to grain alignment, solidifying the inlay’s role as a structural asset rather than a mere decorative element.Furthermore, challenges, such as matching grain seamlessly or compensating for the wood’s natural movement, call for advanced techniques and tools to achieve optimal results.
3. Mortise Accuracy
Mortise accuracy forms a foundational element in the successful integration and functionality of reinforcing inlays in woodworking projects. Deviations from precise dimensions and geometry compromise structural integrity and aesthetic alignment. The following discussion details specific facets of this critical parameter.
- Dimensional Tolerance
Dimensional tolerance refers to the permissible variation in the mortise’s length, width, and depth. In the context of these inlays, tight tolerances are crucial for achieving a snug fit that maximizes the contact area between the inlay and the surrounding wood. Excessive clearance results in a loose fit, diminishing the inlay’s ability to effectively transfer loads and prevent cracking. Conversely, insufficient clearance necessitates excessive force during inlay insertion, potentially damaging the wood fibers and compromising the integrity of the repair. Examples include mortise widths precisely matched to inlay dimensions, ensuring structural stability.
- Geometric Precision
Geometric precision pertains to the accuracy of the mortise’s shape and angles. Inlays are often characterized by complex geometries, such as dovetails or curves, that require corresponding precision in the mortise. Deviations from these shapes can lead to stress concentrations and localized points of weakness, undermining the inlay’s intended reinforcement. Mortises are precisely cut to match the inlay’s angles and curves, guaranteeing seamless integration. Angular inaccuracies will compromise the load-bearing capabilities of the structure.
- Surface Finish
The surface finish of the mortise walls influences the adhesive bond between the inlay and the surrounding wood. Rough, uneven surfaces provide a larger surface area for adhesive adhesion, but they can also interfere with a tight fit. Smooth, consistent surfaces promote intimate contact between the wood fibers, maximizing bond strength. The interior surface of the mortise is smooth and consistent, optimized for maximum adhesive contact. An unfinished interior can lead to uneven stress distribution and potential failure of the joint.
- Alignment and Orientation
Proper alignment and orientation of the mortise with respect to the crack or potential failure point are essential for effective reinforcement. Misalignment can render the inlay ineffective or even exacerbate the problem by introducing stress concentrations in unintended areas. Mortises are carefully aligned to provide maximum reinforcement across the targeted weak point. Failure to consider these factors could result in a cosmetically pleasing but structurally unsound repair.
Mortise accuracy, encompassing dimensional tolerance, geometric precision, surface finish, and alignment, collectively dictates the success of inlaid reinforcement techniques. Precision in mortise creation ensures the inlay functions as an integral structural component, enhancing both the strength and aesthetic appeal of the woodworking project. Careful application of mortise techniques ensures not only the structural integrity but also the visual appeal of finished wood pieces, preventing future splitting or separation.
4. Adhesive Strength
Adhesive strength directly dictates the efficacy of reinforcing inlays in woodworking. The bond created between the inlay and the host wood transfers stress, preventing crack propagation or joint failure. Insufficient adhesive strength negates the mechanical advantage provided by the inlay’s geometry, rendering it a purely cosmetic element. For instance, consider a large slab table with a potential split: a poorly adhered inlay will fail to prevent separation under seasonal wood movement, leading to progressive crack enlargement. In contrast, a robust adhesive bond ensures the inlay acts as an integrated structural component, effectively resisting tensile forces.
The selection of appropriate adhesive significantly impacts long-term performance. Different wood species exhibit varying absorption rates and surface characteristics, necessitating careful consideration of adhesive compatibility. Furthermore, environmental conditions such as humidity and temperature fluctuations influence adhesive performance. Polyurethane adhesives, known for their gap-filling properties and water resistance, are often favored for exterior applications or situations where dimensional stability is a concern. Conversely, traditional wood glues, while offering excellent bond strength, may be susceptible to moisture damage. For example, installing the inlay with insufficient clamp pressure might compromise the ultimate bond, and therefore render the inlay unstable. Ultimately, the chosen adhesive must possess sufficient shear and tensile strength to withstand the anticipated stresses.
The interplay between adhesive strength and inlay geometry determines the reinforcement’s overall effectiveness. A well-designed inlay, meticulously fitted and bonded with a high-strength adhesive, provides a robust and visually appealing solution for addressing structural weaknesses in woodworking projects. However, without adequate adhesion, even the most precisely crafted inlay becomes a liability. Therefore, understanding adhesive properties, application techniques, and wood compatibility is paramount for achieving durable and reliable wood joinery. Consequently, poor technique leads to premature failure of the piece.
5. Clamping Pressure
Clamping pressure constitutes a critical variable in the successful integration of wooden inlays within woodworking projects. The magnitude and distribution of this force during adhesive curing directly influence the strength and longevity of the resulting joint.
- Adhesive Contact
Adequate clamping pressure ensures intimate contact between the inlay and the mortise surfaces, maximizing the surface area available for adhesive bonding. Insufficient pressure leads to gaps and voids, diminishing bond strength and creating potential points of failure. For example, a loosely clamped inlay may exhibit premature separation due to stress concentration along areas of limited adhesive contact.
- Adhesive Distribution
Appropriate clamping pressure facilitates uniform distribution of adhesive across the joint surfaces, preventing adhesive starvation in certain areas and promoting consistent bond strength throughout the inlay’s perimeter. Uneven pressure can result in adhesive pooling or squeeze-out, weakening the joint and creating visual imperfections.
- Wood Fiber Compression
Controlled clamping pressure compresses the wood fibers at the joint interface, enhancing mechanical interlocking and improving the adhesive’s ability to penetrate the wood structure. Excessive pressure, however, can crush the wood fibers, weakening the joint and creating potential points of stress. It is important to balance compression with damage mitigation.
- Joint Alignment
Clamping pressure maintains accurate alignment between the inlay and the surrounding wood, preventing misalignment or shifting during the adhesive curing process. Misalignment can compromise the structural integrity of the repair and detract from the aesthetic appeal of the finished piece.
Effective application of clamping pressure is thus inextricably linked to the successful implementation of these inlays. The optimal pressure range depends on factors such as wood species, adhesive type, and inlay geometry. Overly zealous clamping can cause fiber damage and adhesive squeeze-out, while insufficient pressure compromises bond formation. Precise application guarantees a mechanically sound and aesthetically pleasing result, thus ensuring the success of the wooden inlay’s integration. Furthermore, applying the incorrect amount of pressure can impact the longevity of wood pieces when using wooden bow ties for woodworking.
6. Flush Trimming
Flush trimming, in the context of woodworking, specifically refers to the process of removing excess material from an inlay or repair to bring it level with the surrounding surface. When applying wooden inlays, this step is critical to achieving a seamless and aesthetically pleasing result. Untrimmed or poorly trimmed inlays disrupt the visual flow of the wood and compromise the tactile experience. In the specific instance of these inlays, precise flush trimming ensures the reinforcement integrates imperceptibly into the surrounding surface, preserving the integrity of the design. Poorly trimmed, raised inlays create an uneven surface, which is generally undesirable in woodworking.
The relationship between flush trimming and these inlays is one of cause and effect. The installation of an inlay necessitates subsequent trimming to eliminate any protrusion beyond the original surface plane. The method employed for flush trimming varies depending on the size and shape of the inlay, as well as the type of wood involved. Hand planes, chisels, and specialized routers are common tools used for this purpose. Each tool requires specific techniques and levels of precision to avoid damaging the surrounding wood. Achieving a truly flush surface requires meticulous attention to detail and a thorough understanding of wood grain direction to prevent tear-out. A perfectly trimmed inlay adds to the overall aesthetic appeal.
In summary, flush trimming is not merely a finishing step but an integral component of successful inlay application. Its proper execution dictates both the aesthetic and functional qualities of the finished piece. A seamless transition from inlay to surrounding wood requires meticulous technique, sharp tools, and a comprehensive understanding of wood behavior. Incomplete or inaccurate flush trimming negates the effort invested in the inlay process, resulting in a compromised final product. Thus, flush trimming represents a crucial skill for any woodworker employing reinforcing inlays. Furthermore, the longevity of any project can be secured by proper flush trimming methods.
7. Wood Movement
Wood movement, the dimensional change in wood due to variations in moisture content, is a fundamental consideration in woodworking. Its interaction with rigid elements, such as reinforcing inlays, presents significant challenges. These inlays, intended to stabilize or join wood, can inadvertently induce stress if differential expansion or contraction is not properly accommodated. The very purpose of the inlay to preserve or strengthen wood might be defeated if this inherent material behavior is overlooked. The selection of wood species for both the parent material and the inlay must consider differing expansion coefficients to mitigate potential failures. For instance, employing a dense, stable wood like mahogany within a less stable species such as pine might constrain the pine’s natural movement, leading to cracks or separation at the glue line.
One approach to managing wood movement in conjunction with these reinforcing elements involves strategic grain orientation. Orienting the grain of the inlay perpendicular to the primary grain direction of the parent material can minimize the constraint imposed by the inlay. Furthermore, careful consideration of the inlay’s size and shape is crucial. Large, rigid inlays covering extensive surface areas are more likely to impede wood movement than smaller, more flexible designs. Real-world examples are replete with instances of tabletops cracking along the edges of large, poorly designed inlays. Alternatively, mortise-and-tenon joinery, when reinforced with strategically placed inlays, benefits from the increased strength while allowing for seasonal movement. Thus, the success of reinforcing inlays hinges on balancing structural reinforcement with the accommodation of natural wood behavior.
Understanding the interplay between wood movement and these inlays is not merely an academic exercise; it has direct practical implications for the durability and longevity of woodworking projects. The failure to account for differential expansion and contraction can lead to catastrophic structural failures, negating the benefits of the reinforcing elements. Therefore, a comprehensive understanding of wood science, coupled with careful material selection and meticulous craftsmanship, is essential for achieving lasting and aesthetically pleasing results. The challenge lies in creating reinforcing elements that are both structurally sound and sympathetic to the inherent properties of wood. Furthermore, accounting for the movement of woods is of utmost importance when working with wooden bow ties for woodworking projects.
Frequently Asked Questions
The following addresses common inquiries regarding the application of shaped wood inserts to enhance structural integrity or prevent splitting in woodworking.
Question 1: What wood species are best suited for creating these reinforcing elements?
Hardwoods such as walnut, cherry, maple, or oak generally exhibit superior strength and stability for structural applications. The selection, however, should also consider aesthetic compatibility with the primary workpiece. Softwoods are viable for decorative applications where structural support is not a primary concern.
Question 2: How is the correct size and shape of the reinforcing element determined?
The size and shape depend on the dimensions of the crack or weakness being addressed. The inlay should extend sufficiently beyond the damaged area to distribute stress effectively. Dovetail shapes offer increased mechanical interlocking compared to straight-sided designs.
Question 3: What is the recommended method for cutting the mortise to receive the inlay?
Precise mortise creation is essential. Options include hand chisels, routers with templates, or specialized mortising machines. Regardless of the method, sharp tools and careful technique are paramount to ensure a snug, accurate fit.
Question 4: What type of adhesive provides the strongest bond for these inlays?
High-quality wood glues, such as polyvinyl acetate (PVA) or epoxy resins, are generally recommended. The specific choice depends on the wood species, environmental conditions, and anticipated stress levels. Adhesives should be applied liberally to both the mortise and the inlay surfaces.
Question 5: Is clamping necessary during the adhesive curing process?
Clamping is crucial for ensuring intimate contact between the inlay and the mortise surfaces, maximizing bond strength. Clamps should be applied evenly and with sufficient pressure to eliminate gaps without crushing the wood fibers. Adequate clamping time, as specified by the adhesive manufacturer, is essential.
Question 6: How is the inlay trimmed flush with the surrounding wood surface?
After the adhesive has cured, excess material can be removed using hand planes, chisels, or flush-trim routers. Sharp tools and careful technique are essential to avoid damaging the surrounding wood. Sanding should be performed progressively to achieve a smooth, seamless transition.
Proper material selection, precise execution, and meticulous attention to detail are crucial for achieving lasting and visually pleasing repairs or augmentations using these inlays. A robust adhesive bond between the inlay and the wood piece should be insured for enhanced durability. With proper care and attention to detail, these wooden additions can become a seamless part of any woodworking project.
The next section provides guidelines on selecting tools to create wooden bow ties for woodworking.
Conclusion
This exploration of wooden bow ties for woodworking has illuminated critical considerations for their successful implementation. Material selection, grain orientation, mortise accuracy, adhesive strength, clamping pressure, flush trimming, and accommodation of wood movement all represent interdependent factors influencing the structural integrity and aesthetic integration of these reinforcing elements. Each element demands meticulous attention to detail and a thorough understanding of woodworking principles.
The effective application of wooden bow ties for woodworking transcends mere repair work; it constitutes a commitment to craftsmanship and material preservation. Continuing refinement of techniques and exploration of innovative designs promise to further enhance the utility and aesthetic appeal of this time-honored practice. Diligent adherence to established best practices ensures the lasting value and functionality of woodworking endeavors, particularly where the integrity of the wood is of the utmost importance.


