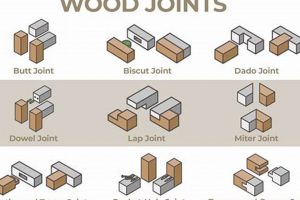
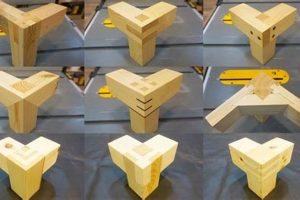
This method of joining wood pieces involves cutting a series of complementary, interlocking profiles resembling fingers on the ends of the boards. These ‘fingers’ are then coated with adhesive and pressed together, creating a strong, visually appealing bond. One can see this technique used in applications ranging from furniture construction to the creation of long, structural timbers.
The inherent strength derived from the increased surface area for gluing makes it a preferred choice where durability and longevity are paramount. Historically, its utilization represents a shift towards efficient material usage, minimizing waste and maximizing the structural integrity of the assembled product. This joining method allows manufacturers and craftsmen to utilize shorter pieces of lumber, joining them end-to-end to create longer, stable boards.
Subsequent sections will delve into the specifics of creating this type of connection, the optimal adhesives to employ, and considerations for achieving consistently high-quality results. Further discussion will address various jig designs and machine setups used to mass-produce this connection with precision and efficiency.
Tips for Superior Results
Achieving robust and visually appealing results requires careful attention to detail throughout the process. The following tips offer guidance on material selection, precision cutting, and assembly techniques to maximize the efficacy of this woodworking joint.
Tip 1: Material Selection: Choose wood species with similar densities and moisture content to minimize stress and potential warping after assembly. Incompatible wood types can lead to joint failure over time.
Tip 2: Precision Cutting is Paramount: Accurate cuts are crucial for tight-fitting connections. Employ sharp blades and well-calibrated jigs or machinery to ensure consistency across all fingers.
Tip 3: Adhesive Choice: Select a high-quality wood glue appropriate for the intended application. Consider factors such as open time, water resistance, and clamping pressure requirements.
Tip 4: Apply Adhesive Evenly: Ensure a uniform coating of adhesive is applied to all mating surfaces. Inadequate glue coverage weakens the bond and reduces overall joint strength.
Tip 5: Clamp Securely: Use clamps to apply even pressure across the entire joint during the curing process. Insufficient clamping pressure may result in gaps and a compromised bond.
Tip 6: Allow Adequate Curing Time: Adhere strictly to the adhesive manufacturer’s recommended curing time before removing clamps and subjecting the joint to stress. Premature removal can compromise joint integrity.
Tip 7: Sanding and Finishing: After the adhesive has fully cured, sand the joint flush and apply a suitable finish to protect the wood and enhance its aesthetic appeal.
Implementing these practices consistently leads to a stronger, more durable, and visually appealing woodworking joint. Attention to detail in each step contributes significantly to the overall quality and longevity of the finished product.
The following sections will expand upon specific aspects of the process, including jig construction and troubleshooting common issues.
1. Strength
The primary advantage of using this wood joining technique lies in the enhanced structural strength it provides compared to simpler joints. This increase in robustness stems directly from the significant increase in surface area available for adhesive bonding. The interlocking fingers, precisely cut and fitted, create multiple points of contact, distributing stress more evenly across the joint and mitigating localized failure points. This distribution reduces the likelihood of shear forces causing separation.
Consider, for instance, load-bearing beams or structural components in furniture. Where a butt joint might fail under significant weight or stress, this joint offers considerably greater resistance to both tensile and compressive forces. The interlocking design inherently resists racking and twisting, crucial attributes in applications demanding stability. Real-world examples include high-stress components in musical instruments or structural elements in cabinet construction, where long-term durability and resistance to deformation are essential.
In summary, the enhanced strength is a direct result of maximized glue surface area and interlocking geometry, leading to more robust and durable wood connections. Understanding the principles that contribute to this strength allows woodworkers to select this technique confidently in applications demanding high structural integrity. The increased strength also makes it a viable alternative to using longer, single pieces of lumber, reducing material waste and cost. Achieving optimal strength requires precise execution and adherence to best practices, highlighting the importance of both design and craftsmanship.
2. Precision
In the context of this wood joining technique, precision is not merely a desirable attribute; it is a fundamental prerequisite for success. The efficacy of this joint hinges directly upon the accuracy of the cuts that form the interlocking fingers. Dimensional inconsistencies, even minute ones, can compromise the integrity of the entire structure. Inaccurate cuts lead to gaps, reduced surface contact, and uneven stress distribution, all of which diminish the joint’s load-bearing capacity and overall durability. The consequence of inadequate precision is a weakened bond that may fail under stress or be aesthetically displeasing. Consider, for example, the construction of high-end furniture where seamless joints are essential for both structural soundness and visual appeal. Lack of precision in forming this type of joint would render the piece unsuitable for its intended purpose.
Achieving the necessary level of precision necessitates the use of appropriate tools and techniques. Precise measurements, sharp cutting implements, and stable jigs are crucial. Power tools, such as routers or table saws equipped with specialized jigs, are commonly employed to ensure consistency and accuracy in mass production. However, even with advanced machinery, careful setup and meticulous execution are essential. Furthermore, skilled craftsmanship plays a pivotal role. Experienced woodworkers possess the knowledge and dexterity to detect and correct subtle imperfections, ensuring a tight, gap-free fit. This expertise is particularly valuable when working with hardwoods or materials prone to splintering, where small errors can quickly compound.
In conclusion, precision forms the bedrock upon which the structural and aesthetic value of this joint rests. Compromises in accuracy inevitably translate to compromises in strength and appearance. Overcoming the challenges associated with achieving the requisite precision demands a combination of appropriate tooling, meticulous technique, and skilled craftsmanship. Mastering this aspect of woodworking is essential for producing high-quality, durable, and visually appealing wooden structures. Subsequent discussion will address specific techniques and tools used to achieve optimal precision in its creation.
3. Adhesive Selection
Adhesive selection constitutes a critical factor influencing the performance and longevity of joints. The complex geometry of this joint, characterized by extensive surface area and multiple interlocking fingers, demands adhesives with specific properties to ensure optimal bond strength and structural integrity. The type of adhesive directly affects the joint’s ability to withstand tensile, compressive, and shear forces. Improper adhesive selection can lead to premature joint failure, compromising the structural integrity of the entire assembly. For instance, using a brittle adhesive in a joint subjected to vibrations or impact loads would likely result in cracks and eventual separation of the wood components. Consider applications in furniture construction, where joints are frequently subjected to dynamic stresses. The chosen adhesive must possess sufficient elasticity to accommodate these stresses without compromising bond strength. The cause-and-effect relationship between adhesive choice and joint performance is demonstrable in the longevity of antique furniture, where the use of appropriate glues has ensured structural integrity for centuries.
The practical implications of understanding adhesive compatibility extend to industrial-scale manufacturing. Selecting adhesives with rapid curing times is essential for increasing production efficiency without sacrificing bond quality. Further considerations include the adhesive’s viscosity, open time, and resistance to environmental factors such as moisture and temperature fluctuations. Water resistance is particularly crucial in outdoor applications or environments with high humidity. The adhesive’s interaction with the wood species is also a vital consideration. Certain wood species contain natural oils or resins that can interfere with adhesive bonding. In such cases, surface preparation techniques or specialized adhesives designed for oily woods may be necessary. The selection of an appropriate adhesive also affects the finishing process. Some adhesives may bleed through the wood grain or react negatively with certain finishes, resulting in discoloration or other aesthetic defects. The selection criteria are thus multifaceted, demanding a thorough understanding of the adhesive’s chemical properties and its interaction with the specific wood species and application environment.
In summary, adhesive selection is inextricably linked to the performance of joints. Choosing the correct adhesive is not merely a matter of convenience but a fundamental requirement for ensuring structural integrity, durability, and aesthetic quality. Factors such as wood species, application environment, stress conditions, and finishing requirements must be carefully considered to make an informed adhesive selection. The failure to do so can result in compromised structural performance and reduced product lifespan. Continuous research and development in adhesive technology provide woodworkers with an ever-expanding array of options, but a solid understanding of fundamental adhesive properties remains essential for successful implementation. Mastering adhesive selection is as crucial as the precise cutting and alignment of the fingers themselves.
4. Alignment
Proper alignment constitutes a non-negotiable element in the successful execution of woodworking finger joints. Misalignment, even of a fraction of a millimeter, precipitates a cascade of detrimental effects that undermine the joint’s structural integrity and aesthetic appeal. The interlocking fingers, meticulously crafted to maximize surface contact for adhesive bonding, function optimally only when precisely aligned. When the fingers are not perfectly aligned, the available gluing surface diminishes, leading to weaker bonds and reduced resistance to shear forces. Stress concentrates at points of misalignment, increasing the risk of premature failure under load. Real-world examples of this phenomenon abound in poorly constructed furniture or structural elements, where gaps and uneven surfaces betray the presence of misalignment issues. The practical significance lies in the ability to discern and correct alignment errors early in the construction process, preventing costly rework and ensuring the longevity of the finished product. Alignment impacts not just strength but also fit and finish. The more accurate alignment is, the less correction has to occur after the assembly is complete.
Practical applications often require the use of specialized jigs and fixtures to maintain consistent alignment during the assembly process. Clamps, strategically positioned and tightened, play a crucial role in holding the fingers in place while the adhesive cures. Furthermore, attention to detail in the initial cutting stages is paramount. Ensuring that the fingers are uniform in size and shape significantly reduces the likelihood of alignment problems during assembly. The choice of wood species also impacts the ease with which alignment can be achieved. Denser hardwoods, while offering greater strength, may be more difficult to work with and require more precise cutting and clamping techniques. Softwoods, conversely, are more forgiving but may require additional support to prevent warping or distortion during the curing process. Experienced woodworkers often employ dry-fitting techniques, assembling the joint without adhesive to identify and correct any alignment issues before committing to the final bond. This process can expose small variations that can be corrected before the glue has been added.
In summary, alignment is not merely a matter of aesthetics; it is an indispensable component of a strong and durable joint. The challenges associated with achieving perfect alignment underscore the need for meticulous attention to detail, the use of appropriate tools and techniques, and a thorough understanding of the materials being used. Overcoming these challenges requires a combination of skill, experience, and a commitment to precision. Achieving correct alignment is not the final solution, as other considerations such as adhesive selection still matter, but an aligned “woodworking finger joint” is a strong starting point to build up from and greatly increase structural integrity. Addressing this critical aspect of woodworking translates directly into enhanced product quality and increased customer satisfaction.
5. Material Compatibility
Material compatibility is a crucial determinant of the long-term structural integrity and aesthetic appeal of finger joints. The selection of compatible wood species and adhesives directly influences the joint’s ability to withstand environmental stressors, mechanical loads, and the passage of time. The failure to consider compatibility factors can lead to joint failure, dimensional instability, and compromised finish quality.
- Differential Expansion and Contraction
Different wood species exhibit varying rates of expansion and contraction in response to changes in humidity and temperature. When dissimilar woods are joined using this method, these differential movements can create stresses within the joint, leading to cracks, glue line failure, or warping. For instance, joining a highly stable wood like mahogany with a more reactive wood like pine could result in significant stress at the glue line as the pine expands and contracts more dramatically than the mahogany. This is especially apparent in situations that could experience prolonged environmental changes, like outdoor furniture.
- Adhesive Bond Strength
The effectiveness of an adhesive bond is contingent upon its compatibility with the specific wood species being joined. Certain wood species contain extractives or oils that can interfere with adhesive bonding, reducing the joint’s overall strength. For example, resinous woods like teak or oily woods like cocobolo require specialized adhesives or surface preparation techniques to ensure a secure bond. Failure to account for these factors can result in a weak or unreliable joint that may fail under stress. Proper surface cleaning to remove excess oil or resin can improve adhesion.
- Grain Orientation and Stability
Matching grain orientation and understanding the stability characteristics of different wood types contribute significantly to the joint’s overall performance. Aligning the grain direction helps to minimize stress induced by moisture absorption and drying. Additionally, utilizing woods with comparable stabilityresistance to warping and twistingprevents the creation of internal stresses that could compromise the bond over time. The design of a strong finger joint should not only prioritize the adhesive’s strength, but should also allow for small movements of the wood without breaking the bond.
- Finishing Compatibility
The chosen finish must be compatible with both the wood species and the adhesive used in the joint. Incompatible finishes can cause discoloration, bubbling, or peeling, detracting from the aesthetic appeal of the finished product. Additionally, some finishes may weaken the adhesive bond or react negatively with the wood, leading to structural problems. Matching a finishing agent to both materials assures a long life to the project. Applying a test finish on the wood with glue residue can prevent a full-scale compatibility failure.
In summary, material compatibility is a multifaceted consideration that encompasses wood species, adhesives, grain orientation, and finishes. Attending to these factors is essential for creating robust, durable, and aesthetically pleasing finger joints that withstand the test of time. The long-term performance of any woodworking project that includes “woodworking finger joint” is directly proportional to the level of care taken in assessing and addressing material compatibility considerations.
6. Surface Area
In the realm of woodworking finger joints, surface area occupies a position of paramount importance. Its magnitude directly dictates the strength and durability of the bond formed between the joined wood pieces. This connection’s efficacy is fundamentally dependent upon the adhesive bond’s ability to resist tensile and shear forces, a capacity that is directly proportional to the available surface area for adhesion.
- Gluing Surface Maximization
The defining characteristic of this particular joint lies in its design to drastically increase the gluing surface compared to simpler joints such as butt joints. The interlocking fingers, meticulously shaped and fitted, create an expansive network of contact points. This extended surface area provides ample opportunity for the adhesive to establish a strong, continuous bond. Examples include structural beams, where increased gluing surface is critical for supporting heavy loads, and frame construction, where durability is crucial to prevent separation. Without maximized surface area, the joint’s capacity to withstand stress significantly diminishes, potentially leading to failure.
- Stress Distribution Enhancement
The increased surface area inherent in its design contributes to a more uniform distribution of stress across the joint. Rather than concentrating stress at a single point, as is the case with simpler joints, the interlocking fingers distribute forces over a wider area. This reduces the likelihood of localized failure and enhances the joint’s overall resistance to cracking or breakage. For example, this even distribution is vital in applications where the joint is subjected to cyclical loading, such as in furniture that experiences repeated use. The ability to distribute stress is directly correlated to the amount of surface area being used.
- Adhesive Bond Strength Amplification
The inherent relationship between surface area and adhesive bond strength is a fundamental principle in adhesion science. As the available surface area increases, the potential for intermolecular bonding between the adhesive and the wood fibers is correspondingly amplified. This results in a stronger, more resilient bond capable of withstanding greater forces. Consider, for instance, applications where the joint is exposed to moisture or temperature fluctuations. A larger surface area provides a greater margin of safety, ensuring that the bond remains intact even under adverse conditions. For maximum bond strength, maximize surface area and choose the right type of wood glue.
- Dimensional Stability Improvement
The increased surface area not only enhances the joint’s strength but also contributes to improved dimensional stability. The multiple interlocking fingers create a network of interconnected elements that resist warping, twisting, and other forms of dimensional distortion. This is particularly important in applications where the joint is subjected to changes in humidity or temperature. For example, in the construction of cabinet doors or drawer fronts, dimensional stability is crucial to prevent the doors or drawers from binding or sticking. The use of finger joints with a large surface area for adhesion significantly reduces the risk of these issues. Greater surface area makes the bond stronger, which reinforces dimensional stability.
The connection between surface area and the efficacy of finger joints is undeniable. Maximizing surface contact, distributing stress effectively, and amplifying adhesive bond strength collectively contribute to a stronger, more durable, and dimensionally stable joint. The design of each interlocking piece’s shape needs to be carefully accounted for. Each of the considerations mentioned above are all important parts of “woodworking finger joint”. These multifaceted benefits underscore the value of incorporating surface area optimization strategies into the construction of this joint, ensuring superior performance and longevity across a wide range of woodworking applications.
7. Joint Geometry
The geometric configuration of interlocking fingers within the “woodworking finger joint” profoundly influences its structural integrity, load-bearing capacity, and overall aesthetic. Precise control over dimensions, angles, and spacing dictates the effectiveness of adhesive bonding and stress distribution. Deviations from optimal geometry compromise the joint’s ability to perform as intended. This is a critical element that requires careful calculation and execution.
- Finger Length and Aspect Ratio
The length and aspect ratio (length to width) of the individual fingers significantly impact the joint’s strength and resistance to bending forces. Longer fingers provide a greater surface area for adhesive bonding, enhancing the joint’s resistance to tensile forces. However, excessively long fingers can become prone to bending or breakage under load, particularly in hardwoods. The aspect ratio influences the finger’s stability and resistance to buckling. An appropriate balance between length and width is essential for optimizing joint performance. In applications such as load-bearing beams, careful calculation of finger dimensions is critical to ensure structural integrity.
- Finger Spacing and Density
The spacing between the fingers and the overall density (number of fingers per unit length) influence the distribution of stress across the joint. Closely spaced fingers distribute stress more evenly, reducing the likelihood of localized failure. However, excessively dense finger arrangements can weaken the wood due to the removal of too much material, thus weakening the overall structure. A balanced approach is vital, considering the specific wood species and the anticipated loading conditions. Different woodworking applications require varied finger spacing configurations to meet structural and aesthetic demands, requiring a careful design balance.
- Interlocking Angle and Fit
The angle at which the fingers interlock, typically 90 degrees, and the precision of the fit between mating fingers significantly affect the joint’s strength and stability. A precise fit maximizes the surface area for adhesive bonding, ensuring a strong and durable connection. Gaps or loose fits reduce the bond area, weakening the joint and increasing the risk of premature failure. The interlocking angle determines the joint’s resistance to racking forces, with steeper angles offering greater stability. In the assembly of frames or boxes, a tight-fitting interlocking angle is vital to maintain squareness and prevent distortion. A small variation in interlocking angle could translate into a large distortion over the entire structure.
- Shoulder Design and Support
The presence of shoulders, which are flat surfaces adjacent to the fingers, provides additional support and stability to the joint. Shoulders distribute stress more evenly and prevent the fingers from being subjected to excessive bending forces. The design of the shoulders, including their width and angle, influences their effectiveness in providing support. In applications where the joint is subjected to high loads or vibrations, well-designed shoulders are essential for preventing premature failure. Adding a chamfer to the shoulder can further increase the strength of the joint.
These geometrical considerations represent interconnected parameters impacting the quality of “woodworking finger joint”. Adjusting these elements to the type of wood, strength required, and aesthetic value will result in a sound design that will last. Through careful calculation, a suitable joint geometry is achieved that balances structural robustness, aesthetic appeal, and ease of manufacture.
Frequently Asked Questions
This section addresses common inquiries regarding this method, providing concise and authoritative answers to ensure a comprehensive understanding.
Question 1: What are the primary advantages of employing a finger joint over other wood joining techniques?
The finger joint’s main advantage lies in its significantly increased surface area for adhesive bonding, resulting in superior strength and durability compared to butt joints or lap joints. This enhanced strength is particularly beneficial in applications requiring resistance to high loads or cyclical stresses.
Question 2: What wood species are best suited for finger joint construction?
While finger joints can be used with various wood species, hardwoods such as oak, maple, and walnut generally offer the best combination of strength and stability. Softwoods like pine or fir can also be used, but may require careful consideration of grain orientation and adhesive selection.
Question 3: What type of adhesive is recommended for finger joints?
High-quality wood glues, specifically those formulated for hardwoods or exterior use, are generally recommended. Consider the adhesive’s open time, clamping pressure requirements, and resistance to moisture and temperature fluctuations.
Question 4: Is specialized machinery required to create finger joints?
While hand tools can be used for small-scale projects, specialized machinery such as routers or table saws equipped with finger joint jigs significantly improve accuracy and efficiency, particularly in mass production settings.
Question 5: What are the common causes of finger joint failure?
Common causes of failure include inaccurate cutting, insufficient adhesive coverage, inadequate clamping pressure, and the use of incompatible wood species or adhesives. Adherence to best practices and meticulous attention to detail are essential for preventing such failures.
Question 6: Can finger joints be used in exterior applications?
Yes, finger joints can be used in exterior applications, provided that appropriate water-resistant adhesives and wood species are selected. Regular maintenance and sealing are also recommended to protect the joint from moisture damage and prevent premature degradation.
In conclusion, the proper application of techniques directly correlates to the overall reliability of the joint. Mastery requires understanding these key aspects.
The following section will expand upon applications and industries that utilize this joint.
Conclusion
The preceding exposition has detailed the multifaceted aspects of the woodworking finger joint, underscoring its significance as a structural element. From material selection and precision cutting to adhesive considerations and geometric optimization, each facet contributes to the overall performance and longevity of the connection. The analysis underscores the necessity for meticulous execution and a comprehensive understanding of material properties to ensure structural integrity.
The principles discussed here are applicable across a spectrum of woodworking disciplines, from furniture construction to structural timber fabrication. The diligent application of these principles will lead to improved product quality, reduced material waste, and enhanced structural reliability. Continued research and development in materials and techniques will further refine the capabilities of this essential woodworking joint, solidifying its position as a cornerstone of sound construction practices. Therefore, a thorough understanding of the described elements is crucial for all those involved in this field.


