Detailed instructions for constructing a workbench tailored to the individual’s needs and skill level, primarily for woodworking activities, represent a substantial resource. These instructions typically encompass material lists, cut diagrams, step-by-step assembly guides, and potentially video tutorials. For instance, these resources allow an amateur woodworker to build a sturdy platform for sawing, planing, and joining wood.
The availability of such resources democratizes the crafting process. Benefits include cost savings compared to purchasing pre-made workbenches, customization to suit specific project requirements and workspace limitations, and the inherent satisfaction derived from building one’s own equipment. Historically, woodworking benches were essential fixtures in carpentry shops, and the ability to construct them oneself ensured a degree of self-sufficiency for artisans.
The following sections will explore various design considerations, material choices, and construction techniques that are commonly found within these instructions. Considerations for adapting these instructions to meet specific user needs will also be discussed. Finally, potential sources for locating such instructional materials will be presented.
Construction Guidance
The following points offer guidance when engaging with instructions to create a bespoke woodworking station. Attention to these details contributes to a safer and more functional final product.
Tip 1: Material Selection: Prioritize dimensional stability. Kiln-dried hardwoods, such as maple or beech, are generally superior choices compared to softwoods, reducing the likelihood of warping and movement over time.
Tip 2: Joinery Methods: Employ robust joinery techniques. Dovetails, mortise-and-tenon joints, and appropriately sized screws enhance structural integrity, particularly in load-bearing areas like the legs and top frame.
Tip 3: Work Surface Flatness: Ensure a level work surface. Before final assembly, meticulously check the flatness of the benchtop using a straightedge and shims. Minor adjustments at this stage can significantly improve overall usability.
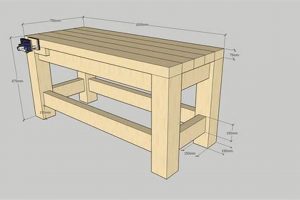
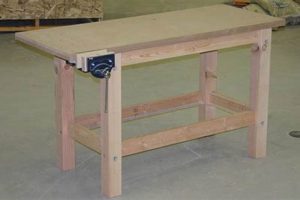
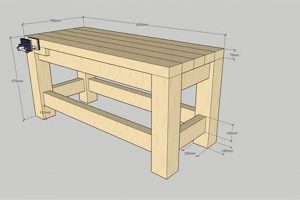
Tip 4: Vise Integration: Plan vise placement strategically. Consider the orientation of the vise jaws relative to common woodworking operations. A vise positioned for both face and edge clamping offers greater versatility.
Tip 5: Stiffening Techniques: Incorporate stiffening elements. Diagonal bracing or aprons beneath the benchtop minimize racking and deflection under heavy loads. This is particularly important for longer benches.
Tip 6: Hardware Quality: Invest in durable hardware. High-quality screws, bolts, and other fasteners resist stripping and corrosion, ensuring a longer lifespan for the finished workbench.
Tip 7: Finishing Considerations: Apply a protective finish. Several coats of oil-based varnish or polyurethane enhance durability and resistance to spills and scratches. Allow adequate drying time between coats.
Adhering to these guidelines promotes a more robust, reliable, and ultimately more satisfying outcome. By carefully considering material choices, joinery, flatness, vise placement, stiffening techniques, and hardware, a woodworking bench can be constructed that meets the user’s needs for years to come.
The subsequent section will address common challenges encountered during the construction process and offer potential solutions.
1. Sturdy Frame
The integration of a sturdy frame constitutes a foundational element within the realm of instructions for creating a woodworking station. The frame serves as the primary load-bearing structure, directly influencing the overall stability and longevity of the completed bench. Inadequate frame construction inevitably leads to workbench instability, manifested as wobbling, racking, or even structural failure under moderate stress. For example, instructions detailing a frame constructed solely with butt joints and without reinforcement are inherently inferior to those emphasizing mortise-and-tenon joints or robust bolted connections. The former exemplifies compromised integrity, increasing the risk of premature failure, while the latter ensures reliable support during demanding woodworking tasks.
Instructions emphasizing a sturdy frame typically include detailed diagrams illustrating proper jointing techniques, material selection guidelines, and load distribution considerations. They often specify appropriate dimensions for frame members based on the intended weight capacity and usage patterns of the workbench. Furthermore, comprehensive plans may incorporate bracing strategies, such as diagonal supports or aprons, to enhance rigidity and prevent deformation under load. These measures are crucial for maintaining a stable and reliable work surface, minimizing vibrations during tool usage, and ensuring worker safety. The absence of these features in instruction sets indicates a lack of attention to structural integrity and compromises the overall value of the resulting workbench.
In conclusion, a sturdy frame is not merely a desirable attribute but a critical requirement for a functional and durable woodworking bench. The presence of detailed frame construction guidance within instructions serves as a reliable indicator of the plan’s quality and the resulting workbench’s suitability for demanding woodworking applications. Comprehending the correlation between frame design and workbench performance enables informed decision-making when selecting building instructions and ultimately contributes to a successful construction outcome.
2. Flat Surface
The creation of a truly functional woodworking bench necessitates a meticulously flat work surface. Deviations from planarity introduce inaccuracies into woodworking operations, compromising the precision and quality of finished projects. Instructions for crafting a workbench must therefore prioritize achieving and maintaining a level plane.
- Material Selection and Stability
The inherent stability of the materials employed directly impacts the long-term flatness of the surface. Kiln-dried hardwoods, such as maple or beech, are less prone to warping and movement compared to softwoods or improperly dried lumber. Detailed instructions will specify appropriate material types and moisture content requirements to minimize subsequent distortion.
- Construction Techniques and Jointing Methods
Methods of assembly significantly influence surface flatness. Poorly executed joinery introduces unevenness and instability. Instructions should emphasize techniques that promote a level plane, such as planing individual components before assembly, employing robust joinery like mortise-and-tenon or rabbet joints, and using clamping strategies to ensure a flush fit during glue-up. Furthermore, the plan should detail the method of flattening the assembled top.
- Support Structure and Load Distribution
An inadequate support structure compromises the flatness of the surface under load. The instructions must account for appropriate spacing and sizing of support members, such as stretchers and aprons, to prevent sagging or deflection. Detailed plans will provide calculations or guidelines for determining the necessary support based on the intended weight capacity and dimensions of the bench.
- Maintenance and Surface Treatment
Even with careful construction, the surface may require periodic maintenance to maintain flatness. Instructions should include guidance on flattening techniques, such as hand planing or the use of a jointer. Furthermore, appropriate surface treatments, such as oil finishes or sealants, can help protect the wood from moisture absorption and reduce the likelihood of warping. This prolongs the life of the flat surface.
These facets underscore the critical role of flatness in the design and construction of a woodworking bench. Instructions lacking sufficient attention to material selection, construction techniques, support structure, and maintenance procedures are unlikely to yield a truly functional and reliable work surface. A focus on flatness enables accurate woodworking and increases the utility of the end product.
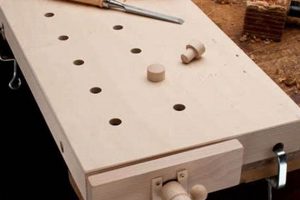
3. Vise Placement
Vise placement represents a critical consideration within the parameters of instruction sets for crafting a woodworking bench. The positioning of the vise, or vises, directly influences the bench’s utility and efficiency in securing workpieces for various operations. Improper vise placement can hinder accessibility, reduce clamping force, and limit the types of tasks that can be effectively performed. For instance, plans failing to account for the user’s dominant hand or typical project dimensions may result in a vise that is awkwardly positioned, making it difficult to securely clamp larger boards or perform tasks requiring intricate manipulation. Consider a scenario where the vise is located too close to a leg; it restricts the ability to clamp long workpieces vertically. Inefficient placement directly hinders project execution.
Instruction sets typically illustrate various vise configurations, including face vises, leg vises, and end vises, each suited for different clamping applications. Face vises, often mounted on the front apron of the bench, are versatile for general-purpose clamping. Leg vises, positioned flush with a leg, provide substantial clamping force for holding wide boards or panels vertically. End vises, integrated into the bench’s end, are particularly useful for securing long pieces for edge jointing or planing. The absence of detailed guidance on selecting and installing the appropriate vise for the intended woodworking tasks constitutes a significant deficiency in a set of plans. These plans often present multiple vise locations and types to allow user-level preferences. The correct installation is the difference between a quality product and poor bench design.
Effective vise placement is a paramount element in ensuring a woodworking bench’s functionality. Comprehensive instructional materials provide clear guidance on vise selection, positioning, and installation, tailored to the user’s specific needs and project requirements. Ultimately, a well-positioned vise enhances the bench’s versatility, improves workflow efficiency, and contributes to safer and more precise woodworking operations. Therefore, attention to vise placement is not merely an ancillary detail but a fundamental aspect of successful bench design and construction; plans without proper discussion are lacking in detail and purpose.
4. Storage Integration
The inclusion of integrated storage within designs for woodworking benches represents a significant enhancement to functionality and workflow. Proper storage optimizes the utilization of workspace, reduces clutter, and ensures tools and materials are readily accessible, thereby improving efficiency and safety.
- Tool Organization and Accessibility
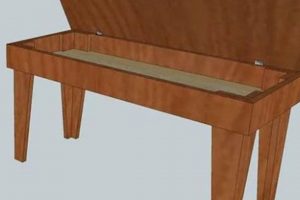
Dedicated storage solutions within a woodworking bench enable systematic organization of tools and accessories. Drawers, shelves, and pegboards provide designated locations for specific items, facilitating quick retrieval and minimizing time wasted searching for necessary implements. For example, a drawer designed to accommodate hand planes, with individual compartments to prevent damage, ensures immediate availability for planing operations. This contrasts with a scenario where tools are haphazardly stored, increasing the risk of damage and requiring excessive search time.
- Material Storage and Management
Efficient storage of lumber, hardware, and consumables contributes to a streamlined workflow. Shelves beneath the bench can accommodate dimensional lumber, while drawers or bins can house screws, nails, and other fasteners. This integration minimizes trips to external storage areas, conserving time and effort. For instance, designated bins for various screw sizes eliminate the need to sort through mixed containers, streamlining assembly processes. Without integrated material storage, the workshop would necessitate external storage; increasing the overall working footprint and impacting work flow.
- Workspace Optimization and Clutter Reduction
Integrated storage maximizes the usable area of the workbench and surrounding workspace. By containing tools and materials within the bench structure, clutter is minimized, creating a safer and more efficient work environment. For example, a pull-out tray designed to catch sawdust and shavings reduces the need for frequent sweeping, maintaining a cleaner work surface. Efficient space usage allows increased movement space and reduces the risks of trips or falls.
- Customization and Adaptability
The flexibility to customize storage configurations to suit individual needs and project requirements is a significant advantage. Adjustable shelves, modular drawers, and adaptable pegboard systems enable users to tailor the storage space to their specific tool collections and working styles. For instance, drawer dividers can be reconfigured to accommodate tools of varying sizes, maximizing storage efficiency. Adjustable storage options offers a flexible work environment to meet ever-changing demands.
The integration of storage solutions within woodworking bench designs directly impacts workflow efficiency, workspace organization, and tool accessibility. By incorporating thoughtfully designed storage elements, woodworking benches become more versatile and practical tools, enhancing productivity and minimizing wasted time and effort. The absence of well-considered storage features diminishes the overall value and usability of the bench, increasing the likelihood of clutter and inefficiency within the workshop.
5. Material Choice
The selection of appropriate materials constitutes a foundational aspect of executing woodworking station construction. The inherent properties of chosen substances directly influence the final bench’s durability, stability, and overall suitability for intended woodworking tasks. The correlation between substance selection and the ultimate success of a woodworking bench cannot be overstated; using materials incompatible with the stresses and demands of woodworking operations inevitably leads to premature failure or compromised functionality. For example, employing low-density softwood for the benchtop subjects it to excessive wear and tear from repeated hammering or clamping, potentially resulting in dents and surface irregularities that impede precision work. Alternatively, frame components crafted from green lumber will experience significant shrinkage as they dry, compromising the structural integrity of the bench.
Careful material evaluation also extends to hardware components. Fasteners, such as screws and bolts, must possess sufficient strength and corrosion resistance to withstand the forces generated during woodworking activities. Inferior hardware is prone to stripping, snapping, or corroding, jeopardizing the stability and safety of the bench. Likewise, the choice of finish materials plays a crucial role in protecting the workbench from moisture, chemicals, and abrasion. The selection of suitable hardware and finishes is an important step in the completion of a solid and reliable woodworking bench. The correct selection improves the benches lifespan.
In summary, material selection is not merely a peripheral consideration but rather an integral determinant of a woodworking bench’s quality and performance. By carefully evaluating the mechanical properties, durability, and environmental resistance of chosen substances, woodworkers can ensure the construction of a robust and functional workbench that serves as a reliable platform for years of woodworking endeavors. Therefore, prudent material evaluation constitutes a prerequisite for any successful bench-building undertaking. Neglecting this phase leads to predictable failures and compromises the usability of the finished product.
6. Ergonomic Height
The consideration of ergonomic height is a crucial element during the design and execution phases of building a woodworking bench from self-directed instructions. The workbench’s height directly impacts the user’s posture, comfort, and overall efficiency, influencing the potential for strain, fatigue, and long-term physical well-being.
- Posture and Reach
An improperly sized bench forces the user to adopt awkward postures, such as excessive bending or reaching, increasing the risk of musculoskeletal disorders. The ideal height allows for a natural standing posture with elbows bent at approximately 90 degrees when performing common tasks like planing or sawing. Woodworking instructions must provide guidance on determining the appropriate height based on individual anthropometric measurements.
- Force Exertion and Leverage
Workbench height influences the ability to apply force efficiently during woodworking operations. A bench that is too low restricts leverage, requiring greater effort to perform tasks such as hand planing. Conversely, a bench that is too high reduces control and increases the risk of injury. Instructions should include recommendations on adjusting height based on specific tasks and tool usage.
- Fatigue Reduction and Productivity
Prolonged woodworking sessions performed at a non-ergonomic height lead to increased fatigue and reduced productivity. A properly sized bench minimizes physical strain, allowing the user to work for longer periods without discomfort. Plans should emphasize the importance of taking breaks and adjusting the workbench height as needed to maintain optimal comfort and efficiency.
- Customization and Adjustability
The ability to customize or adjust the workbench height to accommodate different tasks, tools, and users is a valuable feature. Instructions may include designs for benches with adjustable legs or recommendations for adding shims to achieve the desired height. This versatility ensures the workbench remains ergonomically sound regardless of changing needs.
Ignoring ergonomic considerations during the woodworking bench construction process compromises both user comfort and long-term physical health. Detailed self-directed instructions prioritize ergonomic principles, providing guidance on determining and achieving the optimal workbench height for individual users and specific woodworking tasks. The thoughtful integration of ergonomic principles improves workflow efficiency and reduces the potential for injury or strain.
Frequently Asked Questions
The following section addresses common inquiries pertaining to instruction sets for creating a woodworking bench. The responses aim to provide clarity and address typical points of confusion encountered during the planning and construction processes.
Question 1: What level of woodworking experience is required to successfully execute these plans?
The requisite experience level varies significantly depending on the complexity of the design. Simpler plans utilizing basic joinery and readily available materials may be suitable for beginners. More intricate designs incorporating advanced joinery techniques and specialized hardware necessitate a higher degree of woodworking proficiency. Evaluation of the plan’s complexity prior to commencement is advisable.
Question 2: What tools are essential for building a woodworking bench?
A fundamental set of tools generally includes a measuring tape, saw (hand saw or circular saw), drill/driver, level, square, and clamps. Depending on the specific design, additional tools such as a router, planer, or jointer may be required for precise shaping and flattening of lumber. Assess the tool requirements outlined in the plan and ensure availability before starting construction.
Question 3: How much will it cost to construct a woodworking bench?
The cost of construction is contingent upon material selection, hardware choices, and tool availability. Utilizing reclaimed lumber or less expensive softwoods can reduce material expenses. The purchase of new tools or specialized hardware will increase the overall cost. Careful budgeting and material sourcing are essential for controlling project expenditures.
Question 4: What type of wood is best suited for a woodworking bench?
Hardwoods, such as maple, beech, or oak, are generally preferred due to their durability, stability, and resistance to wear. Softwoods, such as pine or fir, can be used for less critical components, but may require additional reinforcement. Consider the intended usage and budget constraints when selecting lumber.
Question 5: How can variations in shop floor be managed when building a woodworking bench?
Ensure a level foundation by employing adjustable feet or shims beneath the legs of the workbench. Utilize a level to verify the benchtop’s flatness after assembly and make adjustments as necessary. Addressing inconsistencies in the floor is crucial for maintaining a stable and functional work surface.
Question 6: How should the workbench surface be maintained for the long term?
Regular cleaning with a mild detergent and water is recommended. Periodic application of a protective finish, such as oil or varnish, helps to prevent moisture absorption and surface damage. Avoid exposing the bench to extreme temperatures or humidity fluctuations. Surface maintenance ensures long-term use.
This FAQ section provides fundamental insights into the execution of instruction sets for creating woodworking benches. Careful planning, material selection, and adherence to established woodworking principles are essential for a successful outcome.
The subsequent segment will delve into potential sources for acquiring instruction sets.
Conclusion
This exposition has addressed critical elements within the domain of diy woodworking bench plans, outlining pertinent considerations for material selection, construction techniques, storage solutions, ergonomic principles, and long-term maintenance. Successfully interpreting and implementing these plans hinges on understanding the interplay between design choices and intended application.
The pursuit of well-structured diy woodworking bench plans represents a commitment to both craftsmanship and workspace optimization. Diligent application of the outlined principles will likely yield a functional and durable workbench. The ultimate value resides in the user’s ability to adapt existing plans to meet individual needs and consistently adhere to sound woodworking practices, thereby fostering safety and precision within the workshop environment.


![Build Your Own: Woodworking Bench DIY Guide [Easy Steps] Step-by-Step Guides, Tools & Inspiration to Build Beautiful Wooden Decor on a Budget Build Your Own: Woodworking Bench DIY Guide [Easy Steps] | Step-by-Step Guides, Tools & Inspiration to Build Beautiful Wooden Decor on a Budget](https://woodfromhome.com/wp-content/uploads/2026/02/th-350-300x200.jpg)