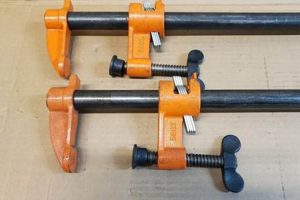
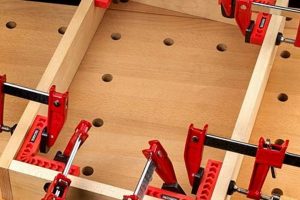
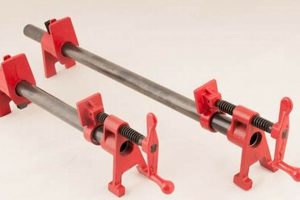
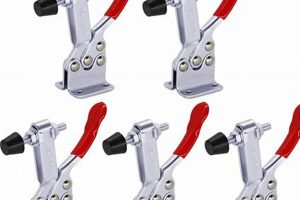
These essential tools, characterized by their “G” shape, are employed to securely hold workpieces together during gluing, fastening, or assembly in woodworking projects. Their design allows for significant clamping pressure, ensuring materials remain firmly in place. For example, when joining two pieces of wood with adhesive, these devices apply the necessary force to create a strong and lasting bond.
The utilization of these clamping devices offers several benefits. They facilitate precision and accuracy in woodworking, leading to higher quality finished products. Furthermore, their application contributes to safety by preventing movement of materials during potentially hazardous operations. Historically, similar clamping mechanisms have been used for centuries in various trades, highlighting their enduring value and adaptability.
The subsequent sections will delve into the different types available, factors to consider when selecting the appropriate size and strength, and proper usage techniques to maximize their effectiveness and longevity. Understanding these aspects will empower woodworkers to leverage these tools effectively in their craft.
Essential Usage Considerations
Effective application of these clamping implements requires attention to detail and adherence to established practices. The following tips outline key considerations for optimal performance and tool longevity.
Tip 1: Select the appropriate size. Choosing a size that matches the project’s dimensions ensures adequate clamping force without unnecessary strain on the device or the workpiece. An undersized clamp may not provide sufficient pressure, while an oversized one can be cumbersome.
Tip 2: Employ protective padding. Placing a buffer, such as wood scraps or specialized clamp pads, between the clamp jaws and the workpiece prevents marring of the material’s surface. This is particularly crucial when working with softwoods or pre-finished surfaces.
Tip 3: Distribute clamping pressure evenly. Using multiple implements spaced strategically along the joint or assembly helps ensure uniform pressure distribution. This minimizes the risk of warping or uneven bonding, particularly over longer spans.
Tip 4: Avoid over-tightening. Applying excessive force can damage the threads of the screw mechanism or crush the workpiece. Tighten the clamp until snug and then apply a moderate additional turn to secure the materials.
Tip 5: Clean and lubricate regularly. Removing debris and applying a light lubricant to the screw thread and swivel pad maintains smooth operation and prevents corrosion. Regular maintenance extends the lifespan of these tools.
Tip 6: Store properly. Storing these tools in a dry environment protects them from rust and corrosion. Consider hanging them on a rack or storing them in a dedicated toolbox to prevent damage.
By adhering to these guidelines, woodworkers can maximize the effectiveness and longevity of these tools, ensuring secure and precise results in their projects. These practices minimize the likelihood of material damage and contribute to a safer working environment.
The subsequent discussion will address advanced techniques and specialized applications, further enhancing the woodworker’s understanding of this indispensable tool.
1. Clamping Pressure
Clamping pressure, in the context of woodworking clamps, refers to the force exerted by the clamp on the materials being joined or held. It is a critical factor influencing the strength and integrity of the bond or assembly. Insufficient pressure can lead to weak joints and gaps, while excessive pressure may damage the materials. The design of “G” shaped clamping device allows for adjustable and considerable clamping pressure, facilitating robust connections in diverse woodworking tasks.
The importance of appropriate pressure is exemplified when gluing two pieces of wood together. Inadequate force will prevent the adhesive from fully bonding the surfaces, resulting in a fragile connection that is susceptible to failure under stress. Conversely, overtightening the screw mechanism may crush the wood fibers, weakening the joint and potentially causing visible indentations or damage. Properly applied clamping pressure, therefore, ensures optimal adhesive contact and prevents deformation of the materials.
Effective management of clamping pressure requires careful consideration of material properties, adhesive type, and joint design. The ability to accurately gauge and regulate the applied force is a key element in achieving professional-quality woodworking results. While variations in clamp design and operator technique can introduce inconsistencies, understanding the relationship between clamping pressure and joint integrity remains fundamental for any woodworker utilizing these tools.
2. Throat Depth
Throat depth, in the context of these clamping tools, designates the distance between the clamping bar and the screw spindle. This dimension directly determines the tool’s capacity to reach and apply pressure at a specific distance from the edge of a workpiece. Insufficient throat depth limits the clamp’s utility in projects requiring pressure further in from an edge, rendering it ineffective for securing joints or assemblies located centrally within larger pieces. The throat depth dictates where a clamp can effectively apply its force. For example, a narrow throat depth prevents these clamps from securing a central joint on a wide tabletop, as the spindle cannot reach far enough to exert pressure on the glue line.
The selection of an appropriate throat depth is paramount for successful woodworking outcomes. Larger throat depths accommodate a broader range of applications, allowing for the secure clamping of components in more complex assemblies. Consider a situation where an internal frame is being added to a cabinet door; a clamp with adequate throat depth is necessary to apply pressure to the joining surfaces. Conversely, smaller throat depths are suitable for edge-joining or smaller workpieces where accessibility is less of a concern. The practical implication is that an assortment of these clamping devices with varying throat depths is advantageous for a comprehensive woodworking shop, enabling adaptation to diverse project requirements.
In summary, throat depth represents a crucial factor influencing the functionality and versatility of woodworking clamping devices. Its consideration ensures that appropriate clamping force can be applied to specific areas of a project, maximizing the effectiveness of the clamping process and contributing to the overall quality of the finished product. Ignoring this aspect can lead to compromises in joint integrity or the inability to complete certain woodworking tasks efficiently. Understanding and appropriately selecting for throat depth is fundamental for the successful application of these tools.
3. Jaw Width
Jaw width, concerning woodworking clamps, dictates the surface area over which the clamping force is distributed. It directly impacts the clamp’s ability to securely hold a workpiece without causing damage or slippage. The jaw width of a clamping device must be considered to ensure effective and safe woodworking practices.
- Distribution of Clamping Force
A wider jaw distributes the clamping force over a larger area, reducing the pressure concentrated on any single point. This is particularly crucial when working with softer woods that are prone to indentation or crushing. Conversely, a narrow jaw focuses the force, which may be desirable for specific applications but increases the risk of damaging the workpiece. For instance, when gluing delicate veneer, a wider jaw minimizes the risk of leaving clamp marks.
- Stability and Grip
Increased jaw width enhances the stability and grip of the clamp on the workpiece. A broader contact surface provides a more secure hold, reducing the likelihood of slippage or movement during assembly. This is essential when working with irregular shapes or when applying significant force. Imagine a scenario where a clamp is used to hold a rounded piece of wood; a wider jaw would provide better purchase and prevent the workpiece from shifting.
- Compatibility with Material Thickness
The jaw width must be compatible with the thickness of the materials being clamped. If the jaw width is too small, the clamp may not be able to fully engage the workpiece, resulting in inadequate clamping force. Conversely, if the jaw width is excessively large, it can be cumbersome and may interfere with the surrounding workspace. When clamping multiple thin boards together, ensure the jaw width accommodates the combined thickness for optimal pressure distribution.
- Influence on Clamp Placement
Jaw width influences the placement of the clamp on the workpiece. A wider jaw may limit the clamp’s ability to fit into tight spaces or corners, while a narrower jaw offers greater flexibility in positioning. Consideration of jaw width is necessary when working on intricate projects with limited access. For example, when assembling a frame with tight corners, a clamp with a narrower jaw may be required to effectively apply pressure without obstruction.
In conclusion, jaw width represents a critical parameter in the selection and application of these woodworking clamps. Its influence on force distribution, stability, material compatibility, and clamp placement directly affects the outcome of woodworking projects. Careful consideration of jaw width ensures that the appropriate clamping force is applied safely and effectively, resulting in robust and aesthetically pleasing finished products.
4. Spindle Strength
Spindle strength constitutes a primary determinant of performance and longevity in woodworking clamping devices. The spindle, typically a threaded rod, is the component responsible for translating rotational force into clamping pressure. Its robustness directly correlates to the clamp’s ability to securely hold workpieces under load without deformation or failure.
- Material Composition and Load Capacity
The material from which the spindle is manufactured significantly affects its load capacity. Higher-strength alloys, such as hardened steel, can withstand greater forces before yielding or fracturing, allowing for higher clamping pressures to be applied. Lower-grade materials may deform under moderate loads, reducing the clamp’s effectiveness and potentially damaging the workpiece. For example, a spindle made from mild steel will likely exhibit greater thread wear and be more susceptible to bending compared to a hardened steel spindle under identical clamping conditions.
- Thread Design and Efficiency
The thread design influences the efficiency of force transmission and the susceptibility to thread stripping. Finer threads generally provide greater clamping force per rotation but may be more vulnerable to damage if overtightened. Coarser threads are more robust but require more rotation to achieve the same clamping pressure. The choice of thread design balances clamping force, durability, and ease of use. A poorly designed thread can lead to premature wear, binding, and ultimately, failure of the clamping device.
- Spindle Diameter and Bending Resistance
The diameter of the spindle directly correlates with its resistance to bending under load. A larger diameter spindle possesses greater cross-sectional area, thereby increasing its capacity to withstand lateral forces without deformation. Bending of the spindle can compromise the accuracy of the clamping process and potentially damage the workpiece. Consider a scenario where a large, heavy workpiece is being clamped; a spindle with a smaller diameter is more likely to bend, resulting in uneven pressure distribution and potential instability.
- Connection to Clamp Frame and Stability
The manner in which the spindle is connected to the clamp frame is crucial for maintaining overall stability and preventing premature failure. A secure and rigid connection minimizes play and prevents the spindle from wobbling under load. A weak or poorly designed connection can concentrate stress on the spindle, leading to fatigue and eventual breakage. Properly designed clamping devices incorporate robust spindle connections to ensure even distribution of clamping force and prevent localized stress concentrations.
These facets collectively demonstrate the critical role of spindle strength in the overall effectiveness and durability of woodworking clamping devices. The material composition, thread design, diameter, and connection to the frame all contribute to the clamp’s ability to securely hold workpieces and withstand the rigors of woodworking applications. Understanding these factors empowers woodworkers to select appropriate clamping devices and employ them effectively, thereby achieving precise and robust results.
5. Material Compatibility
Material compatibility, in the context of woodworking clamps, refers to the interaction between the clamp’s components and the materials being clamped. This encompasses potential chemical reactions, physical damage, and the suitability of the clamp’s design for different material properties. Incompatibility can lead to staining, indentation, or structural weakening of the workpiece. The material selection of clamp pads, jaws, and spindles directly impacts this compatibility.
One critical consideration is the use of protective padding between the clamp jaws and the workpiece surface. Direct contact with bare metal clamp surfaces can cause discoloration on certain woods, particularly those containing tannins. Softwoods are especially susceptible to indentation from the concentrated pressure of the clamp jaws. Examples of compatible padding materials include cork, leather, or specialized clamp pads made of non-marring polymers. These materials distribute the clamping force and prevent direct contact between the clamp and the workpiece, thereby mitigating the risk of damage. Furthermore, the choice of spindle material influences compatibility; stainless steel spindles are preferred for resisting corrosion when working with water-based adhesives or in humid environments. An inappropriate material selection can lead to oxidation, staining the wood and potentially weakening the clamp.
In summary, material compatibility is a crucial factor in the effective and safe utilization of these woodworking clamps. Failure to consider the interactions between the clamp components and the workpiece can result in cosmetic damage or structural compromise. Selection of appropriate padding materials and corrosion-resistant clamp components are essential for preserving the integrity of the project and ensuring the longevity of the clamping tools.
6. Pad Protection
Pad protection, in the context of woodworking clamping tools, serves as a critical interface between the clamp’s metal jaws and the workpiece. The primary effect of employing protective pads is the prevention of physical damage to the wood surface. Direct contact between the hardened steel of the clamp and the often softer wood can lead to indentation, compression of wood fibers, and unsightly marring. Pads, typically constructed from materials like cork, felt, leather, or specialized polymers, distribute the clamping force over a wider area, reducing the pressure per unit area and minimizing the risk of damage. Without this protective layer, even moderate clamping pressure can leave permanent marks, compromising the aesthetic quality of the finished piece. For instance, clamping a delicate piece of figured maple without pads would almost certainly result in visible compression marks around the perimeter of the clamp jaws. Understanding pad protection is thus essential for maintaining the integrity and visual appeal of woodworking projects.
Beyond preventing direct physical damage, appropriate padding material also addresses potential chemical interactions. Certain woods, such as oak, contain tannins that can react with ferrous metals, leading to staining or discoloration of the wood surface. Leather pads, for example, provide a barrier against this chemical reaction, protecting the wood from unwanted staining. Moreover, pad protection extends the lifespan of the clamps themselves. By preventing direct contact with the wood, the pads reduce the transfer of moisture and wood resins to the metal jaws, mitigating corrosion and maintaining the clamp’s functionality over time. Consider the long-term benefits: regularly replacing inexpensive pads is far more economical than replacing entire clamping implements due to corrosion damage.
In conclusion, pad protection is an indispensable component of proper clamping technique in woodworking. Its application safeguards both the workpiece from physical and chemical damage and the clamping tools from premature degradation. The selection of appropriate padding material should be informed by the specific wood species, the type of adhesive used, and the intended finish of the project. Implementing pad protection is a simple yet highly effective measure that ensures the longevity of both the project and the equipment used to create it.
Frequently Asked Questions About Woodworking Clamps
The following addresses common inquiries regarding the selection, application, and maintenance of these essential tools in woodworking.
Question 1: What constitutes an appropriate clamping pressure for softwood species?
Appropriate clamping pressure for softwoods, such as pine or cedar, is characterized by firm contact between the joined surfaces without causing visible indentation. Overtightening can crush the wood fibers, weakening the joint. A pressure level that ensures complete adhesive contact without deforming the material is optimal.
Question 2: How should the throat depth be determined for a given woodworking project?
The throat depth should be determined by measuring the distance from the edge of the workpiece to the point where clamping force is required. The chosen clamp must possess a throat depth sufficient to reach this point and apply pressure effectively. Failure to account for throat depth can render the clamp unusable for the intended application.
Question 3: What materials are suitable for protective padding to prevent damage to wood surfaces?
Suitable materials for protective padding include cork, leather, felt, and specialized polymer clamp pads. These materials provide a cushioning effect, distributing the clamping force and preventing direct contact between the clamp’s metal jaws and the wood surface. The selected material should be non-reactive with the wood and adhesive being used.
Question 4: What are the indications of a compromised spindle strength in a woodworking clamp?
Indications of compromised spindle strength include bending, thread stripping, and difficulty in tightening or loosening the clamp. These symptoms suggest that the spindle has been subjected to excessive force or wear and may be at risk of failure. A clamp exhibiting these issues should be retired from service to prevent potential injury or damage.
Question 5: How frequently should woodworking clamps be cleaned and lubricated to ensure optimal performance?
Woodworking clamps should be cleaned and lubricated at least every six months, or more frequently if used in demanding conditions. Removing debris and applying a light lubricant to the screw thread and swivel pad maintains smooth operation and prevents corrosion. Regular maintenance extends the lifespan and reliability of the tools.
Question 6: Is there a standardized method for assessing the clamping force exerted by a woodworking clamp?
While a standardized method for directly measuring clamping force in typical woodworking scenarios is not universally adopted, techniques involving calibrated load cells or pressure sensors can be employed. However, experienced woodworkers often rely on tactile feedback and visual inspection to determine adequate clamping pressure, avoiding overtightening that could damage the workpiece.
Proper utilization and maintenance contribute to the safety and precision achievable with these tools. Recognizing the nuances of their application is paramount for achieving quality woodworking results.
The next section will explore advanced techniques and specialized applications of woodworking clamping devices.
G Clamps for Woodworking
This exposition has provided a comprehensive overview of g clamps for woodworking, encompassing their fundamental function, selection criteria, optimal usage techniques, and considerations for maintenance. The discussion explored the importance of matching clamp size and strength to specific project requirements, emphasizing the role of protective padding in preventing workpiece damage, and underscoring the significance of even pressure distribution. Furthermore, the examination delved into specific parameters, such as clamping pressure, throat depth, jaw width, spindle strength, and material compatibility, highlighting their individual contributions to successful outcomes.
The effective utilization of g clamps for woodworking demands a thorough understanding of these principles. Proficiency in their application not only enhances the precision and durability of woodworking projects but also promotes a safer and more efficient working environment. Continued refinement of clamping techniques, coupled with informed equipment selection, remains essential for achieving professional-grade results in woodworking endeavors. Mastery of these tools is a hallmark of skilled craftsmanship.


