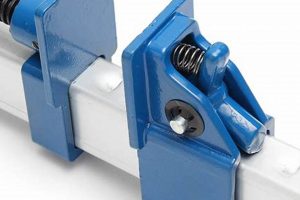
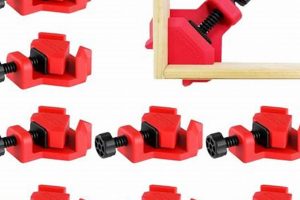
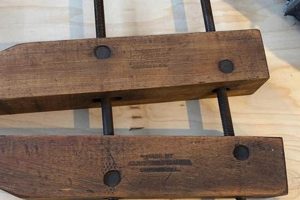
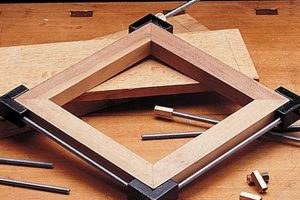
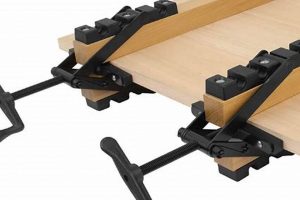
These specialized tools, employed in the discipline of shaping wood, provide adjustable pressure to hold components securely during bonding or assembly. The mechanism typically involves a bar or rail along which a clamping head slides, enabling adaptability to various work piece dimensions. As an illustration, consider their application in frame construction, where uniform and consistent force is essential for square joints.
Their utility stems from their capacity to exert even distribution of force across an extended area, minimizing the risk of material deformation or slippage. This functionality proves advantageous in projects demanding precision and structural integrity. Historically, the evolution of these implements reflects a continuous refinement in material science and mechanical design, aimed at optimizing clamping efficiency and user ergonomics.
The following sections will delve into considerations for selection, proper usage techniques, maintenance procedures, and prevalent applications within the woodworking domain. A thorough understanding of these aspects is crucial for realizing their full potential and ensuring project success.
Essential Considerations for Clamping Wood
Effective utilization hinges on proper selection and application. The following guidance addresses key factors to optimize clamping operations.
Tip 1: Assess Material Compatibility: Ensure the clamping pads are compatible with the wood species. Direct contact with metal components can cause undesirable markings or staining, particularly on porous or tannin-rich varieties. Consider employing protective pads made from cork or plastic.
Tip 2: Evaluate Clamping Force Requirements: Different adhesives necessitate varying levels of pressure. Over-tightening can damage delicate stock, while insufficient force may compromise joint integrity. Consult adhesive specifications to determine optimal compression values.
Tip 3: Confirm Parallel Alignment: Maintaining parallel alignment between the clamping faces prevents distortion and ensures uniform pressure distribution across the bonded surfaces. Misalignment can lead to weak joints or structural instability.
Tip 4: Verify Clamping Capacity: Prior to commencing the operation, confirm that the implement’s maximum opening capacity is sufficient to accommodate the dimensions of the work piece. Attempting to exceed the specified limit can damage the clamp and compromise its holding power.
Tip 5: Implement a Strategic Clamping Sequence: Develop a deliberate clamping sequence to prevent component shifting or misalignment during the tightening process. Employ a staggered approach, gradually increasing pressure on alternating sides of the assembly.
Tip 6: Regularly Inspect for Damage: Periodically examine the apparatus for signs of wear, such as bent bars, stripped threads, or damaged pads. Prompt replacement of compromised components is crucial for maintaining operational safety and clamping efficiency.
Tip 7: Proper Storage Practices: Store the tools in a clean, dry environment to prevent corrosion and maintain their functionality. Applying a light coat of lubricant to the threaded components can extend their lifespan.
Adhering to these principles facilitates secure and precise work holding, contributing to enhanced project quality and longevity.
The subsequent discussion will explore specific applications and advanced techniques.
1. Bar Length
Bar length constitutes a fundamental parameter in the selection and application of these woodworking tools. It dictates the maximum dimensional capacity of a work piece that can be accommodated. Selection of an inadequate length restricts project scope, while excessive length can impede maneuverability and increase operational difficulty. The optimal length balances these competing considerations.
- Work Piece Dimensions
The primary determinant of bar length lies in the dimensions of the materials being joined. The bar must extend sufficiently to encompass the full width or length of the assembly at its widest point, plus any allowance for the clamping pads. Failure to accommodate these dimensions renders the clamp unsuitable for the task. An example includes assembling a wide tabletop requiring a longer clamping reach.
- Clamping Arrangement
The configuration of the clamping setup influences the required bar length. Complex assemblies necessitating multiple clamps positioned at intervals may demand longer bars to provide adequate support and distribution of pressure. A frame construction employing multiple parallel clamps would illustrate this principle.
- Maneuverability and Accessibility
Extended bar lengths can hinder maneuverability in confined workspaces. Clamps with excessive reach may prove unwieldy, particularly in intricate projects involving small components. Consequently, selecting the shortest viable length optimizes accessibility and ease of operation.
- Storage Considerations
Storage limitations can impact the practicality of employing very long clamping apparatus. Workshops with limited space may necessitate prioritizing shorter, more compact versions. Efficient storage solutions are crucial for maintaining organization and preventing damage to these tools.
Therefore, informed selection of bar length requires a comprehensive assessment of work piece dimensions, clamping arrangements, operational workspace, and storage constraints. Careful consideration of these factors ensures optimal functionality and workflow efficiency in the woodworking environment.
2. Clamping Pressure
Clamping pressure, the compressive force exerted by a clamp on a work piece, is a critical parameter affecting joint integrity in woodworking. The proper application of this force, achieved through a sliding clamp mechanism, dictates the strength and longevity of bonded assemblies.
- Adhesive Type and Bond Strength
Different adhesives necessitate varying levels of compressive force to achieve optimal bond strength. Polyvinyl acetate (PVA) adhesives typically require moderate clamping pressure, while epoxy resins may demand higher levels. Insufficient force results in weak bonds, while excessive force can starve the joint of adhesive or damage the work piece.
- Wood Species and Density
The species and density of wood influence the required clamping pressure. Softer woods, such as pine or basswood, necessitate reduced pressure to avoid compression or indentation. Denser hardwoods, like oak or maple, can withstand higher pressure levels. Matching the force to the material properties is essential for preventing damage and ensuring secure adhesion.
- Joint Geometry and Surface Area
The geometry and surface area of the joint impact the distribution of clamping pressure. Intricate joint designs with limited surface area may require higher localized pressure to achieve adequate bonding. Conversely, large, flat surfaces can be effectively bonded with lower, more evenly distributed force. The sliding clamps adjustability proves beneficial in accommodating varied joint configurations.
- Clamp Mechanism and Force Distribution
The design and construction of the sliding clamp influence the uniformity of force distribution across the joint. Clamps with rigid bars and precisely machined jaws ensure even pressure, minimizing the risk of localized stress concentrations. Flexible or poorly constructed clamps may exhibit uneven force distribution, leading to inconsistent bond strength.
The interplay between adhesive properties, wood characteristics, joint design, and clamp mechanics directly influences the success of the bonding process. Precisely calibrated clamping pressure, facilitated by a well-designed sliding clamp, is therefore essential for achieving robust and durable woodworking joints.
3. Jaw Material
The composition of clamping jaws directly influences the outcome of woodworking operations. Jaw material within sliding clamps acts as the intermediary between the clamping force and the wooden surface. The hardness, texture, and chemical properties of this material significantly determine the potential for damage, staining, or slippage during the clamping process.
Consider a scenario involving the assembly of fine cabinetry using delicate hardwoods. Clamps equipped with hardened steel jaws may impart undesirable indentations or blemishes on the wood surface, compromising the aesthetic quality of the finished product. Conversely, jaws constructed from softer materials, such as wood or specialized polymers, distribute force more evenly, minimizing the risk of surface damage. The material also plays a role in preventing slippage. Jaws with a textured or non-slip surface enhance grip, ensuring that the work piece remains securely positioned during adhesive curing or assembly. The choice of material should be informed by the wood species, adhesive type, and desired surface finish.
Effective utilization of sliding clamps in woodworking necessitates a careful consideration of jaw material. Selecting appropriate materials, such as cork, specialized polymers or even sacrificial wooden blocks, ensures optimal clamping performance without compromising the integrity or aesthetic appeal of the finished wood product. The material properties directly impact the clamping effectiveness and the final quality of woodworking projects.
4. Parallel Alignment
Maintaining parallel alignment between the clamping faces of sliding clamps is paramount in woodworking to ensure uniform pressure distribution and structural integrity. Deviations from parallelism can lead to skewed joints, weakened bonds, and compromised project quality. The adjustable nature of sliding clamps makes achieving this alignment achievable, but also places responsibility on the user to verify and correct potential misalignments.
- Ensuring Square Joints
Non-parallel clamping introduces stress concentrations, distorting the joint during adhesive curing. If the clamping faces are not parallel, one edge of the joint receives significantly more pressure than the opposing edge, resulting in a skewed or weakened connection. The use of squares and measuring devices is crucial to verify and correct any misalignment prior to final tightening.
- Distributing Clamping Force Evenly
The primary function of a clamp is to apply uniform pressure across the entire joint surface. When faces are not parallel, this even distribution is compromised. Certain portions of the joint will bear the brunt of the clamping force, potentially crushing fibers or starving other sections of adequate adhesive contact. Parallelism ensures equal force application, promoting consistent bond strength.
- Preventing Material Distortion
Uneven clamping force arising from misaligned clamp faces can induce bending or warping in the work piece. Thin or delicate materials are particularly susceptible to this type of distortion. Maintaining parallel alignment minimizes the risk of deformation, preserving the intended shape and dimensions of the components being joined.
- Enhancing Adhesive Bond Integrity
Parallel clamping promotes optimal contact between the adhesive and the wood surfaces. Consistent pressure distribution across the joint facilitates uniform adhesive flow and penetration, maximizing the bonding surface area and overall bond strength. This is particularly relevant when working with complex joint designs or porous wood species.
In summary, parallel alignment is a fundamental consideration in woodworking operations involving sliding clamps. Proper attention to this aspect enhances joint strength, prevents material distortion, and ultimately contributes to the creation of durable and aesthetically pleasing finished products. The adjustable nature of sliding clamps necessitates careful setup to capitalize on their functionality.
5. Throat Depth
Throat depth, a critical dimension of sliding clamps, dictates the maximum distance a clamping force can be applied from the edge of a work piece. In woodworking, the available throat depth limits the positioning and effectiveness of the clamp, directly impacting the feasibility of certain joint configurations and assembly techniques. Insufficient depth constrains the clamp’s reach, potentially necessitating alternative clamping methods or compromising the integrity of edge-to-edge bonds. For instance, clamping the center of a wide panel for glue-up requires substantial throat depth to exert pressure effectively across the entire surface.
Practical applications further illustrate the significance of throat depth. When assembling frame-and-panel constructions, the depth determines whether a clamp can directly apply force to the panel within the frame, ensuring a tight, gap-free fit. Similarly, in edge-banding operations, insufficient depth hinders the clamp’s ability to hold the banding securely to the substrate, increasing the risk of adhesive failure or misalignment. The selection of the appropriate implement necessitates a careful evaluation of the projects specific requirements.
In summary, throat depth plays a central role in the functionality of sliding clamps in woodworking. Its limitation directly affects the applicability of these tools in various scenarios. A thorough understanding of its importance is essential for selecting and employing implements effectively, ensuring project success and upholding construction standards. Overcoming the limitations of throat depth may require innovative clamping strategies or specialized tooling to accommodate complex woodworking projects.
6. Release Mechanism
The release mechanism in sliding clamps serves a critical function, enabling the controlled loosening and removal of the clamping force following adhesive curing or assembly. Its design and operational efficiency directly influence the workflow and potential for damaging the work piece. A well-engineered mechanism facilitates quick and damage-free clamp removal, while a poorly designed one can impede the process and increase the risk of joint disruption.
- Speed and Efficiency of Operation
The release mechanism significantly affects the time required to disengage the clamp. Mechanisms employing quick-release levers or cam systems enable rapid disengagement, optimizing productivity in high-volume woodworking applications. Conversely, threaded spindles require more time to unwind, potentially slowing down the workflow. The example of a furniture manufacturer assembling multiple components daily highlights the importance of an efficient release mechanism.
- Control over Pressure Release
A controllable release mechanism allows for the gradual reduction of clamping force, mitigating the risk of sudden joint disruption or component shifting. This is particularly relevant when working with brittle materials or complex joints that are susceptible to stress cracking. A threaded spindle, with its fine pitch, offers greater control over the release compared to a cam-action mechanism.
- Durability and Longevity
The materials and construction of the release mechanism influence its durability and long-term reliability. Mechanisms subjected to frequent use and high clamping forces require robust construction to withstand wear and tear. A cast iron or hardened steel mechanism typically exhibits greater durability than one constructed from plastic or soft metals.
- Ergonomics and User Experience
The design of the release mechanism directly impacts the user’s experience. Ergonomic handles and intuitive release actions reduce operator fatigue and improve ease of use. A mechanism that requires excessive force or awkward manipulation can increase the risk of injury or operational errors.
Therefore, the release mechanism is an integral component of sliding clamps, influencing efficiency, control, durability, and user experience. Woodworkers must carefully consider these factors when selecting the appropriate clamps for their specific needs. Comparing the quick-release action of a modern clamp to the cumbersome unwinding of older designs demonstrates the impact of this often-overlooked feature.
Frequently Asked Questions about Sliding Clamps in Woodworking
This section addresses common inquiries regarding the selection, application, and maintenance of these specialized woodworking tools, aiming to provide clarity and promote informed usage.
Question 1: What constitutes the primary advantage of a sliding clamp over other clamping methodologies?
The principal benefit lies in its adjustable clamping range. The sliding head allows for accommodation of varying work piece dimensions without requiring multiple clamps of differing sizes, enhancing versatility and efficiency.
Question 2: How does one ascertain the appropriate clamping pressure for a given woodworking project?
Optimal clamping pressure depends on the adhesive type, wood species, and joint geometry. Adhesive manufacturers typically specify recommended pressure ranges. Consideration must be given to the compressive strength of the material to avoid deformation.
Question 3: What materials are suitable for clamping pads, and what factors influence the selection process?
Acceptable materials include cork, felt, leather, and specialized polymers. The primary considerations involve preventing marring of the wood surface and ensuring compatibility with the adhesive to avoid adverse chemical reactions.
Question 4: How should sliding clamps be maintained to ensure longevity and optimal performance?
Regular maintenance should encompass cleaning to remove adhesive residue, lubricating threaded components, and inspecting for signs of wear or damage. Prompt replacement of compromised parts is essential.
Question 5: What is the significance of jaw parallelism, and how can it be verified?
Jaw parallelism ensures uniform pressure distribution across the joint, preventing skewed bonds and material distortion. Parallelism can be verified using a precision square or by visually inspecting the contact between the clamping faces and a flat reference surface.
Question 6: Are there specific safety precautions to be observed when utilizing these devices?
Safety protocols include wearing appropriate eye protection, avoiding over-tightening, and ensuring the work piece is stable before releasing the clamping pressure. Damaged or malfunctioning clamps should be removed from service.
Proper understanding of these aspects contributes to successful and safe utilization of sliding clamps, resulting in enhanced project outcomes. Their application is often at the center of any project
The subsequent discussion will explore more in-depth projects and applications.
Sliding Clamps in Woodworking
This exposition has elucidated the multifaceted role of sliding clamps woodworking, underscoring their pivotal function in achieving precision, structural integrity, and aesthetic quality in woodworking projects. Examination of essential considerations, including bar length, clamping pressure, jaw material, parallel alignment, throat depth, and release mechanism, reveals the intricate interplay of factors influencing clamping effectiveness. Frequently asked questions further clarified nuances in their application and maintenance.
Mastery of sliding clamps woodworking empowers craftsmen to execute intricate designs, ensure robust joinery, and elevate the overall standard of their work. Continued refinement of clamping techniques, coupled with judicious selection of appropriate implements, remains crucial for advancing the art and science of woodworking. The effectiveness of clamping should not be underestimated.


