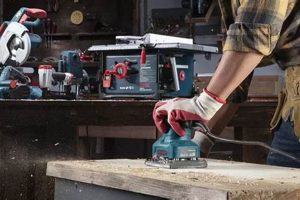
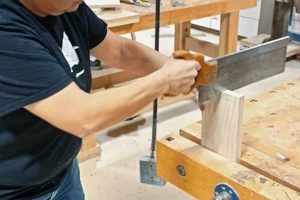
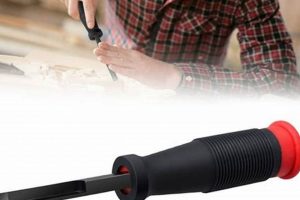
A specialized implement used in woodworking, it creates an angled edge between two faces of a workpiece. This angled edge, also known as a bevel, can be applied for decorative purposes, to ease handling, or to prevent splintering of a sharp corner. For example, a cabinet maker might use this type of tool to soften the edges of a tabletop, providing a more comfortable and visually appealing surface.
The implementation of angled edges enhances both the aesthetic appeal and the functional properties of wooden objects. Historically, these edges were painstakingly crafted by hand using planes and chisels. The introduction of dedicated devices, however, has significantly increased efficiency and precision in producing consistent and repeatable angled features. This has led to widespread use in furniture making, trim carpentry, and other areas of woodworking.
The subsequent sections of this discussion will delve into the various types available, their specific applications, and techniques for achieving optimal results. Emphasis will be placed on selecting the appropriate tool for a given task and mastering the skills necessary for safe and accurate operation.
Operational Guidance
The following guidelines offer practical advice for maximizing the effectiveness and lifespan of these tools while ensuring user safety and project quality.
Tip 1: Blade Sharpness is Paramount. A dull blade necessitates increased force, leading to potential inaccuracies and safety hazards. Regularly sharpen or replace blades according to manufacturer specifications.
Tip 2: Secure Workpiece Fixation. Ensure the workpiece is firmly clamped or held in place to prevent movement during operation. Unstable material increases the risk of slippage and inaccurate angles.
Tip 3: Consistent Feed Rate. Maintain a smooth and uniform cutting speed. Abrupt changes in pressure or feed rate can result in uneven or jagged angled edges.
Tip 4: Depth Adjustment Precision. Accurately set the desired depth of cut prior to operation. Incremental adjustments allow for controlled material removal and prevent over-cutting.
Tip 5: Grain Direction Awareness. Consider the grain direction of the wood. Cutting against the grain may cause tear-out or splintering, requiring a modified approach or specialized technique.
Tip 6: Practice on Scrap Material. Before working on the final project, practice on scrap wood to refine technique and ensure accurate settings. This minimizes the risk of errors on valuable material.
Tip 7: Regular Cleaning and Maintenance. After each use, clean the tool thoroughly to remove wood dust and debris. Lubricate moving parts as recommended by the manufacturer to maintain optimal performance and extend the tool’s lifespan.
Adherence to these best practices enhances the precision, safety, and longevity associated with these specialized woodworking implements, contributing to a higher quality finished product.
The subsequent section will address common challenges encountered during operation and offer troubleshooting strategies for resolving them efficiently.
1. Blade Angle
The blade angle is a fundamental characteristic dictating the geometry of the angled edge produced by the woodworking chamfer implement. It directly influences the aesthetic and functional properties of the resulting chamfer.
- Chamfer Slope and Aesthetics
The blade angle determines the slope of the chamfered edge. A steeper angle results in a more pronounced bevel, while a shallower angle produces a subtler transition. This directly affects the visual appearance and tactile feel of the workpiece. For example, a 45-degree angle is commonly used for decorative purposes, creating a distinct and symmetrical bevel. Conversely, a 15-degree angle might be used to slightly ease a sharp edge, providing a more comfortable grip without a visually prominent bevel.
- Cutting Efficiency and Force
A more acute blade angle (smaller angle) can require less force to initiate a cut, making it easier to work with harder woods. However, it may be more prone to chipping or tear-out. A more obtuse angle (larger angle) may require more force but can produce a cleaner cut, especially on woods prone to splintering. The selection of blade angle must consider the hardness and grain structure of the material being worked.
- Durability and Edge Retention
The blade angle influences the durability of the cutting edge. A steeper angle is typically more fragile and prone to dulling quickly, especially when working with abrasive materials. A shallower angle is more robust and retains its sharpness for a longer period. Regular sharpening or replacement of the blade is essential to maintain optimal performance, irrespective of the angle.
- Adjustability and Versatility
Certain woodworking chamfer tools offer adjustable blade angles, providing increased versatility. This allows a single tool to create a range of chamfer profiles, accommodating diverse design requirements. Such adjustability is particularly useful for projects involving varying edge treatments or working with a wide range of wood species.
In summary, the selection of an appropriate blade angle is a critical consideration when using a woodworking chamfer implement. It directly impacts the aesthetics, efficiency, durability, and versatility of the process. Careful consideration of material properties and desired outcome is essential for achieving optimal results.
2. Cutting Depth
Cutting depth, in the context of woodworking chamfer tools, refers to the amount of material removed from the edge of a workpiece to create the angled surface. Accurate control over cutting depth is paramount for achieving consistent and aesthetically pleasing results. Deviation from the intended depth can compromise the integrity and visual harmony of the finished piece.
- Influence on Chamfer Size and Visual Impact
The cutting depth directly dictates the size of the resulting angled edge. A larger depth creates a more pronounced and visually dominant chamfer, while a smaller depth produces a subtle, almost imperceptible bevel. For instance, a deep chamfer on a table edge might be used for a bold, contemporary design, whereas a shallow chamfer on a drawer front might be employed to soften the edge without drawing excessive attention. Inconsistencies in cutting depth across multiple edges can lead to a visually unbalanced and unprofessional appearance.
- Correlation with Tool Stability and Control
The selected cutting depth influences the stability and control required during operation. A deeper cut necessitates greater force and increases the risk of the tool deviating from the intended path. Shallow cuts offer more control and reduce the likelihood of errors, particularly when working with intricate designs or delicate materials. Adjusting the tool settings for appropriate depth is crucial for maintaining a safe and accurate workflow.
- Material Properties and Cutting Depth Adjustment
The ideal cutting depth is influenced by the material properties of the wood being worked. Softer woods typically allow for deeper cuts without significant risk of splintering or tear-out. Conversely, hardwoods or brittle materials may require shallower cuts to prevent damage. The operator must adjust the cutting depth based on the specific characteristics of the wood to achieve a clean and precise chamfer.
- Impact on Structural Integrity and Edge Durability
Excessive cutting depth can compromise the structural integrity of the workpiece, particularly when applied to thin or load-bearing edges. Removing too much material can weaken the edge and make it susceptible to damage. Conversely, an insufficient cutting depth may not provide the desired aesthetic or functional benefit. Careful consideration of the structural implications is essential when determining the appropriate cutting depth for a given application.
In conclusion, the relationship between cutting depth and the application of a woodworking chamfer tool is a critical element in achieving desired outcomes. Mastering the ability to precisely control cutting depth, while considering material properties and structural implications, is essential for any woodworker seeking to produce high-quality, visually appealing, and durable finished products.
3. Material Compatibility
Material compatibility is a pivotal consideration when utilizing a woodworking chamfer tool. The tool’s effectiveness and the quality of the finished product are directly influenced by the interaction between the tool’s cutting edge and the material being worked. Selecting an appropriate tool and technique based on the wood species and its properties is essential for preventing damage and achieving the desired results.
- Wood Hardness and Cutting-Edge Geometry
Wood hardness, measured by the Janka hardness scale, significantly impacts the selection of cutting-edge geometry and the force required for operation. Hardwoods, such as maple and oak, necessitate sharper, more durable blades and a controlled, steady feed rate to prevent burning or chipping. Softwoods, such as pine and cedar, are more susceptible to tear-out if the blade is not exceptionally sharp and the cutting angle is not optimized. An example of this is evident when using a standard chamfer plane on mahogany, a moderately hard wood. A blade with a steeper bevel angle will be more effective in preventing tear-out compared to a blade with a shallower angle.
- Grain Direction and Cutting Technique
The direction of the wood grain relative to the cutting direction greatly influences the outcome. Cutting against the grain often leads to splintering and a rough finish, particularly in woods with interlocked grain patterns. To mitigate this, a back bevel can be implemented, or cuts can be performed in multiple passes with progressively increasing depths. Consider the process of chamfering the end grain of a piece of walnut. If cut directly against the grain, the end grain fibers are likely to tear. A better approach involves using a sharp blade and making shallow cuts, working from the edges towards the center.
- Resin Content and Tool Maintenance
Woods with high resin content, such as pine and redwood, can deposit sticky residue on the cutting edge, increasing friction and reducing cutting efficiency. This buildup necessitates more frequent cleaning and maintenance to ensure optimal tool performance. Periodically cleaning the blade with a solvent and applying a lubricant can help prevent resin accumulation and maintain a smooth cutting action. Neglecting to clean a chamfer tool after working with resinous woods can lead to diminished performance and reduced tool life.
- Exotic Woods and Blade Composition
Exotic woods often contain oils, minerals, or silica that can rapidly dull the cutting edge of standard steel blades. In such cases, using tools with carbide-tipped blades or specialized high-speed steel (HSS) is recommended. These materials offer superior wear resistance and maintain sharpness for longer periods when working with abrasive woods. For example, when chamfering teak, a wood known for its high silica content, a carbide-tipped blade will significantly outperform a standard steel blade in terms of edge retention and cutting quality.
In summary, the proper selection and application of a woodworking chamfer tool necessitates a thorough understanding of material properties and their interaction with the tool’s cutting edge. Paying close attention to wood hardness, grain direction, resin content, and the presence of abrasive elements ensures optimal tool performance, minimizes material damage, and ultimately contributes to a superior finished product. Failure to consider these factors can lead to inefficient operation, compromised aesthetic quality, and reduced tool longevity.
4. Edge Quality
Edge quality, in the context of woodworking, directly reflects the precision and smoothness achieved when creating angled surfaces with a specialized implement. The resulting edge finish is a critical determinant of both the aesthetic appeal and functional performance of the finished piece.
- Smoothness and Surface Texture
The smoothness of the chamfered edge is a primary indicator of quality. A smooth edge exhibits minimal surface imperfections, tear-out, or grain irregularities. This characteristic is often achieved through the use of a sharp blade, appropriate cutting angles, and careful attention to grain direction. For instance, a well-tuned block plane used as a chamfering tool can produce a glass-like surface on hardwoods, enhancing the tactile and visual appeal of furniture components. Conversely, a dull blade or incorrect technique can result in a rough, uneven surface that detracts from the overall quality.
- Precision and Dimensional Accuracy
The dimensional accuracy of the angled edge is equally important. A high-quality chamfer maintains consistent dimensions along its length and matches the intended specifications. Variations in angle or width can create visual distortions and compromise the fit and function of mating parts. Dedicated chamfering tools often incorporate adjustable fences and depth stops to ensure precise and repeatable results. A slight deviation from the intended chamfer angle on a cabinet door frame, for example, can result in misalignment and detract from the overall craftsmanship.
- Absence of Tear-out and Splintering
Tear-out and splintering are common defects that significantly reduce edge quality. These imperfections occur when wood fibers are prematurely detached from the surface during the cutting process. Factors contributing to tear-out include a dull blade, aggressive cutting angles, and unfavorable grain direction. Employing sharp tools, controlling the depth of cut, and using backer boards or scoring techniques can minimize these issues. The presence of even minor tear-out along a chamfered edge is often considered unacceptable in high-end woodworking projects.
- Consistent Edge Profile and Uniformity
The uniformity of the edge profile is a key aspect of overall edge quality. A consistent profile indicates that the chamfer was created with careful attention to detail and a stable cutting process. Variations in the edge profile can be caused by tool chatter, inconsistencies in feed rate, or play in the tool’s adjustment mechanisms. A well-maintained chamfering tool with tight tolerances and smooth operation is essential for achieving a uniform and visually appealing edge profile. A chamfer exhibiting an inconsistent profile on a molding detail can disrupt the flow of the design and appear unprofessional.
In conclusion, achieving high edge quality when chamfering wood requires a combination of sharp tools, precise techniques, and careful attention to detail. The resulting edge should be smooth, dimensionally accurate, free from tear-out, and exhibit a consistent profile. These qualities are paramount for enhancing both the aesthetic appeal and functional performance of woodworking projects.
5. User Safety
The operation of a woodworking chamfer tool, like any power or hand tool, presents inherent safety risks that demand careful consideration and adherence to established safety protocols. Mitigating these risks protects the user from potential injury and ensures a safe working environment.
- Eye Protection and Projectile Hazards
Woodworking operations frequently generate small chips and dust particles that can become airborne projectiles. These particles pose a significant risk to the eyes, potentially causing irritation, abrasions, or more severe injuries. The consistent use of appropriate eye protection, such as safety glasses or a face shield, is essential when operating a chamfer tool. This protective barrier safeguards the eyes from these hazardous projectiles. An instance of this can be seen in a workshop where, despite wearing eye protection, a splinter still manages to find its way into the area around the eye, underscoring the need for full coverage.
- Hand Placement and Cut Direction
Maintaining proper hand placement during operation is critical to prevent accidental contact with the cutting edge. Hands should be kept clear of the tool’s path and the direction of cut. The use of push sticks or clamps can further enhance safety by providing a means to guide the workpiece without placing hands in close proximity to the blade. A common scenario occurs when a user attempts to hand-hold a small piece of wood while chamfering, increasing the risk of slippage and potential injury. Adhering to safe hand placement practices minimizes the potential for such accidents.
- Dust Collection and Respiratory Protection
Many woodworking processes generate fine dust particles that, when inhaled, can pose respiratory health risks. Prolonged exposure to wood dust can lead to respiratory irritation, allergic reactions, or more serious conditions. Implementing effective dust collection measures, such as connecting the chamfer tool to a dust extractor or using a shop vacuum, minimizes the amount of airborne dust. In situations where dust collection is limited, wearing a properly fitted respirator or dust mask provides essential respiratory protection. Consider a scenario where a woodworker is creating chamfers on MDF (Medium Density Fiberboard), a material known to produce very fine and potentially harmful dust. In this case, both dust collection and respiratory protection are crucial.
- Tool Maintenance and Blade Sharpness
The condition of the chamfer tool itself plays a significant role in user safety. A dull blade necessitates increased force to perform the cut, which can lead to loss of control and potential injury. Regular maintenance, including sharpening or replacing dull blades, ensures efficient and safe operation. A tool with loose or damaged components also presents a safety hazard. Routine inspection and repair of the tool are essential to maintain its safe operating condition. An example of this would be a user attempting to chamfer wood with a dull hand plane; the increased force required could cause the tool to slip, resulting in a cut.
These facets of user safety are integral to the responsible operation of a woodworking chamfer tool. Diligence in adhering to these precautions reduces the likelihood of accidents and promotes a safer and more productive woodworking experience. Recognizing the potential hazards and implementing appropriate safety measures is paramount for all users, regardless of skill level.
6. Maintenance Requirements
Consistent maintenance is essential for ensuring the longevity, accuracy, and safe operation of any woodworking chamfer implement. Neglecting routine maintenance can lead to diminished performance, increased risk of accidents, and a shortened tool lifespan. The following points outline key facets of necessary upkeep.
- Blade Sharpening and Edge Preservation
The sharpness of the blade directly impacts the efficiency and quality of the angled edge produced. Dull blades require more force, leading to inaccurate cuts and potential kickback. Regular sharpening, using appropriate sharpening stones or honing systems, preserves the blade’s cutting edge. The frequency of sharpening depends on the type of wood being worked and the intensity of tool use. Failure to maintain a sharp blade increases the risk of tear-out and reduces the tool’s overall effectiveness. For example, a block plane used as a chamfering tool requires frequent honing to maintain a fine edge for smooth cuts, especially on hardwoods.
- Cleaning and Debris Removal
Wood dust, resin, and other debris can accumulate on the tool’s components, hindering its performance and potentially causing damage. Regular cleaning after each use is essential. Brushes, compressed air, and appropriate solvents can be used to remove these contaminants. Accumulation of resin on the blade, for example, increases friction and reduces the tool’s ability to make clean cuts. Neglecting to remove debris can lead to premature wear and corrosion of critical parts. Proper cleaning ensures smooth operation and extends the tool’s lifespan.
- Lubrication of Moving Parts
Many chamfer tools incorporate moving parts, such as adjustment mechanisms and blade depth controls. These parts require periodic lubrication to ensure smooth and accurate operation. Applying a light oil or lubricant to these components reduces friction and prevents corrosion. For instance, the adjustment screw on a chamfer plane benefits from regular lubrication to maintain its precision and prevent binding. Neglecting lubrication can lead to stiffness, inaccurate adjustments, and eventual failure of the moving parts.
- Inspection and Component Replacement
Regular inspection of the tool is crucial to identify any worn or damaged components. Loose screws, cracked handles, or damaged blades should be addressed promptly. Replacing worn components ensures the tool’s safe and accurate operation. For example, a loose handle on a hand plane can compromise the user’s grip and increase the risk of accidents. Timely replacement of worn parts prevents further damage and maintains the tool’s optimal performance. Periodic inspection also allows for proactive identification of potential problems before they escalate into major repairs.
These maintenance practices are indispensable for preserving the functionality and safety of woodworking chamfer tools. Consistent attention to blade sharpness, cleanliness, lubrication, and component integrity ensures that these tools perform reliably and accurately throughout their service life. Neglecting these requirements not only reduces the quality of the finished product but also increases the risk of accidents and premature tool failure.
Frequently Asked Questions
The following questions address common inquiries regarding the selection, application, and maintenance of these specialized implements. The answers provided aim to clarify proper usage and ensure optimal results.
Question 1: What differentiates a chamfer tool from a standard plane?
While a standard plane is designed to flatten surfaces or reduce thickness, a chamfer tool is specifically engineered to create angled edges, also known as bevels. The chamfer tool’s design incorporates features like adjustable fences or specialized blades that allow for precise control over the angle and width of the chamfer. A standard plane lacks these dedicated features.
Question 2: How does one determine the appropriate chamfer angle for a given project?
The selection of a suitable chamfer angle depends on the intended aesthetic effect and functional requirements of the project. Steeper angles are often used for decorative purposes, while shallower angles are suitable for easing edges or preventing splintering. Architectural styles, project materials, and personal preferences all influence the selection process. Experimentation on scrap material is recommended before committing to a final angle.
Question 3: What safety precautions should be observed when using a power-driven chamfer tool?
Power-driven chamfer tools require adherence to stringent safety protocols. Eye protection is mandatory to shield against flying debris. Proper hand placement, maintaining a firm grip, and securing the workpiece are crucial for preventing accidents. Hearing protection is recommended to mitigate noise exposure. Always disconnect the power tool before making adjustments or changing blades. Familiarization with the tool’s operation manual is essential.
Question 4: How frequently should a chamfer tool’s blade be sharpened?
The frequency of blade sharpening depends on the hardness of the wood being worked, the duration of use, and the sharpness of the blade to begin with. A noticeable decrease in cutting efficiency or the appearance of tear-out indicates the need for sharpening. Visual inspection of the blade’s edge under magnification can reveal microscopic damage. Regular honing between sharpening sessions can extend the blade’s sharpness.
Question 5: What are the potential consequences of using a dull chamfer tool blade?
Employing a dull blade results in increased effort, reduced precision, and a heightened risk of accidents. Greater force is required to perform the cut, leading to potential loss of control. The resulting chamfer may exhibit tear-out, splintering, and an uneven surface. Overexertion can cause fatigue and increase the likelihood of injury.
Question 6: How does the choice of wood species affect the chamfering process?
Different wood species exhibit varying densities, grain patterns, and resin contents, all of which influence the chamfering process. Hardwoods generally require sharper blades and more controlled cutting techniques than softwoods. Woods with interlocked grain patterns may be prone to tear-out when cut against the grain. Resinous woods can deposit sticky residue on the blade, requiring more frequent cleaning. Matching the appropriate tool and technique to the specific wood species is essential for achieving optimal results.
These frequently asked questions provide a fundamental understanding of woodworking chamfer tools. Proper tool selection, safety practices, and maintenance routines are paramount for achieving accurate and professional results.
The subsequent section will delve into troubleshooting common issues encountered during chamfering operations.
Conclusion
This exploration has addressed the multifaceted aspects of a woodworking chamfer tool, encompassing its functionality, operational considerations, maintenance imperatives, safety protocols and common inquiries. The importance of blade sharpness, material compatibility, user technique, and tool condition were emphasized to highlight their influence on the final outcome.
Mastery of this implement demands a commitment to precision, safety, and continuous learning. Successful implementation enhances the aesthetic quality and functionality of woodworking projects and reflects the artisan’s dedication to quality and craftsmanship.


