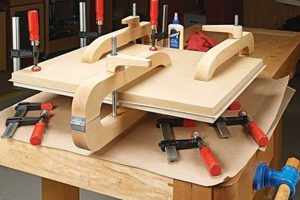
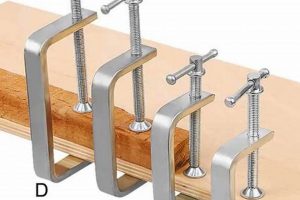
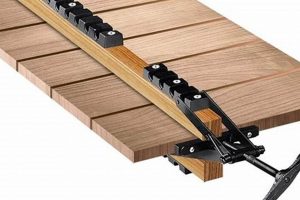
A clamping mechanism frequently utilized in woodworking involves the use of threaded pipes and adjustable heads to apply pressure. This method secures wooden components during glue application and drying, ensuring proper alignment and robust bonding. For instance, when constructing a tabletop, the technique is employed to hold the individual boards tightly together until the adhesive has cured sufficiently.
This clamping approach provides significant advantages in woodworking projects, notably its versatility in accommodating varying lengths and widths of materials. It allows for the creation of large assemblies and curved forms, offering a cost-effective solution compared to specialized clamping tools. Historically, its adoption reflects a practical adaptation of plumbing hardware to meet the specific needs of woodworkers seeking reliable and adaptable clamping solutions.
The following sections will delve into the components involved, proper usage techniques, maintenance considerations, and selection criteria for optimizing the employment of this method in woodworking endeavors. These details will provide a clearer understanding and practical application of the method for enhanced woodworking results.
Essential Considerations for Effective Pipe Clamp Woodworking
The effective application of clamping pressure during woodworking projects significantly influences the final product’s structural integrity and aesthetic quality. Adherence to the following guidelines will optimize results and minimize potential complications.
Tip 1: Pipe Selection: Employ Schedule 40 steel pipes. This specification ensures adequate rigidity to withstand substantial clamping force without bending or deformation. The pipe’s length should exceed the maximum project dimension to accommodate various configurations.
Tip 2: Head Maintenance: Regularly inspect the clamping heads for wear or damage. Clean the threads and lubricate moving parts to ensure smooth operation and prevent binding. Replace any components exhibiting signs of degradation.
Tip 3: Pressure Distribution: Utilize cauls auxiliary pieces of wood between the clamping heads and the project surface. These cauls distribute pressure evenly, preventing localized indentations and ensuring consistent adhesion across the joined surfaces.
Tip 4: Alignment Precision: Before applying clamping pressure, meticulously align the wooden components. Misalignment at this stage results in dimensional inaccuracies and potential structural weaknesses in the finished piece. Utilize shims or spacers as needed.
Tip 5: Controlled Pressure Application: Avoid over-tightening. Excessive force can distort the wood fibers, compromising the joint’s integrity. Apply moderate, uniform pressure, gradually increasing it until the adhesive begins to squeeze out along the joint line.
Tip 6: Adhesive Selection: Choose an adhesive appropriate for the type of wood and the intended application. Ensure compatibility with the chosen finish. Follow the manufacturer’s instructions regarding open time and cure time.
Tip 7: Cleaning Adhesive Squeeze-Out: Promptly remove excess adhesive that squeezes out during clamping. Allow the adhesive to partially set before carefully scraping it away with a sharp chisel or putty knife. This prevents hardened adhesive from interfering with subsequent finishing processes.
Proper implementation of these recommendations ensures consistent clamping pressure, optimal adhesive bonding, and ultimately, superior woodworking outcomes. These guidelines provide a foundation for utilizing this versatile technique effectively.
The following sections will explore advanced techniques and troubleshooting strategies to further refine the utilization of pipe clamp woodworking.
1. Consistent Pressure Application
Consistent pressure application is a paramount factor in the successful execution of pipe clamp woodworking. The uniformity of force exerted upon bonded surfaces directly correlates with the structural integrity and longevity of the resultant assembly. Variations in applied pressure can lead to compromised joints, manifesting as gaps, weaknesses, or aesthetic imperfections.
- Uniform Adhesive Distribution
Consistent pressure ensures the even spreading of adhesive across the entire joint surface. This prevents localized areas of adhesive starvation, which can significantly weaken the bond. An example is seen in edge-gluing boards for a tabletop; uneven pressure results in sections with inadequate adhesive coverage, leading to potential separation under stress.
- Prevention of Warping and Distortion
Balanced pressure application mitigates the risk of warping or distortion in the workpiece. Applying excessive force on one area while neglecting another can induce stress within the wood fibers, resulting in permanent deformation. This is particularly relevant when clamping large panels or assembling complex joinery.
- Maximizing Joint Strength
Consistent pressure optimizes the contact between the wood fibers and the adhesive, promoting maximum bond strength. Sufficient and uniform force allows the adhesive to fully penetrate the wood pores, creating a robust mechanical interlock. In scenarios requiring high load-bearing capacity, such as chair construction, consistent pressure application is critical for joint durability.
- Minimizing Joint Creep
Consistent pressure helps to minimize joint creep, a phenomenon where the joint slowly deforms over time under sustained load. Uniform force distribution reduces stress concentrations, preventing the gradual slippage of the adhesive bond. This is particularly important in projects subject to constant tension or compression, such as shelving or structural supports.
The facets of uniform adhesive distribution, prevention of warping and distortion, maximizing joint strength, and minimizing joint creep are interconnected aspects of consistent pressure application in pipe clamp woodworking. They underscore the necessity of careful technique and appropriate equipment selection to ensure optimal results. The absence of consistent pressure undermines the intended purpose of the method, regardless of other factors such as adhesive quality or joint design.
2. Parallel Alignment Maintenance
Parallel alignment maintenance stands as a crucial determinant in the success of any woodworking project utilizing a clamping methodology. Proper alignment during the clamping phase directly influences the dimensional accuracy, structural integrity, and aesthetic quality of the finished piece. Compromised alignment negates the benefits of precise joinery and high-quality adhesives.
- Ensuring Planar Surfaces
Maintaining parallel alignment is essential for creating planar surfaces in projects such as tabletops or cabinet doors. If clamping pressure is applied to components that are not perfectly aligned, the resultant surface will exhibit irregularities, requiring additional sanding or planing to correct. This not only adds to the workload but may also compromise the final dimensions of the piece.
- Mitigating Joint Stress
Parallel alignment minimizes stress on joints during the clamping process. When components are forced into alignment, the adhesive bond is subjected to uneven tension. Over time, this stress can lead to joint failure or visible cracking. Maintaining proper alignment distributes the clamping force evenly, promoting a stronger and more durable bond.
- Facilitating Hardware Installation
Accurate parallel alignment simplifies the subsequent installation of hardware, such as hinges, drawer slides, or fasteners. Misaligned components can hinder the proper seating of hardware, requiring modifications or compromises in design. Maintaining alignment during clamping ensures that hardware can be installed seamlessly, contributing to the overall functionality and aesthetics of the piece.
- Promoting Squareness and Perpendicularity
In projects requiring precise squareness or perpendicularity, such as boxes or frames, maintaining parallel alignment is paramount. Deviations from square can accumulate over multiple joints, resulting in a finished piece that is visibly out of alignment. Careful attention to alignment during clamping ensures that corners are square and angles are precise, contributing to the overall stability and visual appeal of the project.
The four discussed facets are interrelated elements. Addressing alignment during the clamping phase is crucial to achieving predictable and satisfactory outcomes in woodworking. Failure to prioritize this aspect leads to preventable complications. Proper attention to parallel alignment translates directly into a more refined and robust final product.
3. Appropriate pipe selection
In pipe clamp woodworking, the selection of appropriate pipes directly influences the clamping system’s effectiveness and safety. The pipe serves as the structural backbone, transmitting force from the adjustable clamp heads to the workpiece. Inadequate pipe selection can result in bending, breakage, or slippage, compromising the joint’s integrity and potentially causing injury. For example, using thin-walled pipes intended for low-pressure fluid transport in a woodworking application requiring significant clamping pressure will inevitably lead to deformation under load, rendering the clamp ineffective. Conversely, selecting a pipe with sufficient strength and rigidity ensures consistent and reliable pressure distribution, contributing to a stronger bond.
The choice of pipe material, diameter, and wall thickness dictates the clamp’s load-bearing capacity. Schedule 40 steel pipes are commonly recommended due to their balance of strength, affordability, and availability. A larger diameter and thicker wall provide increased resistance to bending and buckling, crucial when clamping large or heavy workpieces. The pipe’s surface finish is also relevant; a smooth, clean surface minimizes friction and facilitates smooth adjustment of the clamp heads. Real-world applications demonstrate that substituting galvanized steel pipes for black steel pipes, while offering corrosion resistance, may compromise the friction required for a secure hold if the threads are too smooth. Therefore, carefully considering the pipe’s physical properties based on the anticipated clamping demands is vital for successful woodworking outcomes.
The understanding of appropriate pipe selection is not merely a technical detail but a fundamental aspect of safe and effective pipe clamp woodworking. Challenges arise when woodworkers prioritize cost over quality, opting for thinner or weaker pipes to save money. However, the potential consequences of a clamp failure, ranging from damaged workpieces to personal injury, far outweigh the initial cost savings. Therefore, adopting a discerning approach to pipe selection, guided by the specific requirements of each project, is essential for achieving reliable clamping and promoting safe woodworking practices.
4. Threaded head condition
The condition of the threaded head units directly impacts the efficiency, safety, and precision inherent in woodworking. These components, responsible for applying and maintaining pressure during the clamping process, must be meticulously maintained to ensure optimal performance. Their condition affects the ability to achieve consistent clamping force and precise alignment, influencing the quality of the final product.
- Thread Integrity
The integrity of the threads within the clamp head is paramount. Worn or damaged threads impede smooth operation and reduce the clamping force that can be applied. Severely damaged threads can cause slippage, compromising the joint and potentially leading to workpiece damage. For example, a clamp head with stripped threads will be unable to maintain consistent pressure on a glued mortise and tenon joint, resulting in a weak or misaligned assembly. Therefore, regular inspection and maintenance are crucial.
- Swivel Pad Functionality
Many clamp heads feature swivel pads designed to evenly distribute pressure across the workpiece surface, particularly when dealing with non-parallel surfaces. If the swivel pad is seized or damaged, it can create uneven pressure, leading to indentations, distortions, or localized stress concentrations. In situations like edge-gluing boards of varying thickness, a malfunctioning swivel pad will apply disproportionate pressure, resulting in a warped or uneven panel.
- Locking Mechanism Reliability
The locking mechanism, whether a screw or a cam, is responsible for securing the clamp head in position and maintaining the applied pressure. A compromised locking mechanism can slip or fail, releasing pressure and potentially ruining the workpiece. When laminating curved components, a reliable locking mechanism is essential to maintain the desired shape throughout the curing process.
- Corrosion Resistance
Clamp heads, often constructed from metal, are susceptible to corrosion, particularly in humid environments. Corrosion can impede thread movement, reduce the clamping force, and even lead to structural failure. Regular cleaning and lubrication are necessary to prevent corrosion and ensure the longevity and reliability of the clamp heads. Neglecting corrosion control can lead to clamps seizing up during use, making adjustments difficult and potentially damaging the workpiece.
Thread integrity, swivel pad functionality, locking mechanism reliability, and corrosion resistance collectively define the usability and effectiveness of the clamping system. Regular inspection, maintenance, and timely replacement of worn or damaged clamp heads are essential for optimizing the benefits and mitigating risks associated with pipe clamp woodworking. The consequences of neglecting these aspects range from minor inconveniences to significant project failures and potential safety hazards.
5. Even Force Distribution
In pipe clamp woodworking, even force distribution is a critical element influencing the quality and longevity of bonded assemblies. Uneven pressure application during the clamping process can compromise joint integrity, leading to structural weaknesses, aesthetic imperfections, and potential long-term failure. The following points outline key facets of force distribution in this context.
- Caul Utilization
Cauls, auxiliary pieces of wood placed between the clamping heads and the workpiece, play a crucial role in distributing pressure evenly. These cauls, typically made from straight-grained hardwood, conform to minor irregularities in the surface, preventing localized pressure points that can dent or distort the material. For instance, when clamping thin panels, the absence of cauls can result in the clamp heads creating impressions on the wood’s surface, compromising the aesthetic appeal and structural integrity of the panel.
- Clamp Placement Strategy
The strategic placement of clamps along the length of a joint is essential for ensuring uniform pressure. Closely spaced clamps are necessary for curved surfaces or areas prone to warping, while wider spacing may suffice for straight, rigid components. Improper placement, such as concentrating clamps near the ends of a long board, can lead to bowing or uneven adhesion in the center. An example of effective strategy in edge-gluing boards for a tabletop is employing evenly spaced clamps along the entire length, ensuring the boards are pressed together uniformly, resulting in a flat, strong surface.
- Surface Preparation
The preparation of mating surfaces directly impacts the effectiveness of force distribution. Rough or uneven surfaces create gaps and inconsistencies that prevent uniform contact between the adhesive and the wood fibers. Thorough sanding or planing ensures a smooth, level surface, allowing the clamps to apply pressure evenly across the entire joint. Failure to properly prepare the surfaces, especially in end-grain joints, results in weak or incomplete bonds due to the absence of consistent contact.
- Clamp Head Articulation
Clamp heads equipped with swiveling pads or jaws accommodate slight variations in surface angle, promoting even force distribution. These articulated heads adjust to the contours of the workpiece, minimizing stress concentrations and maximizing adhesive contact. When clamping irregularly shaped components, articulated clamp heads are particularly beneficial, ensuring that pressure is applied perpendicular to the joint surface, preventing slippage or misalignment during the curing process.
The points above exemplify the interconnectedness of force distribution with various aspects of pipe clamp woodworking. By understanding the necessity of proper surface preparation, clamp spacing, the employment of cauls, and the importance of articulated clamp heads, woodworkers can optimize the clamping process, minimize defects, and create robust, aesthetically pleasing wooden structures. These factors collectively contribute to maximizing the effectiveness of the clamps and achieving consistent, high-quality results.
6. Adhesive squeeze-out control
Adhesive squeeze-out, the expulsion of adhesive from a joint under clamping pressure, is an unavoidable byproduct of woodworking. Its effective management is intrinsically linked to the success of pipe clamp woodworking projects. Controlling the quantity, timing, and method of removing squeeze-out influences joint strength, aesthetic outcome, and efficiency of subsequent finishing processes.
- Optimal Adhesive Quantity
Applying the appropriate amount of adhesive minimizes excessive squeeze-out. Over-application results in a greater volume of adhesive requiring removal, prolonging the cleaning process and increasing the risk of contaminating adjacent surfaces. Conversely, insufficient adhesive leads to starved joints lacking adequate bond strength. The ideal quantity produces a thin, even bead of squeeze-out along the joint line, indicating complete surface coverage without excess. A carefully metered application of adhesive at the outset mitigates later clean-up efforts.
- Timing of Removal
The timing of squeeze-out removal is critical to achieving a clean, professional finish. Removing adhesive too early, before it has partially cured, smears the substance across the surrounding wood, hindering subsequent staining or finishing. Removing it too late, after it has fully hardened, requires aggressive scraping or chiseling, potentially damaging the wood fibers. The optimal time for removal is when the adhesive has reached a gel-like consistency, allowing it to be cleanly sliced away with a sharp chisel or scraper without smearing or tearing the wood.
- Tool Selection for Removal
Selecting the correct tool for removing squeeze-out is essential for preventing damage to the workpiece. Sharp chisels, scrapers, and specialized glue removal tools are preferred over abrasive methods such as sandpaper, which can create an uneven surface and contaminate the surrounding wood with adhesive particles. The tool’s edge should be kept sharp and angled appropriately to avoid digging into the wood grain. A precise tool, properly wielded, ensures clean removal without compromising the surrounding wood.
- Protective Measures
Implementing protective measures prior to clamping can significantly reduce the time and effort required to manage squeeze-out. Applying painter’s tape along the joint line masks the surrounding wood, preventing adhesive from adhering to the surface. Alternatively, applying a release agent, such as wax or mineral oil, to the adjacent wood surfaces allows the squeeze-out to be easily peeled away after curing. These preventative strategies minimize the risk of adhesive contamination and streamline the finishing process.
These facets underscore the significance of adhesive squeeze-out control in pipe clamp woodworking. Mastering these techniques contributes to achieving structurally sound, aesthetically pleasing, and efficiently produced woodworking projects. Ignoring this aspect leads to increased labor, compromised quality, and potential long-term durability issues. Therefore, careful planning and execution of squeeze-out management are integral components of skilled woodworking.
Frequently Asked Questions
This section addresses prevalent inquiries regarding the effective and safe implementation of pipe clamp woodworking techniques. The information provided aims to clarify common misconceptions and offer practical guidance for woodworking professionals and enthusiasts.
Question 1: What constitutes an appropriate pipe material for clamping applications?
Schedule 40 steel pipe is generally recommended. This specification provides a balance between tensile strength and cost-effectiveness. Avoid thinner-walled pipes, as they are susceptible to bending under pressure, compromising clamping force and potentially damaging the workpiece. Do not use plastic pipes.
Question 2: How frequently should pipe clamp threads be cleaned and lubricated?
Threads should be cleaned and lubricated after each use, or at minimum, monthly in a professional shop. Accumulated debris and dried adhesive can impede smooth operation, reducing clamping efficiency. Use a wire brush to remove debris, followed by a light application of machine oil or paste wax.
Question 3: What is the purpose of cauls in pipe clamp woodworking?
Cauls distribute clamping pressure evenly across the workpiece surface. These auxiliary pieces, typically constructed from straight-grained hardwood, prevent localized pressure points that can cause indentations or distortions, particularly when clamping thin or delicate materials.
Question 4: Is it acceptable to overtighten pipe clamps to ensure a stronger bond?
Overtightening is counterproductive and can damage the workpiece. Excessive pressure can crush wood fibers, weakening the joint. Apply only enough pressure to achieve consistent adhesive squeeze-out along the joint line, indicating adequate adhesive coverage.
Question 5: What is the optimal method for removing adhesive squeeze-out from a clamped joint?
Allow the adhesive to partially cure to a gel-like consistency before removal. Use a sharp chisel or scraper, held at a low angle to the wood surface, to carefully slice away the excess adhesive. Avoid smearing the adhesive across the surrounding wood.
Question 6: How should pipe clamps be stored to prevent rust and corrosion?
Clean clamps thoroughly after each use, removing all traces of adhesive and debris. Apply a light coating of rust-inhibiting oil or paste wax to all metal surfaces. Store clamps in a dry environment, ideally suspended from a rack or stored in a closed container.
The careful selection, maintenance, and utilization of pipe clamps are vital to successful woodworking outcomes. Adherence to best practices ensures both structural integrity and aesthetic refinement of the finished product.
The following section will examine advanced applications and problem-solving techniques related to pipe clamp woodworking.
In Summary
This exploration has highlighted the multifaceted nature of pipe clamp woodworking, detailing the crucial elements influencing the quality and longevity of wood joinery. Consistent pressure, parallel alignment, appropriate pipe selection, maintained threaded heads, even force distribution, and controlled adhesive squeeze-out constitute the core competencies for effective utilization. The adherence to these guidelines determines the success or failure of woodworking projects relying on this versatile technique.
The continued refinement of these skills and a commitment to best practices will elevate the standard of woodworking, ensuring structural integrity and aesthetic excellence. Woodworkers who embrace these principles contribute to the enduring legacy of craftsmanship, creating pieces that stand the test of time. It is imperative to continually evaluate and improve one’s methodology to maximize the benefits of this clamping approach.


