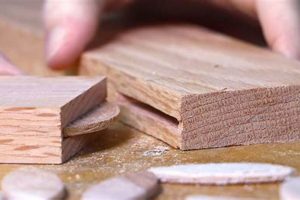
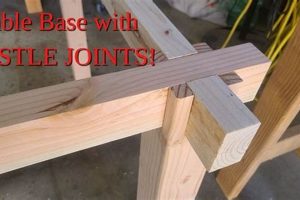
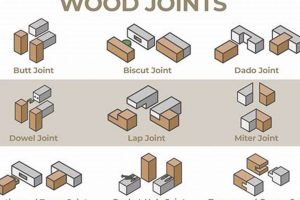
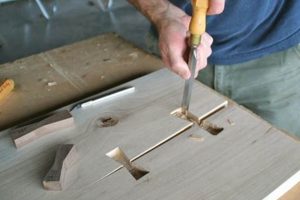
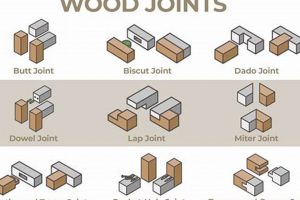
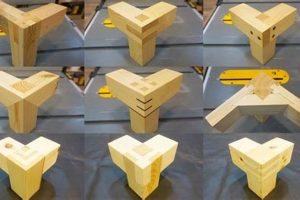
A woodworking joint characterized by one piece having a tenon that fits into a mortise or open-ended slot in the other. The tenon typically runs the full width of the mortised piece, creating a strong and visually appealing connection. This method of joinery provides substantial surface area for glue and a mechanical interlock, contributing to its robust nature.
This form of construction is valued for its strength, resistance to racking, and aesthetic qualities. Historically, it has been employed in a variety of applications, from furniture making to timber framing, showcasing its versatility. Its robust nature makes it suitable for projects requiring durability and stability under stress.
Further examination will detail specific types, applications, best practices for creation, and comparative analysis with alternative joinery methods.
Essential Considerations for Strong and Accurate Joinery
Achieving optimal results in this type of woodworking requires meticulous attention to detail and adherence to proven techniques. The following considerations are crucial for producing robust and visually appealing joints.
Tip 1: Prioritize precise measurements. Accurate dimensions in both the tenon and mortise components are paramount for a tight, reliable fit. Any discrepancies will compromise the joint’s structural integrity and aesthetic quality.
Tip 2: Employ sharp tools. Chisels and saws must be maintained with razor-sharp edges to ensure clean cuts and minimize tear-out, particularly when working with hardwoods. Dull tools can lead to inaccurate joinery and increased effort.
Tip 3: Ensure proper wood selection. Choose lumber with consistent grain and moisture content to prevent warping or separation after assembly. Species compatibility is also a factor when considering long-term performance.
Tip 4: Dry-fit before gluing. Always assemble the joint without adhesive to confirm a proper fit and identify any necessary adjustments. This step minimizes errors and ensures a flush, secure connection.
Tip 5: Use appropriate adhesives. Select a high-quality wood glue designed for the specific type of wood being used and apply it evenly to all mating surfaces. Follow the manufacturer’s instructions for clamping time and pressure.
Tip 6: Maintain consistent clamping pressure. Use clamps to apply even pressure across the joint during the adhesive curing process. Excessive pressure can squeeze out too much glue, while insufficient pressure may result in a weak bond.
Tip 7: Finish carefully. After the adhesive has fully cured, carefully remove any excess glue and sand the joint flush. Apply a protective finish to enhance the wood’s natural beauty and provide resistance to moisture and wear.
Proper execution of these techniques results in joints characterized by enhanced strength, durability, and aesthetic appeal, suitable for a wide range of woodworking projects.
The following sections will delve into specific applications and advanced techniques, further expanding upon the principles outlined here.
1. Strength
In the context of “bridle joint woodworking,” strength denotes the joint’s capacity to withstand applied forces without failure. This attribute is paramount for structural integrity and overall longevity.
- Surface Area and Glue Bond
The design inherently provides a substantial surface area for adhesive application. This increased contact area promotes a stronger glue bond compared to other joinery methods, distributing stress more effectively across the joint. For example, in a table leg connection, a larger glue surface resists shear forces from lateral loads.
- Mechanical Interlock
The interlocking nature of the tenon and mortise creates a mechanical bond that resists separation, even before adhesive is applied. This feature is crucial in scenarios where the joint is subjected to sudden or impact forces, such as the corner of a frame. The tenon’s shoulders also contribute to the joint’s strength by providing additional resistance against racking.
- Wood Fiber Orientation
When properly executed, the joint aligns wood fibers in a manner that maximizes strength along the primary stress lines. By maintaining continuous grain orientation, the joint can effectively transfer loads without creating weak points. Consider a stretcher connecting two legs, the long grain orientation allows the part to resist buckling or breaking.
- Resistance to Racking Forces
The tight fit and large glue surface collectively contribute to exceptional resistance against racking forces. This resistance is particularly beneficial in applications where the joint is subjected to torsional or distortional stresses, such as in cabinet frames or chair construction. The bridle joint helps to maintain the structure’s squareness and prevent deformation.
The interplay of surface area, mechanical interlock, wood fiber orientation, and racking resistance synergistically contributes to the superior strength. This makes it a preferred choice for projects where structural integrity is a primary concern, exceeding the capabilities of simpler joints like butt joints or dowel joints in demanding applications.
2. Accuracy
Precision in “bridle joint woodworking” is not merely desirable; it is fundamental to the integrity and longevity of the resulting structure. The fit of the tenon within the mortise directly dictates the joint’s strength and resistance to stress. Deviations from precise dimensions can compromise the entire assembly.
- Dimensional Consistency
Maintaining consistent dimensions across all components of the joint is crucial. Variations in tenon thickness or mortise width, even minor ones, can result in a loose or overly tight fit. A loose fit reduces glue surface area and weakens the mechanical interlock, whereas an overly tight fit can induce stress within the wood, potentially leading to splitting or warping. As an example, a tenon that is even 1/32″ too thick may require excessive force to assemble, risking damage to surrounding material.
- Precise Cutting Angles
Accuracy in cutting angles ensures proper alignment and maximizes the contact area between the mating surfaces. Inaccurate angles can create gaps and stress points, compromising the joint’s ability to withstand loads. Consider a corner bridle joint; misaligned angles will prevent the frame from sitting squarely, impacting stability and overall appearance.
- Surface Flatness and Smoothness
Flat, smooth surfaces are essential for achieving a strong and reliable glue bond. Irregularities or roughness can create air pockets and reduce the effective contact area between the adhesive and the wood. Furthermore, a smooth surface ensures uniform clamping pressure, promoting an even distribution of adhesive and a stronger bond. For instance, rough chisel marks on the mortise walls will impede proper adhesion.
- Consistent Mortise Depth
A consistent mortise depth is important for an even tenon protrusion and therefore strength. This ensures that when the tenon fully engages in the mortise, it sits flush. Inconsistency can result in an uneven or exposed end, which can diminish its integrity over time.
In summary, dimensional consistency, precise cutting angles, surface flatness, and consistent mortise depth all intertwine to determine the quality of the constructed with “bridle joint woodworking”. Failure to adhere to these accuracy-related principles results in a structurally compromised and aesthetically deficient joint, thereby undermining the overall integrity of the project.
3. Aesthetics
The aesthetic appeal stemming from this woodworking technique arises from its blend of structural integrity and visual presentation. Unlike concealed joints, the presence of the tenon and mortise creates a distinct design element. This exposed joinery can be incorporated intentionally as a feature, contributing to the overall style of the piece. The clean lines and geometric forms resulting from the construction can complement various design aesthetics, from traditional to contemporary. A well-executed joint demonstrates craftsmanship and attention to detail, elevating the perceived value of the finished product. For example, in furniture design, the exposed bridle joint at the corners of a table or chair can become a signature element, showcasing the quality of construction.
However, achieving a desirable aesthetic requires careful consideration of proportion, symmetry, and surface finish. The size and shape of the tenon must be visually balanced with the surrounding wood. Consistent gap tolerances and seamless transitions between the tenon and mortise are critical for a refined appearance. Furthermore, the choice of wood species and the application of appropriate finishes can enhance the joint’s visual appeal. As an example, the contrasting colors of wood species in a particular type of construction can create visual interest, while a smooth, even finish highlights the precision of the joinery.
In conclusion, aesthetics serves as an integral component. The joint’s visual presence can enhance the design, provided meticulous attention is given to proportion, symmetry, and surface finish. This intersection of structural function and aesthetic consideration underscores its importance in high-quality woodworking projects. Challenges in achieving this balance often stem from a lack of precision in execution or a failure to consider the overall design context.
4. Applications
The spectrum of “bridle joint woodworking” applications is broad, stemming from its inherent strength and aesthetic versatility. Its suitability for structural components results in widespread adoption across diverse woodworking disciplines. The joint serves as a crucial element wherever a strong, visually appealing connection is required. The selection of this joint directly impacts the durability and aesthetic character of the final product. For instance, in chair construction, the joint secures the legs to the seat, providing stability and resisting the stresses of daily use. The integration of this joint ensures the structural integrity necessary for reliable seating.
Further practical applications include furniture framing, where the joint connects rails and stiles to create robust and visually pleasing frames for tables, cabinets, and doors. Timber framing utilizes the joint for connecting posts and beams, creating durable and load-bearing structures. The construction of musical instruments, specifically stringed instruments, benefits from the joints ability to create strong connections within the instrument’s neck and body. In each case, the selection of this joint is driven by a need for reliability, load-bearing capacity, and aesthetic integration. The precise execution ensures longevity and performance.
In summary, the choice of this joint strongly influences the practical outcome of a woodworking project. Applications range from critical structural elements to visually integrated design components. A clear understanding of the joints strengths and limitations, coupled with skilled execution, is essential for maximizing its benefits across a wide range of woodworking endeavors. Common challenges include selecting the appropriate joint variation for a given application and maintaining dimensional accuracy throughout the construction process.
5. Variations
The concept of variations within this joint encompasses modifications to its fundamental form, each designed to address specific structural or aesthetic needs. The existence of these variations directly affects the versatility and applicability of this type of joinery across diverse woodworking projects. The choice of a particular variation influences the strength, appearance, and ease of construction, thereby dictating its suitability for a given purpose. For instance, a T-bridle joint, characterized by a tenon extending from the end of one piece into a mortise in the middle of another, is frequently employed for connecting table aprons to legs, providing robust support. The corner bridle joint, conversely, connects two pieces at a 90-degree angle and is often used in frame construction. These variations demonstrate how alterations to the basic joint can broaden its range of application.
Further examples include the mitered bridle joint, where the tenon and mortise are angled to create a seamless corner, and the housed bridle joint, where the tenon is concealed within the mortise for a cleaner appearance. These variations offer trade-offs between strength, visual appeal, and complexity. The mitered joint, while aesthetically pleasing, might sacrifice some strength compared to a standard corner joint. The housed joint prioritizes appearance but may require more intricate cutting techniques. Understanding these trade-offs is essential for selecting the optimal variation. Considerations such as load-bearing requirements, exposure to stress, and desired visual style all contribute to the decision-making process.
In conclusion, variations represent a critical dimension, extending its adaptability across a wide array of projects. The selection of a specific form dictates structural properties, visual characteristics, and construction complexity. Mastering these variations demands a comprehensive grasp of their individual strengths and limitations, allowing woodworkers to implement this versatile joint with precision and intentionality. Challenges frequently arise in the accurate execution of complex variations, requiring advanced skills and meticulous attention to detail. This proficiency enhances the overall quality and longevity of woodworking creations.
Frequently Asked Questions
This section addresses common inquiries regarding the application and execution of “bridle joint woodworking.” These questions and answers aim to clarify key aspects and provide practical guidance.
Question 1: What are the primary advantages of using a bridle joint compared to a mortise and tenon joint?
The inherent strength of the bridle joint lies in its larger glue surface area and the mechanical advantage derived from the tenon encompassing the full width of the mortised piece. This configuration provides enhanced resistance to racking forces. The specific advantages are realized best when structural stability is of foremost importance.
Question 2: What factors should influence the selection of wood species for constructing a bridle joint?
Wood density, grain orientation, and gluing characteristics are essential factors. Hardwoods such as oak or maple provide superior strength and durability. Straight grain promotes stability and minimizes the risk of splitting. Species compatibility is also a consideration to prevent differential expansion or contraction, which can weaken the joint over time.
Question 3: What is the recommended procedure for ensuring accurate mortise and tenon alignment?
Precise measurement and marking are paramount. A sharp marking gauge and accurate measuring tools are essential. The use of jigs or templates can aid in achieving consistent results, particularly when creating multiple joints. A dry fit before adhesive application is crucial for verifying alignment and identifying any necessary adjustments.
Question 4: What types of adhesives are most suitable for bridle joint woodworking, and what factors influence adhesive selection?
High-quality wood glues, such as polyvinyl acetate (PVA) or polyurethane adhesives, are generally recommended. PVA glues are suitable for most interior applications, while polyurethane adhesives offer greater moisture resistance for exterior use. The adhesive should be selected based on the wood species, environmental conditions, and desired bond strength.
Question 5: How should clamping pressure be applied during the adhesive curing process to ensure optimal joint strength?
Uniform clamping pressure is critical for distributing adhesive evenly and ensuring a tight bond. Clamps should be positioned strategically to avoid distorting the joint. Excessive pressure can squeeze out too much adhesive, while insufficient pressure may result in a weak bond. Follow the adhesive manufacturer’s recommendations for clamping time and pressure.
Question 6: What are the common causes of joint failure, and how can they be prevented?
Inadequate glue surface area, imprecise cuts, inappropriate wood selection, and insufficient clamping pressure are primary causes. Meticulous attention to detail, the use of sharp tools, appropriate wood species, and proper clamping techniques can mitigate these risks. Regular inspection and maintenance can also help to identify and address potential problems before they escalate.
The information presented here offers a concise overview of essential considerations for achieving successful results with “bridle joint woodworking”. Careful attention to these details will lead to durable and aesthetically pleasing outcomes.
The subsequent sections will explore advanced techniques and project-specific applications in further detail.
Conclusion
The preceding discussion has comprehensively addressed various aspects of “bridle joint woodworking,” including its definition, benefits, essential techniques, applications, variations, and frequently encountered challenges. The analysis underscores the importance of meticulous execution and material selection in achieving robust and aesthetically pleasing results.
Mastery of “bridle joint woodworking” demands a commitment to precision and a thorough understanding of its inherent structural properties. Continued exploration and refinement of these techniques are essential for woodworkers seeking to elevate the quality and durability of their projects. The principles outlined herein serve as a foundation for further innovation and adaptation within the craft.


