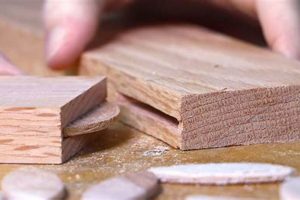
Addressing imperfections in the connection between wooden components is a common requirement in woodworking. This process involves introducing a substance to occupy spaces that may exist due to imprecise cuts, wood movement, or damage. For example, a small void between a table leg and the apron can be remedied by introducing a color-matched filler.
This practice is essential for both structural integrity and aesthetic appeal. The presence of voids can weaken a joint, making it susceptible to failure under stress. Furthermore, visible separations detract from the overall quality and visual harmony of the finished piece. Historically, artisans have employed various materials and techniques to achieve seamless and durable connections, reflecting both available resources and evolving standards of craftsmanship.
The following sections will delve into the specific materials suitable for this task, the techniques for effective application, and considerations for achieving a professional finish. Careful material selection and proper application are key to ensure longevity and visual satisfaction in woodworking projects.
Tips for Addressing Imperfections in Woodworking Joints
Achieving seamless and durable woodworking joints often requires careful attention to detail. The following tips provide guidance on effectively addressing gaps and imperfections to ensure structural integrity and a professional finish.
Tip 1: Select the Appropriate Filler. The choice of filler material depends on the size of the gap and the desired finish. Wood filler, epoxy, and specialized patching compounds are available, each offering different properties in terms of strength, workability, and stain acceptance. For small gaps, wood filler is generally sufficient, while larger voids may necessitate the use of epoxy or a structural patching compound.
Tip 2: Prepare the Joint Surface. Before applying any filler, thoroughly clean the joint surface. Remove any loose debris, sawdust, or old finish that could interfere with adhesion. A clean surface is crucial for a strong and lasting bond.
Tip 3: Tint or Color-Match the Filler. To achieve a seamless appearance, carefully tint or color-match the filler to the surrounding wood. Test the color on a scrap piece of wood to ensure an accurate match before applying it to the project. Pigments, stains, or dyes can be added to the filler to achieve the desired hue.
Tip 4: Apply the Filler Methodically. Use a putty knife or similar tool to carefully apply the filler to the gap, ensuring it is fully packed and slightly overfilled. Avoid trapping air pockets, as these can weaken the joint and create visible imperfections.
Tip 5: Allow Adequate Drying Time. Allow the filler to dry completely according to the manufacturer’s instructions. Premature sanding or finishing can result in shrinkage or cracking of the filler, requiring rework.
Tip 6: Sand Smoothly and Evenly. Once the filler is dry, sand it smooth and flush with the surrounding wood surface. Use progressively finer grits of sandpaper to achieve a seamless transition. Avoid excessive sanding, which can damage the surrounding wood.
Tip 7: Consider Using Wood Shims for Larger Gaps. For particularly large gaps, consider using thin wood shims to reduce the volume of filler required. Shims provide structural support and minimize the risk of filler shrinkage or cracking.
Addressing imperfections in woodworking joints is essential for creating durable, visually appealing, and long-lasting pieces. By selecting the right materials, preparing the surface properly, and applying the filler methodically, a professional-quality result can be achieved.
The subsequent discussion will focus on specific joint types and the unique considerations for each in terms of addressing imperfections and ensuring optimal performance.
1. Material Selection
The selection of appropriate material is paramount to the successful filling of gaps in woodworking joints. The choice directly impacts the strength, durability, and aesthetic integration of the repair. Incorrect material selection can lead to premature failure, discoloration, or a visually unappealing result. For instance, using a water-based filler in an exterior application subject to moisture exposure will likely result in the filler deteriorating and the gap reappearing. Conversely, employing a rigid epoxy filler in a joint intended for flexibility can lead to cracking in the surrounding wood during expansion and contraction.
Specific examples illustrate the importance of proper material selection. For small gaps in interior furniture, a stainable wood filler that accepts the final finish is generally adequate. However, if the gap is larger or subject to stress, a two-part epoxy resin may be more suitable, offering superior strength and adhesion. When addressing gaps in marine applications, a waterproof epoxy or specialized marine-grade filler is essential to withstand constant exposure to water and prevent wood rot. Consideration of factors such as wood type, finish requirements, and environmental conditions are crucial in the selection process.
In summary, the selection of the appropriate material is not merely a superficial consideration, but a fundamental aspect of addressing voids between wooden components. Understanding the characteristics of different filling compounds and their suitability for specific applications is essential for achieving a durable, aesthetically pleasing, and long-lasting repair. Failure to prioritize material selection can compromise the integrity of the woodworking project and necessitate costly rework.
2. Surface Preparation
Effective surface preparation is a foundational requirement for successful execution. Proper preparation ensures adequate adhesion, prevents premature failure of the filler, and contributes significantly to the aesthetic integration of the repair within the overall woodworking project.
- Cleaning of Debris
The removal of loose debris, dust, sawdust, and any contaminants from the joint surface is paramount. These materials can impede adhesion, creating weak points within the filler and leading to cracking or separation over time. Compressed air, brushes, and solvent-based cleaners are commonly employed to achieve a clean substrate. For instance, residual sanding dust left within a mortise and tenon joint will prevent the filler from properly bonding to the wood fibers.
- Removal of Old Finish
Existing finishes, such as varnish, lacquer, or paint, must be removed from the areas to be filled. These finishes create a barrier that prevents the filler from bonding directly to the wood. Sanding, scraping, or chemical strippers are used to remove the old finish. Failure to remove old finish around a dovetail joint will result in the filler adhering to the finish rather than the wood, leading to eventual separation.
- Texturing for Adhesion
Creating a slightly rough surface, often through sanding with medium-grit sandpaper, enhances the mechanical bond between the wood and the filler. The increased surface area allows the filler to grip the wood fibers more effectively. However, excessive roughening can damage the surrounding wood. A light sanding with 120-grit sandpaper is typically sufficient to create the necessary texture for optimal adhesion. A smooth, polished surface offers little for the filler to adhere to, increasing the likelihood of failure.
- Moisture Content Control
The moisture content of the wood at the time of filling is a critical factor. Wood expands and contracts with changes in humidity, and if the filler is applied to wood with a high moisture content, it may shrink and crack as the wood dries. Ideally, the wood should be acclimated to its intended environment for several days before filling to stabilize its moisture content. Applying filler to freshly sawn lumber is almost certain to result in problems as the wood dries and shrinks.
The principles of surface preparation detailed above are fundamental to achieving lasting and visually pleasing results. By adhering to these guidelines, the risk of filler failure is minimized, ensuring the longevity and aesthetic integrity of the woodworking project. Neglecting surface preparation, regardless of the quality of the filler used, will inevitably lead to unsatisfactory outcomes.
3. Filler Application
The introduction of filling material into voids within joined wooden components represents a critical phase in woodworking. Proper application directly influences the structural integrity, aesthetic quality, and overall longevity of the finished product. The following elements detail the nuances of this process.
- Methodical Introduction
The process of introducing filler into voids must be approached with precision. It necessitates using appropriate tools, such as putty knives or specialized applicators, to ensure complete and uniform filling of the gap. The application method should minimize air pockets, which can compromise the strength of the joint and lead to surface imperfections. An example of methodical introduction involves using a thin, flexible knife to force filler into a narrow crack, ensuring full penetration without trapping air.
- Overfilling and Contouring
The practice of slightly overfilling the gap during application is a standard technique. This compensates for potential shrinkage of the filler material as it dries and allows for subsequent sanding to achieve a flush surface. The contouring of the filler during application is also important, especially in areas with complex geometries. For instance, when addressing a gap around a curved molding, the filler should be shaped to match the existing profile before it hardens.
- Material Compatibility
Ensuring compatibility between the filler material and the surrounding wood is essential. This includes considering factors such as wood species, grain orientation, and the type of finish that will be applied. Incompatible materials can lead to discoloration, uneven absorption of finish, or differential expansion and contraction, resulting in cracks or separation. For example, using an oil-based filler on a water-based finish may result in poor adhesion and an unsightly appearance.
- Layered Application for Large Voids
When dealing with substantial voids, a layered application approach is recommended. Applying the filler in multiple thin layers, allowing each layer to dry partially before adding the next, minimizes shrinkage and cracking. This technique also provides better control over the final shape and contour of the filled area. A single, thick application of filler is more likely to crack or sag as it dries, especially in large voids.
The facets detailed above are collectively important. When properly executing application of filling materials, a seamless, stable, and visually harmonious joint becomes apparent. Each phase of filler application plays a role in both structural and aesthetic integration, ultimately influencing the perceived quality and long-term performance. The integration between appropriate materials, meticulous technique, and an understanding of how each influences the end result is the connection between the two mentioned terms.
4. Drying Time
The duration required for a filler to cure or harden is a critical factor in the process of filling spaces between wooden elements. Inadequate consideration of this parameter can compromise the structural integrity and aesthetic quality of the joint, leading to rework and potential long-term failures.
- Influence on Shrinkage
The drying process directly affects the shrinkage characteristics of the filler material. As the filler cures, it typically loses volume, which can result in a depression or crack forming within the filled space. The drying time dictates the extent of shrinkage; shorter drying times may lead to rapid shrinkage and increased risk of defects. A longer, controlled drying period often minimizes shrinkage and allows the filler to conform more effectively to the surrounding wood. For instance, applying a thick layer of wood filler that dries too quickly can cause it to crack due to uneven shrinkage.
- Impact on Sandability
The consistency of the filler during sanding is directly related to the drying time. If sanding is initiated before the filler is fully cured, the material may be too soft, leading to uneven removal and a smearing effect. Conversely, allowing the filler to over-cure can result in an excessively hard material that is difficult to sand and may damage the surrounding wood. The ideal sanding window occurs when the filler is firm enough to be shaped but not so hard as to resist the abrasive action of sandpaper. Determining the correct time to sand based on drying time avoids imperfections such as unwanted lines.
- Adhesion Strength Development
The development of optimal adhesion strength between the filler and the wood substrate is intrinsically linked to the drying time. The adhesive properties of the filler typically increase as it cures, reaching a maximum level after the recommended drying period. Shortening the drying time can prevent the filler from fully bonding to the wood, resulting in a weak joint that is susceptible to failure under stress. For example, a two-part epoxy requires a specific curing time to achieve its full bonding potential; interrupting this process will significantly reduce the strength of the joint.
- Environmental Factors
Environmental factors, such as temperature and humidity, significantly influence the drying time of fillers. High humidity levels can slow down the drying process, while high temperatures can accelerate it. Inaccurate estimation of drying time due to environmental variations can lead to premature sanding or finishing, resulting in defects. Manufacturers’ recommendations for drying times are typically based on standard conditions; adjustments must be made to account for deviations from these standards. Knowing what drying time is in reference to certain enviromental factors is a key factor in a long lasting product.
These facets are interconnected and, when carefully managed, contribute to a successful outcome. The proper drying time is not merely a passive waiting period; it is an active phase that requires monitoring and adjustment based on material characteristics and environmental conditions. A comprehensive understanding of this influence is crucial for achieving a durable, aesthetically pleasing, and long-lasting repair.
5. Sanding Technique
The procedure for smoothing or refining a surface and its impact on addressing imperfections in wooden structures are intricately linked. The success of integrating filling materials into spaces between wooden components hinges, in large measure, on the application of proper abrasive methods. If incorrectly applied, surface refinement can diminish the structural integrity of the repair and impair the visual quality of the finished piece. Proper sanding minimizes visible transitions between the filler and the surrounding material, leading to a more unified appearance. For example, aggressive abrasion using a coarse grit paper on a delicate veneer surface can quickly remove the applied material but simultaneously damage the surrounding veneer, necessitating further repairs.
Employing a progressive sequence of abrasive grits is a common practice to refine filler to the level of the surrounding surface. Typically, one begins with a grit appropriate to the extent of material needing removal, and then progresses to finer grits. For instance, if a filler application is significantly proud of the surrounding surface, a grit of 120 may be used to reduce the material. That abrasive is then typically followed by 180, 220, and potentially finer grits to eliminate the scratches from the coarser paper and create a smooth transition. The method is not merely about material removal; it is a technique to blend the filler into the overall form and texture of the woodworking piece.
Ultimately, the integration of proper finishing contributes to both the longevity and aesthetic merit of the repair. Skillful abrasion is not just a final step in the process; it is an integral component that determines the degree to which the filled space becomes an invisible and structurally sound element of the woodworking piece. The challenge is to achieve this integration without causing collateral damage to the surrounding material. Therefore, a well-executed abrasive application is essential for ensuring the enduring quality of woodworking endeavors where spaces need to be addressed.
6. Joint Type
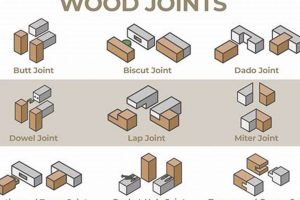
The geometry and construction methods inherent to different joint types in woodworking significantly influence both the likelihood and the methodology required for addressing gaps. The inherent structural demands of each joint dictate the critical nature of addressing imperfections, as well as the most suitable materials and techniques for doing so.
- Butt Joints
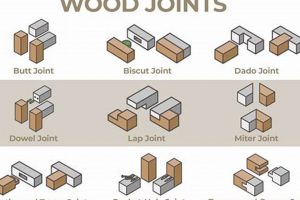
Butt joints, characterized by their simplicity, are inherently prone to gapping due to their reliance on surface-to-surface adhesion. The end grain exposure in a butt joint absorbs adhesives differently than the long grain, often leading to weaker bonds and visible separations. Filling gaps in butt joints is often a cosmetic necessity, but the structural integrity typically requires reinforcement beyond just filling, such as fasteners or splines. The large, exposed surface area necessitates careful color matching of fillers to avoid visually jarring repairs.
- Mortise and Tenon Joints
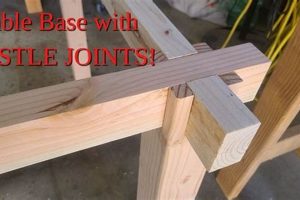
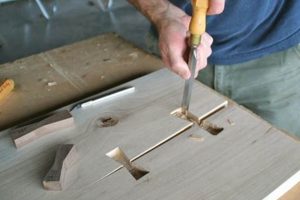
Mortise and tenon joints, known for their strength, can still exhibit gaps due to imprecise cutting of the mortise (the hole) or tenon (the projecting piece). Gaps in a mortise and tenon joint can compromise its load-bearing capacity and stability. Addressing these imperfections requires careful selection of fillers that can withstand shear forces and compression. Epoxy resins, often used for their structural properties, are a common choice. Furthermore, the hidden nature of much of the joint allows for less stringent aesthetic considerations, focusing instead on strength and durability.
- Dovetail Joints
Dovetail joints, valued for their interlocking strength and aesthetic appeal, present unique challenges when gaps are present. The complex geometry of the dovetails makes it difficult to uniformly fill voids. Gaps in dovetail joints not only detract from their visual quality but can also weaken their mechanical interlock. Precise fitting is paramount, and any filler must be carefully applied to maintain the sharp lines and angles characteristic of the joint. Color-matched wood fillers are frequently used to preserve the aesthetic integrity of the joint.
- Miter Joints
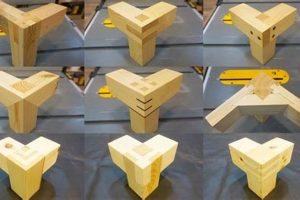
Miter joints, used to create angled corners, are particularly susceptible to gaps due to the precise angle required for a tight fit. Any deviation from the ideal angle results in a visible separation. Filling gaps in miter joints is crucial for both structural stability and visual appeal, as they are often used in highly visible applications such as picture frames or moldings. Reinforcing the joint with splines or other mechanical fasteners is often necessary, in addition to carefully filling any remaining gaps with a color-matched filler.
In summary, the specific approach to mitigating imperfections is intimately tied to its design. Butt joints often necessitate reinforcement beyond filling, while mortise and tenon joints prioritize structural fillers. Dovetail joints demand meticulous fitting and aesthetic fillers, and miter joints benefit from both reinforcement and careful cosmetic repair. A comprehensive understanding of these joint-specific considerations is essential for achieving lasting and visually appealing results.
Frequently Asked Questions
This section provides answers to common inquiries regarding the techniques and considerations involved in addressing imperfections found in the connections between wooden elements.
Question 1: What constitutes an acceptable gap size that requires filling?
The determination of an acceptable gap size is subjective and depends on the intended application, aesthetic standards, and structural requirements of the woodworking project. Gaps that compromise the structural integrity of the joint, or those that detract significantly from the visual appearance, generally warrant attention. A gap exceeding 1/16th of an inch is often considered substantial enough to require filling.
Question 2: Is it necessary to address spaces in joints that are not visible in the final product?
Addressing spaces in non-visible joints is often dictated by structural considerations. If the joint is intended to bear a load, any spaces, regardless of visibility, can compromise its strength and stability. Filling such spaces is recommended to ensure the longevity and performance of the joint, even if aesthetic concerns are not a primary factor.
Question 3: What are the potential consequences of neglecting imperfections in wooden joints?
Neglecting imperfections can lead to a variety of adverse outcomes, including weakened structural integrity, increased susceptibility to moisture intrusion and wood rot, diminished aesthetic appeal, and premature failure of the woodworking project. The severity of the consequences depends on the size and location of the spaces, as well as the environmental conditions to which the project is exposed.
Question 4: Is it possible to overfill a joint, and what are the implications?
Overfilling a joint is possible and can create challenges during the finishing process. Excess filler material that extends beyond the surface of the wood requires additional sanding and shaping to achieve a flush, seamless appearance. Furthermore, overfilling can distort the intended lines and contours of the joint, detracting from its visual appeal. Precise application of filler is recommended to minimize the need for extensive sanding.
Question 5: How does the type of wood affect the choice of filler material?
The type of wood significantly influences the selection of filler material. Factors such as wood density, grain pattern, and color must be considered to ensure compatibility and aesthetic integration. For example, using a coarse-grained filler on a fine-grained wood can result in a visually jarring mismatch. Similarly, the color of the filler should closely match the surrounding wood to achieve a seamless appearance.
Question 6: Can imperfections in joints be addressed after the finish has been applied?
Addressing imperfections after the finish has been applied is generally discouraged, as it can be difficult to achieve a seamless repair without damaging the surrounding finish. Attempting to fill spaces after finishing often results in visible patches or color variations that detract from the overall appearance. Addressing imperfections prior to finishing is the preferred approach to ensure a uniform and professional result.
In summary, the successful mitigation of voids requires careful consideration of factors such as gap size, structural requirements, material compatibility, and the intended finish. Addressing these concerns proactively minimizes the risk of long-term problems and ensures the enduring quality of the woodworking project.
The following section will provide practical examples and case studies illustrating the application of these principles in real-world woodworking scenarios.
Conclusion
This exploration has underscored the criticality of “filling gaps in woodworking joints” for both the structural integrity and aesthetic appeal of woodworking projects. Proper material selection, surface preparation, application technique, drying time management, and sanding protocol are all vital to a successful outcome. Moreover, the specific joint type significantly influences the choice of materials and methods.
Mastery of “filling gaps in woodworking joints” represents a dedication to quality craftsmanship. This skillset ensures both the longevity and visual harmony of finished pieces. Continued refinement of these techniques will further elevate the standards of woodworking practice, ensuring robust and beautiful creations for generations to come.


