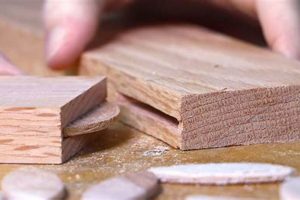
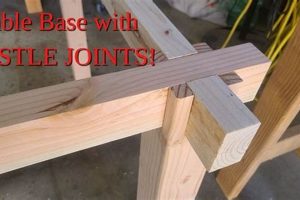
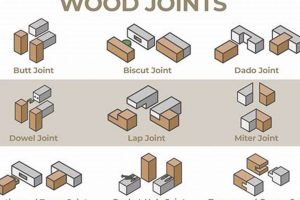
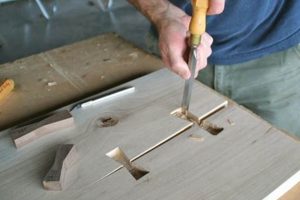
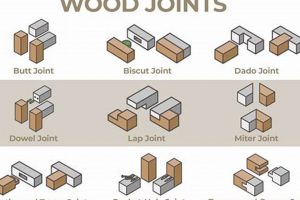
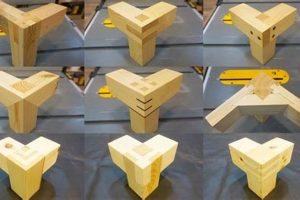
A corner produced when two pieces of wood are connected at a right angle, forming a structure where the ends meet at a precise 90-degree intersection. A common example is found in the construction of a basic box, where the sides, top, bottom, and ends are joined to create the enclosure.
This connection is fundamental to a vast range of construction and craft projects. Its strength and stability are critical for ensuring the longevity and functionality of furniture, cabinetry, and architectural elements. Historically, achieving accuracy in this construction has been a hallmark of skilled craftsmanship, contributing to both the aesthetic appeal and structural integrity of finished pieces.
The success of creating such a corner relies on various techniques and methods, each offering unique advantages depending on the specific application and desired outcome. Exploring these methods, including joinery types and best practices, will provide a greater understanding of achieving reliable and aesthetically pleasing results in woodworking projects.
Achieving Accurate Corners
The following outlines essential tips for creating strong and precise right-angle intersections in woodworking projects.
Tip 1: Accurate Measurement and Marking: Prior to any cutting, ensure precise measurements are taken and clearly marked on the material. Use a sharp marking knife and a reliable square to transfer dimensions accurately.
Tip 2: Precision Cutting Techniques: Employ cutting methods that minimize deviation from the marked line. A saw with a fine kerf and a stable fence or guide will contribute to greater accuracy.
Tip 3: Utilizing a Miter Saw or Shooting Board: For high-precision cuts, a miter saw with a digital angle readout or a shooting board can significantly improve the accuracy of angled surfaces.
Tip 4: Joint Selection Based on Application: Choose a joint appropriate for the load and stress it will bear. Simple butt joints are adequate for light-duty applications, while mortise and tenon, dovetail, or rabbet joints offer superior strength.
Tip 5: Proper Clamping Pressure: When gluing and assembling components, apply consistent and even clamping pressure to ensure tight and uniform contact between surfaces. Use cauls to distribute pressure and prevent marring of the wood.
Tip 6: Ensuring Squareness During Assembly: Continuously monitor and adjust the assembly during clamping to maintain squareness. Use a framing square or measuring diagonals to confirm the intersection remains at a perfect right angle.
Tip 7: Allow Sufficient Glue Drying Time: Adhere to the manufacturer’s recommended drying time for the adhesive being used. Premature removal of clamps can compromise joint strength and stability.
Adherence to these techniques will result in constructions that are both structurally sound and visually appealing. Consistent accuracy in corner construction is a cornerstone of quality woodworking.
The subsequent sections of this article will further elaborate on specific methods and best practices for creating reliable and aesthetically pleasing corner junctions.
1. Squareness
Squareness is a fundamental geometric property directly affecting the structural integrity and visual appeal of any construction incorporating right-angle intersections. In woodworking, maintaining precise squareness is crucial for ensuring that assembled pieces align correctly, resulting in a stable and aesthetically pleasing final product.
- Structural Stability
A lack of squareness introduces stress points within the assembly. Distorted angles compromise the ability of the structure to bear loads evenly, potentially leading to premature failure or deformation. Consider a bookcase: if the uprights are not perfectly square to the shelves, the weight of the books will create uneven pressure, weakening the joints over time.
- Accurate Dimensions
Deviation from perfect right angles inevitably results in dimensional inaccuracies. Even a small error in squareness can accumulate across multiple joints, leading to significant discrepancies in overall size and shape. This is particularly problematic in cabinetry, where consistent dimensions are essential for proper fit and function within a designated space.
- Ease of Assembly
Accurate squareness facilitates straightforward assembly. When components are cut and prepared with precision, they align correctly without requiring excessive force or adjustment. Attempting to force misaligned, non-square parts together can damage the wood and compromise the strength of the joints. Imagine trying to assemble a picture frame where the corners are not precisely 90 degrees – the glass will not fit properly, and the frame will appear skewed.
- Aesthetic Quality
Visually, squareness conveys a sense of precision and craftsmanship. Sharp, clean corners enhance the overall appearance of the piece, while deviations from squareness can be jarring and detract from the perceived quality. In furniture making, perfect squareness communicates meticulous attention to detail and elevates the finished product.
The aspects of structural integrity, dimensional accuracy, ease of construction, and aesthetic appeal all serve to highlight the importance of squareness for success with woodworking projects. Achieving such connections requires careful measurement, precise cutting techniques, and diligent monitoring throughout the assembly process to guarantee the desired accuracy and lasting value. For furniture, cabinetry, or any project employing right-angle construction, the commitment to squareness is a direct reflection of the quality of the work.
2. Joint Strength
Joint strength is a critical determinant of the overall durability and longevity of any woodworking construction utilizing right-angle intersections. The ability of a joint to withstand applied forces directly influences the stability and functionality of the assembled piece.
- Load-Bearing Capacity
The primary function of joint strength is to resist separation or failure under load. A stronger joint can support heavier objects or withstand greater stresses without compromising its structural integrity. For example, in the construction of a bookshelf, the joints connecting the shelves to the uprights must possess sufficient strength to bear the weight of the books placed upon them. Insufficient strength results in sagging shelves or complete joint failure.
- Resistance to Shear Forces
Right-angle intersections are often subjected to shear forces, which act parallel to the joint surface, attempting to slide one component past the other. A robust joint design incorporates features that effectively resist these forces. A dovetail joint, commonly used in drawer construction, excels at resisting shear due to its interlocking geometry. Conversely, a simple butt joint, relying solely on adhesive, offers minimal resistance to shear and is prone to failure in high-stress applications.
- Impact Resistance
The ability of a joint to withstand sudden impacts or shocks is crucial in applications where the assembly is likely to experience external forces. A well-constructed joint will absorb and distribute the energy of the impact, preventing damage or dislodgement. In furniture intended for heavy use, such as chairs or tables, strong joints are essential for ensuring longevity and preventing breakage under repeated stress.
- Long-Term Durability
Joint strength directly correlates with the long-term stability of a woodworking construction. A weak joint will gradually degrade over time due to repeated stress, temperature fluctuations, and humidity changes. Selecting appropriate joinery methods and adhesives that maintain their strength over extended periods is essential for creating durable and lasting pieces. Mortise and tenon joints, when properly executed with durable adhesives, demonstrate exceptional long-term stability, making them suitable for heirloom-quality furniture.
The interplay of these facets directly influences the performance and lifespan of projects relying on right-angle connections. By considering the specific demands of the application and selecting appropriate techniques and materials, craftspeople can create constructions that withstand the test of time. Failures can lead to the structure toppling with zero structural integrity.
3. Material Stability
Material stability directly influences the integrity and longevity of any woodworking construction, particularly those employing right-angle intersections. Wood, being a hygroscopic material, undergoes dimensional changes in response to variations in moisture content. This characteristic presents significant challenges to maintaining the precision and strength of right-angle junctions over time. The inherent tendency of wood to expand and contract can induce stress within the joint, potentially leading to warping, cracking, or complete failure. For instance, a frame-and-panel door constructed with unstable wood may exhibit panel movement or warping, compromising the door’s seal and aesthetic appeal. The selection of properly seasoned and acclimated lumber is, therefore, a fundamental prerequisite for creating durable and reliable right-angle structures.
The direction of wood grain also plays a crucial role in material stability, particularly at right-angle connections. Tangential shrinkage, which occurs perpendicular to the growth rings, is significantly greater than radial shrinkage, which occurs along the radius of the tree. Mismatched grain orientations at a right-angle connection can exacerbate differential movement, leading to stress concentrations and joint failure. In cabinetry, using quarter-sawn lumber for frame components minimizes tangential shrinkage and enhances the stability of the overall structure. Furthermore, engineered wood products, such as plywood and MDF, offer enhanced dimensional stability compared to solid wood, making them suitable choices for components that require minimal movement.
Achieving lasting and dependable constructions requires a comprehensive understanding of wood’s behavior and careful attention to material selection, grain orientation, and environmental control. Addressing these factors mitigates the risks associated with wood movement and ensures the long-term integrity of right-angle intersections. Ignoring the principles of material stability compromises joint strength, which may cause aesthetic quality and dimensional change in woodworking projects. Appropriate sealing and finishing techniques also play a key role in regulating moisture exchange and preserving material stability over time.
4. Precision Cuts
The accurate creation of right-angle intersections in woodworking hinges significantly on the execution of precise cuts. Deviations from intended dimensions and angles directly impact the structural integrity and aesthetic appeal of the final construction. The following outlines key facets of precision cutting and their relevance to achieving optimal results.
- Dimensional Accuracy
Ensuring that each component of a joint adheres precisely to the specified dimensions is paramount. Even minor discrepancies can accumulate, leading to misalignments and weakened joints. For example, if the tenon of a mortise and tenon joint is even slightly oversized, it may create excessive stress on the mortise, potentially leading to cracking or joint failure. Conversely, an undersized tenon will result in a loose and unstable connection.
- Angular Accuracy
Maintaining a precise 90-degree angle at the intersection of two pieces of wood is crucial for achieving square and stable constructions. Inaccurate angles lead to skewed frames, uneven surfaces, and compromised structural integrity. A common example is found in the construction of a box: if the corners are not perfectly square, the box will be visibly distorted, and the lid may not fit properly.
- Cleanliness of Cut
A clean, smooth cut minimizes gaps and ensures optimal glue adhesion. Rough or splintered surfaces reduce the contact area between mating parts, weakening the joint. A fine-toothed saw blade, coupled with appropriate cutting techniques, is essential for achieving clean cuts. In applications such as edge-joining boards for a tabletop, clean cuts are particularly important for creating a seamless and visually appealing surface.
- Minimizing Tear-Out
Tear-out, the splintering or chipping of wood fibers during cutting, can significantly compromise the accuracy and aesthetic quality of a joint. Preventing tear-out requires careful consideration of wood grain direction, blade sharpness, and cutting speed. Using a backing board or scoring the cut line prior to sawing can minimize tear-out, particularly when working with brittle or highly figured woods.
The successful integration of these facets directly influences the quality and longevity of constructions involving right-angle connections. Consistently accurate, clean, and controlled cutting techniques are essential for creating woodworking projects that are both structurally sound and visually pleasing. Skillful execution ensures a smooth assembly, tight bond, and lasting connection.
5. Proper Alignment
Proper alignment is indispensable for achieving structurally sound and aesthetically pleasing right-angle connections in woodworking. Its absence introduces stress, diminishes joint strength, and compromises the overall integrity of the construction. Misalignment, even if minor, can result in uneven load distribution, leading to premature wear or failure of the joint. Consider a basic frame; if the sides are not precisely aligned during assembly, the resulting structure will be weak and unstable, prone to racking or collapse under even minimal pressure. Therefore, ensuring accurate and consistent positioning of components before and during the joining process is critical.
The achievement of proper alignment relies on several factors. Accurate measurement and marking are essential first steps. The use of jigs and fixtures can further enhance precision by holding components in the correct position during assembly. Clamping plays a vital role, applying consistent pressure to maintain alignment as adhesive cures. For example, when constructing a drawer using dovetail joints, a specialized dovetail jig ensures that each tail and pin aligns perfectly, resulting in a strong and visually appealing joint. Similarly, when assembling a cabinet carcass, clamping cauls can distribute pressure evenly across the joint, preventing movement and ensuring proper alignment.
In conclusion, proper alignment is not merely a desirable attribute but a fundamental requirement for successful woodworking involving right-angle intersections. Diligent attention to measurement, the use of appropriate tools and techniques, and careful monitoring throughout the assembly process are essential for achieving durable, stable, and visually appealing constructions. Neglecting alignment results in compromised joint strength and structural integrity, regardless of the materials or methods employed. Therefore, prioritizing alignment is a cornerstone of skilled woodworking practice.
6. Adhesive Selection
The selection of an appropriate adhesive is paramount for achieving durable and reliable right-angle intersections. The adhesive acts as a crucial bonding agent, transferring loads between the joined components and ensuring the structural integrity of the assembly. The performance of the adhesive directly influences the strength, longevity, and overall success of the construction.
- Adhesive Strength and Joint Type
The required strength of the adhesive must correspond to the type of joint being employed and the anticipated stresses it will bear. For example, a simple butt joint relies entirely on the adhesive for strength, necessitating the use of a high-strength adhesive such as epoxy or polyurethane. Conversely, a mechanically interlocking joint, such as a mortise and tenon or dovetail, can utilize a less demanding adhesive like PVA (polyvinyl acetate) glue, primarily to fill gaps and prevent movement. In applications where moisture resistance is critical, waterproof adhesives such as resorcinol or marine epoxy are essential, regardless of the joint type.
- Open Time and Working Time
Open time, the period during which the adhesive remains workable after application, and working time, the duration available for assembly and clamping, must be considered in relation to the complexity of the project. For intricate assemblies involving multiple right-angle intersections, an adhesive with a longer open time allows for adjustments and ensures adequate bonding before the adhesive begins to set. Fast-setting adhesives, such as cyanoacrylate (CA) glues, are suitable for small, quick repairs or when clamping is challenging, but their limited open time restricts their use in larger or more complex assemblies.
- Gap-Filling Properties
Ideally, mating surfaces should be perfectly flush and gap-free. However, in practice, minor imperfections are inevitable. An adhesive with good gap-filling properties can bridge these imperfections and ensure a solid bond, even when surfaces are not perfectly matched. Certain adhesives, such as epoxy resins, possess inherent gap-filling capabilities, while others, like PVA glues, require close-fitting joints for optimal performance. In situations where gaps are unavoidable, using shims or wood fillers in conjunction with the adhesive can improve joint strength and stability.
- Compatibility with Wood Species and Finishes
Different wood species possess varying levels of acidity and porosity, which can affect adhesive bond strength. Certain adhesives may not adhere well to oily woods, such as teak or rosewood, requiring surface preparation or the use of specialized adhesives. Furthermore, the adhesive must be compatible with the intended finish. Some adhesives can bleed through or react adversely with certain finishes, resulting in discoloration or adhesion problems. It is essential to test the adhesive and finish combination on scrap wood before applying it to the final project.
The facets of adhesive strength, working time, gap-filling capabilities, and material compatibility collectively determine the suitability of an adhesive for creating robust and enduring structures. Careful consideration of these factors, informed by the specific requirements of the project, is essential for achieving successful and long-lasting right-angle intersections.
7. Clamping Technique
Clamping technique exerts a decisive influence on the integrity and longevity of right-angle woodworking joints. Inadequate or improper clamping compromises the adhesive bond, leading to weakened junctions and diminished structural stability. The primary function of clamping is to maintain intimate contact between the mating surfaces during adhesive curing, thereby facilitating optimal molecular adhesion. For example, when constructing a frame using mortise and tenon joints, consistent and evenly distributed clamping pressure ensures that the tenon seats fully within the mortise, creating a tight and gap-free connection. The resulting bond provides superior resistance to tensile and shear forces, contributing significantly to the overall strength of the frame.
Variations in clamping pressure across the joint surface can lead to localized stress concentrations and uneven adhesive distribution. Excessive pressure can starve the joint of adhesive, while insufficient pressure allows for movement and prevents proper bonding. The selection of appropriate clamping devices, such as bar clamps, pipe clamps, or hand screws, is crucial for applying the necessary force uniformly across the joint. Furthermore, the use of cauls, which are auxiliary pieces of wood placed between the clamps and the workpiece, helps to distribute pressure evenly and prevent marring of the wood surface. For instance, when edge-gluing boards to create a tabletop, cauls are essential for maintaining a flat and even surface during the clamping process, preventing cupping or bowing.
Proper execution of clamping techniques requires an understanding of adhesive properties, wood species, and joint design. Careful consideration of these factors, coupled with the use of appropriate clamping devices and auxiliary tools, ensures the creation of durable, stable, and visually appealing. Deviations can cause poor joint strength and material distortion. Mastering the art of clamping is a fundamental skill for any woodworker seeking to achieve high-quality right-angle connections.
Frequently Asked Questions
The following addresses common questions and misconceptions related to creating stable and accurate right-angle junctions in woodworking projects.
Question 1: What is the most critical factor in achieving a strong joint?
Achieving intimate contact between the mating surfaces during adhesive curing is paramount. This ensures optimal molecular adhesion and maximizes joint strength.
Question 2: Why is squareness so important at right-angle intersections?
Deviations from perfect right angles introduce stress points, dimensional inaccuracies, and visual distortions, compromising the overall structural integrity and aesthetic quality.
Question 3: Can any adhesive be used for a 90-degree connection?
No. The adhesive must be selected based on the joint type, wood species, anticipated loads, and environmental conditions to ensure adequate bond strength and durability.
Question 4: How does wood movement affect 90-degree structures?
Wood’s hygroscopic nature leads to dimensional changes with moisture fluctuations. These changes induce stress within joints, potentially leading to warping, cracking, or joint failure if not accounted for.
Question 5: Why is precision cutting vital for constructing right-angle intersections?
Accurate cuts minimize gaps, ensure proper alignment, and promote optimal glue adhesion, contributing to both the strength and visual appeal of the joint.
Question 6: Is clamping always necessary for 90-degree junctions?
Clamping is essential for maintaining intimate contact between mating surfaces during adhesive curing. It ensures optimal bonding and prevents movement, thereby maximizing joint strength and stability.
Achieving stable and accurate connections requires careful attention to several interrelated factors. Proper material selection, precise cutting techniques, appropriate joint design, suitable adhesive choice, and diligent clamping procedures all contribute to successful outcomes.
The next section will discuss specific joinery methods commonly used for creating these connections, providing detailed guidance on their construction and application.
Woodworking 90 Degree Joint
The preceding discussion comprehensively addresses the multifaceted nature of creating stable and precise right-angle connections in woodworking. Critical elements, including material stability, joint strength, accurate cutting, proper alignment, adhesive selection, and clamping techniques, necessitate careful consideration for achieving durable and aesthetically sound results. The exploration emphasizes the importance of understanding wood’s behavior, selecting appropriate joinery methods, and employing meticulous assembly procedures.
Mastery of these principles is essential for any craftsperson seeking to produce high-quality woodworking. The successful application of these techniques contributes to the longevity and integrity of constructed pieces. Continued dedication to refining these skills will ensure the enduring quality and value of woodworking endeavors.


