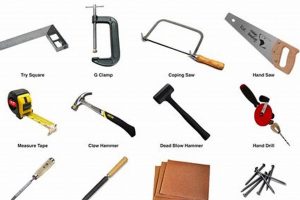
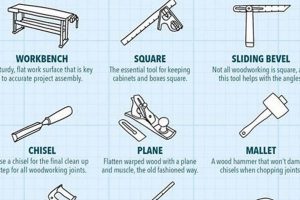
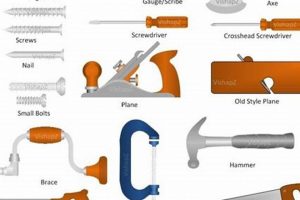
The act of learning to shape wood using manual implements represents a foundational skill set. This approach involves techniques such as sawing, chiseling, and planing, all executed without the assistance of power tools. The focus remains on developing precision and control through direct interaction with the material.
This approach fosters a deeper connection with the craft, promoting a greater understanding of wood grain, texture, and inherent properties. Historically, it was the primary method of construction and artistic expression, shaping both utilitarian objects and intricate designs. Today, it offers a sustainable and quieter alternative to power tool woodworking, encouraging patience and meticulousness.
The following sections will delve into essential hand tools, fundamental techniques, and project ideas designed to introduce the novice to this fulfilling craft. Subsequent discussions will cover tool maintenance, wood selection, and safety protocols, providing a solid foundation for further exploration and skill development in woodworking.
Essential Guidance for New Woodworkers
Embarking on the journey of woodworking requires a strategic approach. The following tips are designed to facilitate a successful introduction to the craft, emphasizing safety and the development of fundamental skills.
Tip 1: Prioritize Sharp Tools: Dull tools require excessive force, increasing the risk of slippage and injury. Invest in sharpening equipment and learn to maintain a keen edge on all cutting implements. A sharp tool is a safer tool.
Tip 2: Master Basic Hand Sawing: Accurate sawing is crucial for joinery and shaping. Practice sawing straight lines and consistent angles on scrap wood. Begin with softwoods like pine to develop control and gradually progress to hardwoods.
Tip 3: Understand Wood Grain Direction: Working with the grain minimizes tear-out and facilitates smoother cuts. Identify the grain direction before each cut and orient the tool accordingly. This is particularly important when using chisels and planes.
Tip 4: Secure Workpieces Effectively: A stable workpiece is essential for precise and safe woodworking. Utilize a vise, clamps, or a bench hook to hold the material firmly in place. Ensure the clamping force is sufficient to prevent movement without damaging the wood.
Tip 5: Practice Joinery on Scrap Material: Before attempting complex joinery on a final project, practice the techniques on scrap wood. This allows for experimentation and refinement of skills without risking costly mistakes. Common joints to practice include mortise and tenon, dovetail, and rabbet joints.
Tip 6: Invest in Quality Measuring Tools: Precise measurements are fundamental to accurate woodworking. Acquire a reliable ruler, square, marking gauge, and calipers. Learn to use these tools accurately and consistently to ensure proper fit and alignment.
Tip 7: Adhere to Safety Protocols: Always wear appropriate safety gear, including eye protection and hearing protection. Ensure adequate ventilation when working with finishes or adhesives. Maintain a clean and organized workspace to minimize hazards.
By adhering to these guidelines, the aspiring woodworker can establish a solid foundation for skill development and safety awareness. Consistent practice and a dedication to mastering fundamental techniques will contribute significantly to long-term success in the craft.
The subsequent sections will explore specific project ideas suitable for beginners, further reinforcing the skills outlined above and providing opportunities for practical application.
1. Sharpness
In the context of beginning woodworking, the condition of sharpness is not merely desirable but essential. It forms the bedrock upon which successful techniques and safe practices are built. Without adequately sharpened tools, the novice woodworker faces increased difficulty, potential for injury, and compromised results.
- Reduced Force Requirement
Sharp tools penetrate wood fibers cleanly and efficiently, minimizing the force required from the user. This reduction in force not only makes the work easier but also increases control, leading to more accurate cuts and a lower risk of tool slippage. For the beginner, managing force can be a significant challenge; sharp tools mitigate this.
- Enhanced Cut Quality
Sharpness directly influences the quality of the cut. A dull tool tears and crushes wood fibers, resulting in rough surfaces and splintering. In contrast, a sharp tool severs the fibers cleanly, leaving a smooth surface that requires less sanding and finishing. This is particularly important when creating joinery, where precise and clean cuts are crucial for a strong and aesthetically pleasing result.
- Improved Safety
Counterintuitively, sharp tools are safer than dull ones. Dull tools require excessive force, leading to increased user fatigue and a higher probability of losing control. When a tool is sharp, it performs its intended function with minimal effort, allowing the user to focus on control and accuracy. The likelihood of accidental slips and subsequent injuries is significantly reduced.
- Increased Efficiency and Enjoyment
Sharp tools make the woodworking process more efficient and enjoyable. Tasks that might be frustrating and time-consuming with dull tools become manageable and even satisfying with sharp tools. This positive feedback loop encourages continued practice and skill development, fostering a deeper appreciation for the craft.
The relationship between sharpness and successful beginning woodworking is symbiotic. Proper tool maintenance, including regular sharpening, should be considered a fundamental skill in itself. The time invested in honing and sharpening will yield returns in terms of safety, quality of work, and overall enjoyment of the craft, solidifying a foundation for future woodworking endeavors.
2. Accuracy
In woodworking, accuracy is paramount; especially so when initiating work with hand tools. Discrepancies, even minute, accumulate throughout the construction process, potentially compromising the structural integrity, aesthetic appeal, and functional viability of the project. Hand tool work demands a higher degree of precision than power tool alternatives, as there’s less reliance on mechanical aids to compensate for errors. For example, when cutting a mortise and tenon joint by hand, inaccuracies in the mortise’s dimensions will directly impact the tenon’s fit, resulting in a weak joint requiring shims or complete rework.
Accuracy manifests through several interconnected facets: precise measurement, careful marking, and controlled execution. Measurement tools, such as rulers, squares, and marking gauges, must be reliably calibrated and used consistently. Markings must be fine and clearly defined, serving as precise guides for cutting and shaping. Execution entails skilled manipulation of hand tools, maintaining consistent angles, pressures, and cutting paths. The cumulative effect of these aspects determines the overall accuracy of each component and its relationship to the final assembly. A practical illustration lies in creating a set of drawers; if each drawer front is not accurately sized and squared, the finished cabinet will exhibit uneven gaps and misalignment, detracting from its overall quality.
Ultimately, the pursuit of accuracy in beginning woodworking transcends the mere creation of projects; it fosters disciplined craftsmanship and an appreciation for detail. While achieving perfect accuracy remains an ongoing pursuit, embracing meticulousness and striving for incremental improvements will yield tangible benefits. Overcoming challenges associated with inaccuracy, such as learning to correct minor misalignments or refining measurement techniques, are integral to developing proficiency and confidence in woodworking with hand tools, thereby solidifying fundamental skills for future endeavors.
3. Wood Selection
Wood selection plays a pivotal role in beginning woodworking. The choice of material directly impacts the ease of work, the quality of the finished piece, and the overall learning experience. Understanding the properties of different wood species is therefore crucial for the novice.
- Workability and Tool Friendliness
Certain wood species are inherently easier to work with hand tools than others. Softwoods, such as pine or fir, are generally preferred for initial projects due to their lower density and softer grain. These characteristics allow for smoother cuts with less resistance, making them ideal for developing fundamental skills. Conversely, hardwoods like oak or maple, while offering greater durability and aesthetic appeal, present a greater challenge for beginners due to their density and resistance to hand tools.
- Grain Structure and Tear-Out
The grain structure of wood significantly affects its susceptibility to tear-out the splintering or chipping of wood fibers during cutting. Straight-grained woods are generally more predictable and less prone to tear-out than woods with irregular or interlocked grain patterns. For beginners, choosing straight-grained species will minimize the risk of tear-out and promote cleaner, more successful cuts. This is particularly important when working on joinery, where precise and clean cuts are essential.
- Stability and Movement
Wood is a hygroscopic material, meaning it absorbs and releases moisture from the surrounding environment. This process causes the wood to expand and contract, potentially leading to warping, cracking, or joint failure. Different wood species exhibit varying degrees of stability and movement. For initial projects, selecting dimensionally stable woods like poplar can minimize the risk of these issues. Understanding the stability characteristics of different species is crucial for long-term project success.
- Cost and Availability
The cost and availability of different wood species can also influence selection decisions. Exotic or rare woods often command a premium price, making them less suitable for initial projects where mistakes are more likely. Common and readily available woods, such as pine or poplar, offer an affordable and accessible option for beginners to practice and experiment with different techniques without incurring significant financial risk. Furthermore, using locally sourced wood can reduce transportation costs and environmental impact.
The astute novice woodworker recognizes the interplay between wood species and the challenges posed by hand tool woodworking. By carefully considering workability, grain structure, stability, cost, and availability, beginners can select materials that facilitate learning and enhance their chances of creating successful and satisfying projects. As skill and confidence grow, experimentation with a wider range of wood species becomes a natural progression, leading to a deeper appreciation for the unique qualities of each material.
4. Joinery Basics
The acquisition of fundamental joinery skills is integral to successful woodworking. For the beginning woodworker employing hand tools, a grasp of these basics provides the foundation for constructing durable and aesthetically pleasing projects. These initial joinery experiences directly influence the quality and longevity of completed works.
- Butt Joints and Fasteners
The butt joint, while simple, represents a crucial starting point. It involves joining two pieces of wood end-to-end or edge-to-edge. Securing the joint typically requires mechanical fasteners such as screws or nails. In beginning woodworking, the butt joint teaches the importance of accurate measurement and alignment. For instance, a basic box construction might utilize butt joints at each corner, highlighting the need for precise 90-degree angles to prevent structural weakness and visual misalignment. Careful attention to fastener placement is also critical to prevent splitting the wood.
- Rabbet Joints
The rabbet joint involves creating a recess or channel along the edge of one board to receive another. This joint increases the gluing surface area compared to a butt joint, resulting in a stronger bond. An example is its application in constructing the back of a cabinet or drawer. Creating a clean, consistent rabbet with hand tools like a rabbet plane or chisel develops skill in achieving uniform depth and width, essential for creating a snug and secure fit. Errors in the rabbet dimensions directly impact the overall alignment and stability of the structure.
- Dado Joints
Similar to a rabbet, a dado joint involves a channel cut into a board, but unlike a rabbet, the channel is cut across the grain and not along the edge. Dado joints are often used to house shelves in cabinets or to create strong, interlocking connections. Achieving a precise dado with hand tools, like a backsaw and chisel, requires careful marking and controlled cutting. Variations in the dado’s width or depth will affect the shelf’s stability and flushness with the surrounding structure. Consistent practice in creating accurate dados improves the woodworker’s ability to create robust and visually appealing assemblies.
- Dowel Joints
Dowel joints utilize cylindrical pins inserted into precisely drilled holes in both joining members. This method strengthens the connection compared to simple butt joints, particularly when subjected to shear forces. Dowel joints are useful in frame construction or attaching legs to tabletops. Accurate drilling and alignment are vital for success with dowel joints. Utilizing a doweling jig helps maintain perpendicularity and consistent spacing. Misaligned dowel holes can result in weakened joints and difficulty in assembly, underscoring the need for careful preparation and execution when employing this technique.
The understanding and application of these joinery basics provide a solid foundation for beginning woodworkers employing hand tools. Each joint presents distinct challenges and opportunities for skill development. Mastering these foundational techniques not only enables the construction of functional and aesthetically pleasing projects but also cultivates a deeper appreciation for the craft.
5. Tool Maintenance
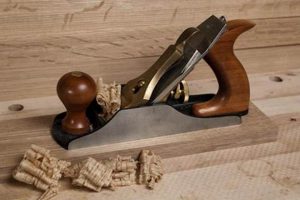
The practice of tool maintenance is inextricably linked to success in beginning woodworking. The condition of tools directly affects the quality of work, the safety of the operator, and the overall efficiency of the woodworking process. Neglecting tool maintenance creates a cascade of negative consequences. Dull tools require more force, increasing the risk of slippage and potential injury. This also leads to rough cuts, tear-out, and compromised joinery. Consequently, projects demand additional time for correction and refinement, diminishing the satisfaction derived from the craft. For example, a dull hand plane will skip across the surface of the wood, leaving an uneven finish and requiring extensive sanding. In contrast, a sharp, well-maintained plane will produce smooth, consistent shavings, resulting in a surface that requires minimal further processing.
Effective tool maintenance encompasses several key areas: sharpening, cleaning, lubrication, and proper storage. Sharpening restores the cutting edge of blades, chisels, and planes, ensuring efficient material removal and clean cuts. Cleaning removes accumulated debris and prevents rust formation. Lubrication reduces friction in moving parts, extending tool life and improving performance. Proper storage protects tools from damage and environmental exposure. A backsaw left exposed to moisture, for instance, will quickly develop rust, compromising its ability to make accurate cuts. Routine maintenance, such as honing the blade of a chisel after each use and applying a light coat of oil to metal surfaces, can significantly extend the lifespan of tools and maintain their optimal functionality.
Therefore, incorporating tool maintenance into the beginning woodworking curriculum is not merely a suggestion but a necessity. It is a fundamental aspect of responsible craftsmanship and contributes directly to the woodworker’s ability to execute projects safely, efficiently, and with precision. The challenges associated with mastering tool maintenance, such as learning to sharpen effectively or identifying the appropriate lubrication for different tools, are integral to developing a comprehensive understanding of woodworking principles and practices. Investing time and effort in tool maintenance yields long-term benefits, fostering a sustainable approach to the craft and ensuring that tools remain reliable and effective for years to come.
6. Workholding
In the context of beginning woodworking with hand tools, workholding represents a non-negotiable prerequisite for achieving accuracy, safety, and efficiency. Securing the workpiece against movement forms the foundation upon which all subsequent operations are built. Inadequate workholding directly translates to compromised cuts, increased risk of injury, and ultimately, a lower quality finished product. The direct correlation between secure workholding and positive outcomes underscores its importance as a foundational skill for novice woodworkers. For instance, attempting to hand-saw a straight line on a board that is not firmly secured invariably results in wandering cuts and frustration. Similarly, chiseling a mortise on an unstable workpiece significantly increases the chance of tool slippage and potential injury. Therefore, understanding and implementing effective workholding techniques is not merely a suggestion, but a necessity for those embarking on the path of hand tool woodworking.
Effective workholding manifests in various forms, each suited to specific tasks and workpiece geometries. A bench vise provides a robust and versatile solution for securing larger pieces of wood, while smaller, more intricate components might necessitate the use of clamps or specialized jigs. Bench hooks offer support and stability when sawing thin stock. The choice of workholding method should be determined by the size, shape, and orientation of the workpiece, as well as the nature of the operation being performed. For example, when hand-planing a large surface, the workpiece should be firmly clamped to the workbench, preventing any movement or vibration that could compromise the smoothness of the finished surface. Conversely, when carving a small detail, a specialized carving vise might be more appropriate, allowing for precise control and maneuverability. Developing proficiency in selecting and utilizing appropriate workholding methods is a critical aspect of mastering hand tool woodworking techniques.
The challenges associated with workholding often lie in achieving a balance between security and accessibility. The workpiece must be held firmly enough to prevent movement, but without impeding access to the areas being worked on. Overcoming this challenge requires a combination of practical experience, careful planning, and a willingness to experiment with different workholding solutions. Furthermore, attention must be paid to protecting the workpiece from damage caused by clamping pressure. Utilizing soft jaws or padding between the clamps and the wood can prevent unsightly marks and indentations. In conclusion, effective workholding is a cornerstone of beginning woodworking with hand tools, demanding deliberate consideration and consistent practice. Mastering these techniques empowers the novice woodworker to execute projects with greater precision, safety, and confidence, setting the stage for continued growth and skill development.
7. Safety
The integration of safety protocols into beginning woodworking with hand tools is not merely a procedural formality but a fundamental prerequisite. Safe practices safeguard the individual, minimize the risk of injury, and foster an environment conducive to learning and skill development. A deliberate emphasis on safety from the outset cultivates responsible habits that extend throughout the woodworking journey.
- Sharp Tool Handling
The paradox of sharp tools being safer than dull ones demands attention. Dull tools require excessive force, increasing the likelihood of slippage. Conversely, sharp tools, when handled with caution and control, require less force and therefore offer greater precision. Novices must learn proper grip techniques, controlled movements, and methods for safely setting down tools. Regular sharpening routines, while essential for performance, must be conducted with adherence to established safety protocols, utilizing appropriate personal protective equipment such as cut-resistant gloves.
- Eye and Ear Protection
Woodworking, even with hand tools, generates airborne particles and noise that can pose risks to sensory organs. Eye protection, in the form of safety glasses or goggles, is imperative to shield against flying debris, such as wood chips and dust. Similarly, prolonged exposure to the sound of sawing, planing, and striking tools can lead to hearing damage. Earplugs or earmuffs are essential to mitigate this risk. The consistent use of both eye and ear protection establishes a critical habit that minimizes long-term health consequences.
- Workholding and Stability
Securely clamping or otherwise stabilizing the workpiece is paramount. Unstable workpieces increase the risk of tool slippage, resulting in potential injury and inaccurate cuts. Novices must learn to select appropriate workholding methods for different tasks, ensuring that the workpiece is firmly secured before commencing any operation. The stability of the workbench itself is also a factor. A sturdy, well-supported bench provides a stable platform for woodworking activities, minimizing the risk of accidents.
- Dust and Fume Control
While hand tool woodworking generates less dust than power tool methods, it is still crucial to manage airborne particulates. Fine wood dust can be a respiratory irritant, and certain wood species can cause allergic reactions. Adequate ventilation is essential, and the use of a dust mask or respirator is recommended, particularly when working with woods known to be allergenic. Furthermore, finishes, adhesives, and other woodworking chemicals often emit fumes that can be harmful. Proper ventilation and the use of appropriate respiratory protection are essential when working with these materials.
The integration of these safety facets into beginning woodworking with hand tools creates a holistic approach to the craft. These principles are not isolated rules but interconnected elements of a safe and sustainable woodworking practice. Prioritizing safety from the outset fosters responsible habits, minimizes the risk of injury, and promotes a more enjoyable and fulfilling woodworking experience. Consistent adherence to these protocols transforms safety from an afterthought to an ingrained aspect of the woodworking process.
Frequently Asked Questions
This section addresses common inquiries and misconceptions encountered by individuals initiating woodworking with hand tools. The aim is to provide clear, concise information to facilitate a successful and informed entry into the craft.
Question 1: What is the minimum investment required to begin woodworking with hand tools?
The initial investment varies depending on the quality and quantity of tools acquired. A basic starter set, including essential hand saws, chisels, a plane, measuring tools, and sharpening equipment, typically ranges from $200 to $500. Opting for quality tools from reputable manufacturers is advisable, as they offer superior performance, durability, and longevity. The cost can be mitigated by purchasing used tools in good condition, but a thorough inspection is necessary to ensure functionality.
Question 2: How long does it take to become proficient in hand tool woodworking?
Proficiency is a function of dedicated practice and consistent application of proper techniques. While basic skills, such as sawing straight lines and chiseling accurately, can be acquired within a few weeks of regular practice, achieving mastery of complex joinery and advanced techniques requires years of dedicated effort. Consistent engagement with the craft and a willingness to learn from both successes and failures are crucial for long-term skill development.
Question 3: Is hand tool woodworking inherently safer than power tool woodworking?
The perception of safety is nuanced. While hand tools lack the high-speed operation of power tools, they still pose inherent risks if mishandled. Sharp tools, if improperly used, can cause severe cuts. The absence of automated safety mechanisms necessitates a heightened level of attentiveness and control. Proper training, adherence to safety protocols, and a thorough understanding of tool operation are essential to minimize the risk of injury, regardless of the tools employed.
Question 4: What are the space requirements for setting up a hand tool woodworking workshop?
Hand tool woodworking requires less space than power tool woodworking, but a dedicated workspace is still necessary. A minimum of 100 square feet is recommended to accommodate a workbench, tool storage, and ample room for maneuverability. Adequate lighting and ventilation are also crucial. The workspace should be organized and free of clutter to minimize the risk of accidents and promote efficient workflow.
Question 5: What are the most common mistakes made by beginners in hand tool woodworking?
Common errors include using dull tools, neglecting proper workholding techniques, failing to accurately measure and mark, forcing tools beyond their capabilities, and ignoring the grain direction of the wood. These mistakes often result in compromised cuts, damaged workpieces, and increased frustration. Diligent practice, meticulous attention to detail, and a willingness to learn from errors are essential for overcoming these challenges.
Question 6: What resources are available for learning hand tool woodworking?
Numerous resources exist to support aspiring hand tool woodworkers. Books, instructional videos, online forums, and in-person workshops offer valuable guidance and instruction. Seeking mentorship from experienced woodworkers can provide personalized feedback and accelerate the learning process. Local woodworking guilds and community education programs often offer introductory courses and opportunities for skill development.
Adherence to fundamental principles, persistent practice, and a commitment to continuous learning are essential for achieving proficiency in woodworking. The initial challenges encountered can be overcome with a structured approach and dedication to mastering the core skills.
The subsequent section will provide a curated list of resources designed to further support the aspiring hand tool woodworker. These resources include books, online tutorials, and recommended tool vendors.
Conclusion
Beginning woodworking with hand tools presents a distinct path to craftsmanship. This exploration has addressed essential aspects ranging from initial tool selection and maintenance to fundamental techniques and safety protocols. An understanding of wood properties, joinery basics, and the importance of accuracy has been emphasized. The presented information serves as a foundation for further skill development.
The deliberate engagement with hand tools fosters patience, precision, and a deeper connection with the materials. Continued practice and a commitment to mastering fundamental techniques will facilitate enduring woodworking skills. Pursuing this craft demands discipline, but the rewards are lasting and tangible, offering a sustainable approach to creating functional and artistic pieces.


