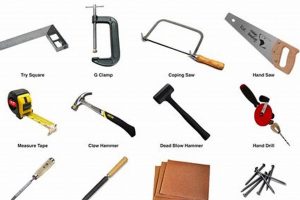
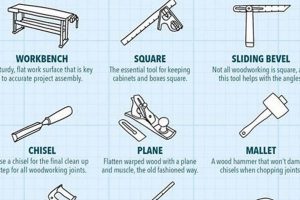
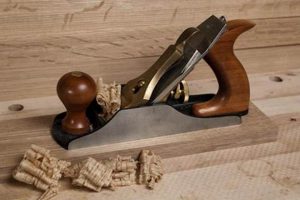
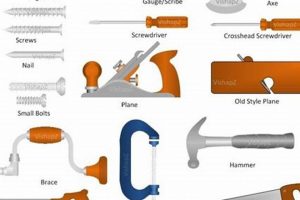
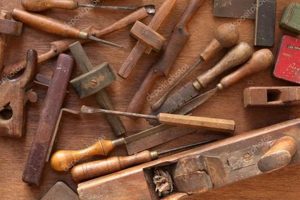
Instruments employed in shaping wood with precision and artistry, relying on manual power rather than electricity, are fundamental to the craft. Chisels, planes, saws, and measuring devices serve as extensions of the artisan’s hand, enabling meticulous control over material removal and surface refinement. These implements offer a tangible connection to the woodworking process.
The advantages of utilizing manual methods in shaping wood are multifold. They provide a degree of control and sensitivity unattainable with power equipment, allowing for intricate detailing and the preservation of wood grain. Historically, reliance on hand-operated implements fostered a deep understanding of wood properties and grain direction, knowledge essential for creating lasting, aesthetically pleasing pieces. The discipline cultivates patience and precision, skills paramount in achieving superior results.
The subsequent sections will explore specific types of these instruments, focusing on their proper maintenance, sharpening techniques, and applications within various woodworking projects. Furthermore, guidance will be provided on selecting suitable instruments based on project requirements and experience level.
Essential Guidance for Manual Wood Shaping
Optimizing the performance and longevity of manual wood shaping instruments requires diligent attention to both usage and maintenance. These tips provide a foundation for achieving superior results and extending the lifespan of valuable tools.
Tip 1: Maintain Sharpness. Sharp cutting edges are paramount. Dull tools require excessive force, leading to inaccuracies and potential damage to both the workpiece and the implement. Regular sharpening, using appropriate stones and honing techniques, is non-negotiable.
Tip 2: Proper Storage is Crucial. Moisture and oxidation are detrimental. Store implements in a dry environment, ideally in a tool cabinet or roll, and consider applying a thin coat of rust-inhibiting oil to exposed metal surfaces.
Tip 3: Understand Wood Grain. Cutting against the grain can result in tear-out and splintering. Always examine the workpiece and orient the instrument to cut with, or at a slight angle to, the grain direction for a cleaner finish.
Tip 4: Use Appropriate Force. Exert only the necessary pressure. Forcing a cut not only risks damaging the instrument but also compromises control and accuracy. Let the sharpness of the blade do the work.
Tip 5: Regular Cleaning. Resin and wood particles accumulate and impede performance. Clean instruments after each use with a brush or cloth to remove debris, and occasionally apply a solvent to dissolve stubborn residue.
Tip 6: Handle with Care. Treat manual shaping instruments with respect. Avoid dropping them or using them for tasks beyond their intended purpose. Mishandling can lead to breakage or misalignment.
Tip 7: Select the Right Instrument for the Job. Using an undersized chisel for heavy stock removal or a coarse saw for fine detailing will yield unsatisfactory results. Match the instrument to the specific task for optimal efficiency and precision.
Adhering to these guidelines will not only improve the quality of work but also safeguard the investment in quality manual wood shaping instruments.
The following sections will delve into specific applications and advanced techniques, further enhancing woodworking capabilities.
1. Sharpness Maintenance
The efficacy of manual woodworking instruments is inextricably linked to the condition of their cutting edges. Sharpness maintenance is not merely a desirable practice but a fundamental prerequisite for achieving the precision and quality associated with the craft. A dull blade necessitates increased force, which leads to several undesirable consequences. The likelihood of tear-out increases significantly, especially when working with figured or difficult-to-plane wood. Precise cuts become challenging, compromising joinery and overall dimensions. Furthermore, excessive force increases the risk of instrument slippage, potentially causing injury to the woodworker. Examples include attempting to pare a dovetail joint with a dull chisel, resulting in crushed fibers and an ill-fitting joint, or using a dull plane that chatters across the surface of the wood, leaving an uneven, unsatisfactory finish.
The correct methods for sharpening tools vary depending on the type of steel and the instruments intended use. Water stones, oil stones, and diamond stones are common abrasive options. Honing, a subsequent step, refines the cutting edge, removing microscopic imperfections. The frequency of sharpening depends on the type of wood being worked and the amount of usage. Softer woods require less frequent sharpening than hardwoods or abrasive materials. Recognizing the signs of a dull edge increased resistance, torn fibers, a polished reflection on the cutting edge is crucial. Consistent and proper maintenance, including regular sharpening and honing, translates directly into efficiency, accuracy, and the overall quality of the finished product.
Neglecting sharpness maintenance ultimately undermines the benefits of employing manual woodworking instruments. The capacity for fine detail, precise control, and the unique tactile experience offered by these tools are all diminished when the cutting edges are not optimally prepared. Maintaining a keen edge is not just a chore but an integral part of the skill set and philosophy for creating quality wood project with these instruments. The challenges of properly sharpening and maintaining blades and implements are overcome through practice, correct use of equipment, and an understanding of the metal properties, linking directly to the success of any fine woodworking project.
2. Wood Grain Awareness
An understanding of wood grain is paramount when employing manual woodworking implements. The orientation and characteristics of wood fibers directly influence how the wood responds to cutting, shaping, and finishing. Ignoring grain direction can lead to unsatisfactory results, including tear-out, splitting, and weak joints. Skillful woodworking necessitates an intimate knowledge of how the instruments interact with varying grain patterns.
- Tear-Out Prevention
The primary benefit of grain awareness lies in minimizing tear-out the splintering of wood fibers during cutting. When planing, for example, one must observe the grain direction and plane with it, not against it. Working against the grain lifts and tears the fibers, resulting in a rough surface. Skilled artisans alter the planing direction or angle of attack to avoid tear-out in areas where the grain reverses. This is vital for achieving smooth, polished surfaces with planes and other shaping implements.
- Joint Strength Optimization
Grain orientation also affects the strength and stability of joints. In mortise-and-tenon joinery, aligning the grain direction of the mortise and tenon minimizes the risk of splitting or weakening the joint over time due to seasonal wood movement. Dovetail joints gain added strength when the dovetails and pins are cut with consideration for grain direction, ensuring optimal glue surface and resistance to stress.
- Splitting Resistance
Driving fasteners, such as nails or screws, without regard for grain direction can induce splitting, particularly near the ends of boards. Pre-drilling pilot holes, oriented parallel to the grain, helps mitigate this risk. When splitting wood intentionally (e.g., for firewood), understanding the grain structure enables predictable and controlled splitting along natural cleavage lines, utilizing wedges and mauls.
- Aesthetic Enhancement
Grain patterns contribute significantly to the visual appeal of a finished piece. Selecting and orienting boards to showcase the natural figure and character of the wood requires a keen eye and an understanding of how different cuts (e.g., quarter-sawn, rift-sawn, flat-sawn) reveal the grain. Matching grain patterns across adjacent components creates a cohesive and harmonious design.
These aspects of grain awareness are intertwined with the effective use of manual instruments. Saws, planes, chisels, and other implements become extensions of the woodworker’s understanding of the material. Mastery of hand-tool techniques, coupled with a deep respect for grain properties, results in pieces of enduring beauty and structural integrity.
3. Instrument Selection
Appropriate instrument selection constitutes a critical element within the domain of shaping wood. The correlation between the chosen instrument and the intended task dictates the quality of the resultant work. An ill-suited implement not only compromises precision but also increases the likelihood of material damage and user fatigue. For instance, employing a rip saw intended for cutting along the grain when crosscutting, will result in a rough cut and inefficient material removal. Conversely, utilizing a delicate dovetail saw for heavy stock removal risks damaging the fine teeth and compromising its intended purpose of creating precise joints. Therefore, proficiency requires discerning the specific attributes of each instrument and its optimal application.
The selection process necessitates considering several factors, including the type of wood, the nature of the cut, and the desired finish. Hardwoods demand instruments with greater durability and sharpness retention compared to softwoods. Intricate joinery, such as mortise and tenon or dovetail joints, necessitate specialized instruments with precise cutting capabilities, such as mortise chisels or dovetail saws. Achieving a smooth, refined surface requires planes with specific blade configurations and the ability to make fine adjustments. An example could be selecting a low-angle block plane for end-grain trimming due to its ability to shear the fibers cleanly, reducing tear-out. Equally significant is the ergonomic design of the instrument, ensuring comfortable and controlled operation, thereby minimizing fatigue and maximizing accuracy over extended periods.
In summary, careful instrument selection is not merely a preliminary step but an integral component of the entire woodworking process. It represents an investment in both efficiency and quality. A comprehensive understanding of the characteristics, limitations, and optimal applications of each instrument enables the craftsman to execute tasks with greater precision, control, and ultimately, achieve superior results. The effectiveness of shaping wood depends heavily on mastering the art of choosing the right tool for the job.
4. Ergonomic Application
Ergonomic application, the science of designing workspaces and tools to fit the user, is of considerable importance when employing shaping wood. Extended periods spent gripping, pushing, and manipulating implements can lead to musculoskeletal strain and reduced precision if ergonomic principles are disregarded. Proper application minimizes physical stress and optimizes both efficiency and the quality of the work.
- Grip and Handle Design
The design of instrument grips and handles significantly influences user comfort and control. Handles shaped to conform to the natural curvature of the hand reduce strain and improve grip strength. Materials such as hardwood offer a tactile connection, while textured surfaces enhance grip, preventing slippage, even with perspiration. Poorly designed handles cause fatigue and increase the risk of accidents. A handle that is too small or too large forces the hand into an unnatural position, leading to discomfort and reduced control. Choosing instruments with ergonomically designed handles enables prolonged use without compromising precision.
- Posture and Body Mechanics
Maintaining correct posture and employing proper body mechanics are integral to ergonomic application. Bending or twisting excessively while working places undue stress on the back and shoulders. Elevating the workpiece to an appropriate height minimizes the need to bend over, reducing strain on the lower back. Using a stable workbench positioned at a comfortable working height promotes good posture. Similarly, keeping the elbows close to the body while performing tasks such as planing minimizes shoulder strain. Correct posture and body mechanics distribute the workload evenly, preventing fatigue and promoting efficiency.
- Force and Motion Optimization
Ergonomic application encompasses the efficient utilization of force and motion. Applying excessive force to a dull instrument not only increases the risk of injury but also reduces control and precision. Sharp instruments require less force, allowing for smoother, more controlled cuts. Utilizing body weight to generate force, rather than relying solely on arm strength, reduces fatigue. Fluid, controlled motions are more efficient and less fatiguing than jerky, forced movements. By optimizing force and motion, woodworkers minimize physical strain and enhance their ability to execute intricate tasks with accuracy.
- Workbench and Workspace Layout
The arrangement of the workbench and overall workspace affects ergonomic application. Placing frequently used instruments within easy reach minimizes the need to stretch or twist, reducing strain. Adequate lighting reduces eye strain and allows for better visibility of the workpiece. A well-organized workspace minimizes distractions and promotes efficiency. The height of the workbench should be adjusted to suit the individual, promoting good posture. By creating an ergonomically sound workspace, woodworkers optimize their physical comfort and enhance their ability to focus on the task at hand.
These facets of ergonomic application are interconnected and mutually reinforcing. Implementing ergonomic principles enhances the comfort, efficiency, and long-term health of the artisan, while simultaneously promoting the creation of high-quality woodworking.
5. Precision Measurement
Accuracy in dimensioning and marking is paramount when employing manual woodworking instruments. The inherent control afforded by hand tools demands a corresponding commitment to precision measurement to ensure accurate execution and seamless integration of components. Discrepancies, however small, are often magnified during assembly, compromising the structural integrity and aesthetic appeal of the final product.
- Dimensional Accuracy
Dimensional accuracy refers to the degree to which a component’s actual dimensions match the intended design. When using manual instruments, achieving dimensional accuracy relies on the meticulous use of measuring tools such as rulers, calipers, and squares. For example, precisely measuring and marking the dimensions of a mortise before chiseling is crucial for a snug, well-fitting tenon. Failure to maintain dimensional accuracy can result in gaps, misalignments, and overall structural instability.
- Angle Precision
Angle precision pertains to the accurate establishment and replication of angles, whether for joinery, shaping, or decorative elements. Protractor or bevel gauge, combined with sharp marking knives or pencils, facilitates precise angle transfer and cutting. Consider the accurate cutting of dovetails; slight angular deviations can render the joint ineffective. Precision is key in reproducing angles accurately across multiple components to achieve uniformity and structural soundness.
- Marking and Layout
Precise marking and layout are the foundation for accurate cutting and shaping. Marking gauges, knives, and pencils with fine points allow for clear, unambiguous layout lines. For example, accurately marking the depth of a rabbet or the width of a groove is essential for consistent and repeatable results. Improper marking leads to errors that compound throughout the woodworking process.
- Verification and Adjustment
Verification and adjustment involve the systematic checking of dimensions and angles throughout the woodworking process. Squares ensure that components are perpendicular, while levels confirm that surfaces are horizontal or vertical. When discrepancies are identified, adjustments must be made carefully and deliberately. For instance, checking the squareness of a drawer box during assembly and making necessary adjustments before final glue-up ensures proper functionality. Verification and adjustment are iterative processes that contribute significantly to the overall quality and accuracy of the finished piece.
These elements of precision measurement are inextricably linked to the skillful application of manual woodworking tools. By prioritizing accuracy in dimensioning, marking, and verification, artisans can harness the potential of instruments to produce pieces of exceptional quality and craftsmanship.
Frequently Asked Questions
This section addresses common inquiries regarding manual woodworking instruments, providing clarity on their proper use, maintenance, and selection.
Question 1: What are the fundamental advantages of shaping wood using manual instruments compared to power tools?
Manual shaping offers superior control over material removal, reducing the risk of tear-out, particularly in figured woods. This approach fosters an understanding of wood grain and instrument behavior. The process is quieter and generates less dust than power equipment, contributing to a healthier work environment.
Question 2: How frequently should manual instruments be sharpened?
Sharpening frequency depends on wood hardness, instrument usage, and steel composition. Observe instrument performance; increased resistance or tear-out indicates a dull edge. Sharpen before performance degrades significantly to maintain efficiency and control.
Question 3: What is the proper method for storing shaping wood?
Manual shaping instruments require protection from moisture and oxidation. Store instruments in a dry environment, ideally in a tool cabinet or roll. Apply a thin coat of rust-inhibiting oil to exposed metal surfaces to prevent corrosion.
Question 4: Is prior experience necessary to achieve proficiency?
While prior experience is beneficial, beginners can achieve proficiency through focused practice and adherence to established techniques. Start with fundamental skills, such as sharpening and basic joinery, gradually progressing to more complex operations.
Question 5: What are the essential instruments for a beginning woodworker?
A starter kit typically includes a selection of chisels, a smoothing plane, a combination square, a marking gauge, and a saw appropriate for both ripping and crosscutting. Invest in high-quality instruments that will retain sharpness and withstand prolonged use.
Question 6: What are the potential hazards and mitigation strategies when employing manual instruments?
Potential hazards include cuts from sharp edges, injuries from instrument slippage, and musculoskeletal strain. Mitigation strategies include maintaining sharp edges, using proper clamping and work-holding techniques, and employing ergonomic posture and body mechanics.
Mastering the effective utilization of manual instruments requires patience, diligence, and a commitment to continuous learning. The rewards, however, are substantial: precise control, superior finish quality, and a tangible connection to the art of woodworking.
The subsequent section will delve into advanced techniques and project applications. Please keep the article on “fine woodworking hand tools” continue.
Conclusion
The preceding discussion has explored the multifaceted aspects of shaping wood using manual instruments. From instrument selection and maintenance to ergonomic application and precise measurement, each element contributes to the successful execution of woodworking projects. The inherent control, tactile feedback, and potential for refined detail offered by these implements underscore their enduring value in a craft increasingly dominated by mechanized processes.
Continued refinement of technique and an unwavering commitment to precision represent the hallmarks of skilled artisans. By embracing the disciplines inherent in shaping wood, practitioners not only create objects of enduring beauty but also cultivate a profound appreciation for the material itself. The legacy of woodworking rests upon the skillful manipulation of these instruments and their ability to transform raw materials into objects of lasting significance.


