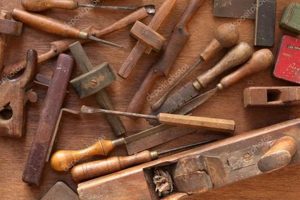
The use of manually powered boring tools to create holes in wood is a fundamental practice within traditional woodworking. This technique employs a specialized tool consisting of a rotating shaft with a cutting head, operated by hand to excavate material. Examples of its application range from preparing wood for joinery to creating pilot holes for fasteners.
This method offers precision and control, particularly valued in situations where power tools are impractical or unavailable. Historically, it played a crucial role in timber framing, shipbuilding, and other large-scale construction projects. The resulting joinery often exhibits a level of craftsmanship difficult to replicate with modern machinery. It also allows users to operate more quietly and avoid the reliance on electricity to accomplish these tasks.
Therefore, the following article explores various aspects of this craft, including tool selection, sharpening techniques, and best practices for achieving accurate and clean results.
Tips
Optimal employment of manual wood-boring implements necessitates adherence to specific techniques to ensure accuracy and prevent material damage.
Tip 1: Proper Auger Selection: Choose an auger appropriate for the wood type and hole size. Hardwoods demand augers with sharper cutting edges and more robust construction compared to those used for softwoods.
Tip 2: Secure Workpiece Fixture: Ensure the workpiece is firmly secured to prevent movement during the boring process. Clamps or vices are essential for stability and user safety.
Tip 3: Pilot Hole Establishment: Initiating the hole with a smaller awl or nail facilitates accurate auger placement and prevents wandering, particularly when starting on curved surfaces.
Tip 4: Consistent Downward Pressure: Apply consistent, moderate downward pressure while rotating the auger handle. Avoid excessive force, which can lead to binding or breakage.
Tip 5: Periodic Auger Clearing: Regularly remove wood shavings from the auger flutes to maintain efficient cutting action and reduce friction. A specialized auger clearing tool or a small hook is suitable for this purpose.
Tip 6: Edge Breakout Prevention: When boring through the workpiece, reduce downward pressure as the auger approaches the exit point to minimize splintering or breakout. Consider backing the workpiece with a sacrificial board.
Tip 7: Auger Sharpening Maintenance: Maintain a sharp cutting edge on the auger. A dull auger requires increased force, increasing the risk of errors and user fatigue. Utilize specialized sharpening tools and techniques to preserve the cutting geometry.
Effective application of these tips enhances the precision and efficiency of manual wood boring, resulting in cleaner holes and reduced material waste. These practices are vital for achieving professional-quality results.
The following sections will delve deeper into the specific types of augers available and the techniques for restoring their cutting edges.
1. Auger Type
The selection of the appropriate auger type is paramount to achieving desired results in manual wood boring. Different designs cater to specific applications, wood densities, and accuracy requirements. The auger’s geometry dictates its cutting action, chip ejection, and overall performance.
- Spur Augers
Spur augers feature sharp spurs that score the wood ahead of the cutting edge, resulting in a cleaner hole with minimal tear-out. They are particularly well-suited for working with hardwoods and creating precise holes for joinery. Their use reduces splintering around the hole’s perimeter.
- Solid-Center Augers
Solid-center augers possess a continuous central web that provides increased strength and rigidity, preventing deflection during boring. This design is beneficial when drilling deep holes or working with dense materials, where stability is crucial. They are a robust option for demanding applications.
- Jennings Pattern Augers
Jennings pattern augers combine a screw feed with cutting lips, allowing for self-feeding and efficient chip removal. The screw thread draws the auger into the wood, reducing the amount of manual force required. These are commonly used for general-purpose boring tasks.
- Nose Augers (Spoon Bits)
Nose augers, sometimes referred to as spoon bits, lack a screw feed and are designed for boring curved surfaces or enlarging existing holes. Their rounded cutting edge allows for controlled material removal without the aggressiveness of a self-feeding auger. They are frequently employed for shaping and sculpting operations.
The careful consideration of auger type, based on the specific demands of the woodworking project, directly impacts the efficiency, accuracy, and quality of the finished product. Utilizing the correct auger reduces the risk of material damage and ensures a successful outcome. The varying geometries underscore the importance of understanding the nuances of each tool.
2. Wood Species
The selection of wood species exerts a significant influence on the efficacy and execution of manual wood boring. The density, grain structure, and resin content of the chosen wood directly affect the force required, the cutting performance of the auger, and the resulting quality of the hole. Hardwoods, such as oak or maple, necessitate sharper auger bits and a more deliberate, controlled approach due to their inherent resistance to cutting. In contrast, softwoods, like pine or cedar, demand less force but can be prone to splintering if the auger is not properly sharpened or the technique is careless.
For instance, attempting to bore a large-diameter hole in a dense hardwood with a dull auger can lead to excessive friction, heat buildup, and potential binding. This can result in inaccurate hole placement, damage to the auger bit, or even injury to the user. Conversely, boring through a knotty softwood requires careful attention to grain direction to prevent the auger from wandering or tearing the wood fibers. The inherent oiliness of certain wood species, such as teak, can also affect the auger’s grip and cutting action, necessitating frequent cleaning of the bit to maintain optimal performance.
In summary, a comprehensive understanding of the wood species being worked is crucial for successful manual wood boring. This knowledge informs the choice of auger type, the sharpening technique employed, and the overall approach to the boring process. Failure to account for the wood’s properties can lead to inefficient work, inaccurate results, and potential damage to both the workpiece and the tool. Matching wood species with the corresponding hand auger woodworking strategy contributes to a superior final product.
3. Sharpening Technique
The effectiveness of manual wood boring is inextricably linked to the precision of the sharpening technique applied to the auger. A dull auger necessitates increased force, leading to inaccurate hole placement and potential material damage. The geometric integrity of the cutting edge directly influences the auger’s ability to efficiently sever wood fibers. Improper sharpening, such as rounding the cutting edge or altering the bevel angle, compromises the tool’s performance. Consider, for instance, an auger used for creating mortise and tenon joints. A properly sharpened auger creates clean, square shoulders, essential for a strong and precise joint. Conversely, a dull auger produces ragged edges, weakening the joint’s integrity.
The process of sharpening typically involves filing or grinding the cutting edges to restore their original geometry. Specialized tools, such as auger sharpening files and jigs, are employed to maintain consistent angles and prevent over-sharpening. The angle of the cutting edge is critical; a steeper angle is suitable for hardwoods, while a shallower angle is preferred for softwoods. Incorrect angles can lead to inefficient cutting or premature wear. Furthermore, the removal of burrs or wire edges after sharpening is essential for a smooth cutting action. A burr left on the cutting edge can cause the auger to catch or tear the wood fibers.
In conclusion, the sharpening technique represents a critical component of manual wood boring. A well-sharpened auger facilitates accurate and efficient hole creation, minimizing material waste and ensuring the structural integrity of the finished product. Consistent maintenance and proper sharpening practices are vital for achieving optimal performance and extending the lifespan of manual wood boring tools. The selection of sharpening methods has a consequential impact on the function of the tool.
4. Boring Angle
The angle at which a manual wood boring implement engages with the workpiece significantly impacts the efficiency, accuracy, and overall success of the process. Precise control over the boring angle is paramount in achieving desired results.
- Perpendicularity and Hole Accuracy
Maintaining a perpendicular boring angle relative to the wood surface is critical for creating holes that are true and straight. Deviations from this angle can result in angled holes, which compromise the integrity of joinery and the structural stability of the workpiece. For example, in furniture making, angled holes for dowels or screws can lead to misaligned components and a weakened structure.
- Grain Direction and Auger Wandering
The boring angle interacts with the grain direction of the wood. Boring parallel to the grain can encourage the auger to follow the grain lines, resulting in a wandering hole. Conversely, boring perpendicular to the grain provides more resistance and stability. Experienced woodworkers often use a slight angle when boring along the grain to mitigate this effect.
- Angle Consistency for Mortise and Tenon Joints
In crafting mortise and tenon joints, maintaining a consistent boring angle is imperative. The mortise, which is often created by drilling overlapping holes with an auger and then cleaning out the waste, must have sides that are parallel to each other. An inconsistent boring angle can lead to a mortise that is wider at one end than the other, resulting in a weak or ill-fitting joint.
- Impact on Cutting Edge Engagement
The boring angle directly affects how the cutting edge of the auger engages with the wood fibers. A shallow angle can result in inefficient cutting and increased friction, while a steep angle can cause the auger to bite aggressively and potentially tear the wood. The optimal angle depends on the wood species and the design of the auger bit. Determining the accurate angle can impact the precision of the process.
In summary, the boring angle is not merely a geometric consideration but a crucial factor that interacts with wood properties and auger design to determine the outcome of manual wood boring. Attention to this detail separates skilled craftsmanship from amateur attempts and is a cornerstone of successful practice.
5. Handle Control
Effective handle control is a foundational element in manual wood boring. The application of force, stability, and rotation are dictated by the manner in which the user manipulates the handle. Inadequate control precipitates inaccuracies and compromised outcomes. For example, when boring a pilot hole for a screw, a lack of handle control can result in a skewed or oversized hole, diminishing the screw’s holding power and the structural integrity of the joint.
Proper technique involves maintaining a firm, balanced grip on the handle, applying consistent downward pressure while rotating the auger. This coordinated action ensures the cutting edge engages the wood efficiently, creating a clean, uniform hole. Variations in pressure or rotation speed can lead to inconsistencies in hole diameter or depth. Furthermore, the handle serves as a tactile feedback mechanism, transmitting information about the wood’s density and the auger’s cutting performance. An experienced user can detect changes in resistance through the handle, allowing for adjustments to maintain optimal control. It is a skill that allows experienced users to determine the quality of the tool.
In summary, handle control in manual wood boring is not merely a physical action but a skilled technique requiring precision and awareness. It is the direct interface between the user’s intent and the tool’s performance. Mastery of handle control enhances accuracy, minimizes material waste, and contributes to the creation of high-quality woodworking projects. Challenges can exist when wood is oily or dense, so users have to be prepared. This topic helps showcase the importance of woodworking and its many subtleties.
6. Chip Removal
Effective chip removal is intrinsic to the success of manual wood boring. The accumulation of wood chips within the bore hole impedes the cutting action of the auger, increasing friction and heat. This escalation of friction necessitates greater force to advance the tool, compromising accuracy and potentially damaging the workpiece. A practical example is observed when attempting to bore a deep hole in hardwood; inadequate chip removal results in a clogged auger, necessitating frequent extraction and cleaning. The increased effort and time required significantly diminish efficiency. Auger design often incorporates flutes or spirals specifically engineered to facilitate chip ejection.
The efficiency of chip removal directly impacts the quality of the resulting hole. When chips are not effectively cleared, they can become compacted within the bore, leading to uneven cutting and a rough interior surface. This is particularly problematic when creating precise joints, such as mortise and tenons, where a smooth, accurately sized hole is essential. Furthermore, compacted chips can exert pressure on the auger bit, potentially causing it to deflect or wander, resulting in an inaccurate hole placement. Regularly clearing the chips prevents binding and maintains the tool’s intended trajectory. Specialized tools, such as small hooks or reamers, can be employed to aid in chip extraction.
In conclusion, chip removal is not a mere ancillary task but a critical component of proficient manual wood boring. Effective chip management enhances cutting efficiency, minimizes friction, prevents workpiece damage, and ensures the creation of accurate, high-quality holes. Attention to this detail is crucial for achieving professional results and maximizing the lifespan of manual wood boring tools. This fundamental aspect ensures a clean, precise bore.
7. Depth Consistency
Maintaining uniform boring depth is a critical factor in successful manual wood boring. Precision in this area ensures structural integrity and aesthetic appeal in woodworking projects. Inconsistent depths can compromise the fit and function of joined elements, leading to structural weaknesses or visual imperfections. The focus on a consistent depth is essential for achieving professional results.
- Joint Integrity
Consistent depth is particularly crucial when creating mortise and tenon joints. Variations in mortise depth can lead to a loose or uneven fit, reducing the strength and stability of the joint. A tenon that bottoms out in a shallow mortise prevents proper engagement, while a mortise that is too deep weakens the surrounding material.
- Hardware Installation
Accurate and consistent depth is essential for installing hardware, such as hinges or fasteners. Over-drilling can weaken the surrounding wood, while under-drilling prevents the hardware from seating properly. Uniform depth ensures secure and flush mounting, contributing to both the functionality and appearance of the finished piece.
- Blind Hole Accuracy
Achieving precise depth is paramount when creating blind holes, where the hole does not penetrate the entire workpiece. Consistent depth prevents breakthrough and ensures that the concealed end of the hole is uniform. This is particularly important in decorative applications or when creating hidden compartments.
- Aesthetic Uniformity
In projects involving multiple, visible holes, maintaining consistent depth contributes to visual harmony. Variations in depth can be distracting and detract from the overall aesthetic appeal of the piece. Attention to detail in depth control enhances the perceived quality and craftsmanship of the finished product. A uniform appearance conveys professionalism and skill.
These interconnected facets highlight the importance of depth consistency in manual wood boring. Whether it is for structural purposes, hardware integration, or aesthetic considerations, the ability to control and replicate boring depth is essential for achieving high-quality results in woodworking projects. Precise boring depth can impact the product in many ways.
Frequently Asked Questions
The following addresses common queries regarding the application and techniques associated with boring holes in wood using hand-powered augers.
Question 1: What distinguishes a hand auger from a brace and bit?
A hand auger is a self-contained tool with an integrated handle, whereas a brace utilizes interchangeable bits secured within a chuck. Augers are typically used for larger diameter holes, while braces offer versatility with varying bit types.
Question 2: Is manual wood boring suitable for hardwoods?
Yes, however, hardwoods necessitate sharp auger bits and increased physical exertion. Augers designed with aggressive cutting edges are recommended. Pre-drilling a pilot hole can also ease the process.
Question 3: How can tear-out be minimized when boring through wood?
Using a spur auger and scoring the wood fibers before full penetration can significantly reduce tear-out. Backing the workpiece with a sacrificial board also provides support as the auger exits.
Question 4: What maintenance is required for hand augers?
Regular cleaning to remove wood shavings is essential. Sharpening the cutting edges maintains optimal performance. Light oiling prevents rust and corrosion.
Question 5: How does grain direction affect manual wood boring?
Boring with the grain can lead to auger wandering. Boring against the grain provides more resistance and stability. Angling the auger slightly against the grain can mitigate wandering.
Question 6: What safety precautions should be observed?
Securely clamp the workpiece to prevent movement. Use eye protection to guard against flying debris. Maintain a firm grip on the handle and avoid excessive force that can cause the auger to slip.
These points highlight essential considerations for effective and safe execution of this practice.
The subsequent section will explore advanced techniques and specialized applications.
Conclusion
The preceding exploration elucidated critical aspects of manual boring in woodworking. From tool selection and maintenance to technique refinement, each element contributes to the precision and efficiency of the process. A comprehensive understanding of auger types, wood properties, and the nuances of sharpening is paramount for achieving optimal results.
The commitment to mastering hand auger woodworking represents a dedication to craftsmanship and a connection to traditional methods. Continued refinement of these skills allows for sophisticated joint creation and lasting structural integrity in woodworking projects. Skillful application of this technique ensures the longevity of woodwork.


