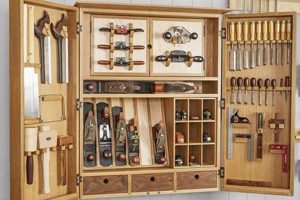
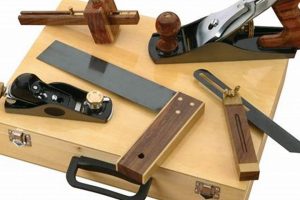
Manual implements designed for shaping wood into functional or decorative items represent a core aspect of the craft. Examples include constructing a dovetail joint with a handsaw and chisel or shaping a table leg using a spokeshave. This approach relies on human power and skill rather than electricity.
The reliance on manual skills fosters a deeper connection with the material, promoting precision, mindful practice, and a tangible sense of accomplishment. Historically, this approach was the only means of woodworking, leading to the creation of enduring and often intricate artifacts. Further, the practice promotes sustainability and reduces reliance on power tools.
Subsequent sections will delve into specific manual implements, techniques for their effective utilization, and illustrative examples of projects suited to this approach. The focus will be on developing fundamental woodworking abilities and understanding the unique characteristics of working by hand.
Essential Guidance for Manual Woodworking Endeavors
The following recommendations serve to enhance the efficacy and enjoyment of crafting objects using manual implements. Adherence to these principles will improve precision, safety, and the overall quality of the finished product.
Tip 1: Sharpness is Paramount: Maintain edged tools at optimal sharpness. A keen edge reduces the force required for cutting, leading to increased control and reduced risk of injury. Regular honing and sharpening are essential.
Tip 2: Prioritize Accurate Marking: Precise marking is crucial for accurate joinery and overall dimensional control. Use a sharp marking knife and a precise measuring tool to transfer dimensions to the workpiece accurately.
Tip 3: Secure Workholding is Mandatory: Employ vises, clamps, and other workholding devices to ensure the workpiece is stable and secure during operations. This minimizes movement and allows for controlled tool manipulation.
Tip 4: Practice Grain Orientation Awareness: Understanding wood grain direction is essential for effective cutting and shaping. Work with the grain whenever possible to avoid tear-out and achieve smooth surfaces.
Tip 5: Develop Controlled Cutting Techniques: Focus on controlled, deliberate strokes rather than excessive force. Allow the tool’s sharpness and your guidance to perform the work, minimizing the risk of errors.
Tip 6: Emphasize Proper Tool Maintenance: Regularly clean and lubricate tools to prevent rust and ensure smooth operation. Proper maintenance extends tool life and preserves performance.
Tip 7: Begin with Simpler Projects: Start with basic constructions to develop fundamental skills and build confidence before attempting more complex designs. Incremental learning is key to mastering the craft.
The successful utilization of manual implements relies on disciplined practice, a thorough understanding of materials, and a commitment to maintaining tools. These efforts culminate in the creation of quality pieces and the satisfaction of a skilled craft.
The subsequent sections will explore specific project ideas applicable to this manual approach, offering detailed instructions and guidance for successful execution.
1. Tool Selection
In the context of constructing items using manual implements, tool selection directly influences project feasibility, efficiency, and ultimately, quality. The choice of a specific tool dictates the precision and nature of cuts, shaping, and joinery possible. For instance, a fine-toothed saw is essential for creating clean dovetail joints, whereas a rough-cut saw proves more suitable for quickly dimensioning stock. Incorrect tool selection can lead to compromised joinery, increased material waste, and an overall degradation of the finished product. An example is attempting to create a mortise with a chisel too large for the intended dimension; the result is likely a loose and structurally unsound joint.
Proper consideration of wood type also informs tool selection. Harder woods necessitate tools of higher quality steel and sharpness to prevent premature dulling or damage. Conversely, softer woods may require tools designed to minimize tear-out during shaping and planing. The scale of the project further influences selection; smaller, more intricate projects demand tools with finer control and greater precision. A delicate paring chisel, for example, is better suited for cleaning up small joinery details than a large, heavy bench chisel. Furthermore, specialized tools, such as spokeshaves and drawknives, are essential for creating curved components, demonstrating that tool selection is driven by the project’s specific design requirements.
Therefore, informed tool selection represents a foundational element in manual woodworking. It is a determinant of both structural integrity and aesthetic quality. While a skilled craftsman can often adapt to limitations, the efficient and effective creation of any project relies on the appropriate and intentional selection of each individual implement. The mastery of tool selection is an ongoing process, refined through experience and a thorough understanding of both material properties and the capabilities of each tool.
2. Sharpening Proficiency
Maintaining a keen edge on implements stands as a non-negotiable prerequisite for effective manual woodworking. Sharpening proficiency directly influences the quality of cuts, the ease of execution, and the overall safety of operating edged instruments in woodworking projects.
- Cut Quality and Precision
A sharp edge cleanly severs wood fibers, minimizing tear-out and resulting in smooth, accurate cuts. Dull tools, conversely, crush fibers, leading to ragged edges and reduced precision, which is detrimental for joinery and fine detailing. For example, a dull chisel used for creating dovetails will crush the corners, leading to weak and unsightly joints. Sharpness is particularly critical when working with hardwoods, which resist cutting more than softwoods.
- Effort and Control
Sharp tools require less force to cut, leading to increased control and reduced fatigue. This is particularly crucial for extended woodworking sessions. Less force also reduces the risk of slipping and potential injury. Imagine planing a large surface: a sharp plane glides smoothly, requiring minimal effort, while a dull plane demands significant force and increases the chances of a miscut.
- Tool Longevity and Maintenance
Proper sharpening techniques, encompassing both honing and grinding, extend the lifespan of woodworking tools. Regular honing maintains the edge, while periodic grinding restores the correct bevel angle. Neglecting sharpening can lead to damage that requires more extensive and costly repairs. For instance, allowing a chisel edge to become excessively dull can lead to chipping, requiring significant material removal to restore the cutting edge.
- Safety Considerations
Counterintuitively, sharp tools are safer than dull ones. Dull tools require more force, increasing the likelihood of slips and uncontrolled movements. A sharp tool, on the other hand, cuts predictably, minimizing the risk of accidents. Consider a scenario where one uses a dull knife: more force is required, and it is more likely to slip resulting in injury.
In summary, honing skills in sharpening transforms woodworking from a laborious task into a controlled craft. Achieving proficiency ensures higher-quality results, prolongs tool life, and minimizes the risk of accidents. The benefits of sharp tools resonate throughout every aspect of manual woodworking, underscoring the essential link between edge maintenance and project success. Neglecting sharpness in woodworking is not merely an inconvenience; it is a compromise on safety, quality, and the lifespan of tools.
3. Joinery Techniques
The integrity and aesthetic appeal of any item crafted using manual implements heavily depends on the selection and execution of appropriate joinery methods. The absence of powered machinery necessitates reliance on precisely cut and fitted joints to achieve robust and visually pleasing constructions.
- Dovetail Joints
Dovetail joints, characterized by their interlocking pins and tails, represent a strong and visually distinctive method for connecting pieces. Primarily used in drawer construction and carcase assembly, they provide mechanical strength without requiring fasteners. Executing dovetails by hand demands precision in sawing and chiseling, resulting in a joint that resists pulling forces. The aesthetic quality of hand-cut dovetails is often considered superior to machine-cut versions due to the slight variations and craftsmanship evident in each joint.
- Mortise and Tenon Joints
The mortise and tenon joint, consisting of a projecting tenon that fits into a mortise (a hole or recess), offers a versatile method for connecting pieces at right angles. Widely employed in frame and leg assemblies for tables and chairs, this joint provides substantial strength and stability. Creating mortise and tenon joints with manual implements requires careful layout, precise chiseling of the mortise, and accurate shaping of the tenon to ensure a snug fit. The joint can be further strengthened with the addition of pegs or wedges.
- Lap Joints
Lap joints involve overlapping two pieces of wood and fastening them together. These joints are simpler to execute than dovetail or mortise and tenon joints, making them suitable for applications where less strength is required. Lap joints are commonly used in frame construction and for creating wide panels. Creating lap joints manually involves accurately removing half the thickness of each piece of wood, ensuring a flush surface when joined. Variations include half-lap joints, where the thickness of both pieces is reduced by half, and full-lap joints, where one piece overlaps the other completely.
- Rabbet Joints
Rabbet joints feature a recess cut along the edge or end of a piece of wood, allowing it to fit into another piece. This type of joint is frequently used in cabinet construction and for creating drawers and boxes. Executing rabbet joints by hand requires precise sawing and chiseling to create the recess. The resulting joint provides a clean and stable connection, offering a larger gluing surface compared to simple butt joints.
The successful application of these joinery techniques using manual implements necessitates a thorough understanding of wood behavior, meticulous layout, and precise execution. Proficiency in these methods enables the construction of durable and aesthetically pleasing items, highlighting the value of traditional woodworking skills.
4. Wood Grain Awareness
Understanding the direction and characteristics of wood grain is fundamental to successful woodworking, especially when relying on manual implements. Ignoring grain orientation can lead to inefficient cutting, increased tear-out, and structurally unsound joints. A mindful approach to grain management is thus essential for maximizing both the quality and efficiency of manual woodworking endeavors.
- Tear-Out Prevention
Cutting against the grain often results in tear-out, where wood fibers are lifted and splintered rather than cleanly severed. This is particularly problematic when using hand planes and chisels. Recognizing grain direction allows the woodworker to orient the tool to cut with the grain, minimizing tear-out and producing a smooth surface. For example, when planing a board, observing the grain direction and planing “downhill” prevents the blade from catching and tearing the wood fibers.
- Joint Strength and Stability
Grain direction affects the strength and stability of joints. Aligning the grain direction of mating pieces can enhance the overall strength of the construction, while mismatched grain can weaken joints over time due to differential expansion and contraction. In mortise and tenon joints, orienting the tenon’s grain parallel to the grain of the mortise cheek provides optimal resistance to stress. Furthermore, consideration should be given to the orientation of growth rings, as end-grain can absorb moisture at a faster rate compared to face-grain.
- Shaping and Carving Control
Grain direction influences the ease and predictability of shaping and carving. Working with the grain allows for controlled removal of material, enabling the creation of smooth curves and intricate details. Attempting to carve against the grain can result in splitting and uneven surfaces. For example, when carving a decorative detail on a furniture leg, working along the grain ensures that the carving tools follow the intended path, producing a crisp and well-defined design.
- Wood Movement Management
Wood expands and contracts differently depending on grain orientation, primarily across the grain rather than along it. Understanding this anisotropic behavior is critical for designing structures that can accommodate wood movement without cracking or warping. Cabinet doors, for example, should be constructed to allow the panel to expand and contract within the frame. Ignoring this property can lead to panel distortion or the separation of joints.
Wood grain awareness is not merely a theoretical concept but a practical skill that significantly impacts the quality and longevity of projects. From selecting the appropriate cutting direction to designing for wood movement, a deep understanding of grain characteristics enhances the ability to create durable and aesthetically pleasing items with manual implements. Masterful utilization of manual tools is complemented by a keen awareness of grain, leading to the successful completion of woodworking projects.
5. Project Complexity
The scope of a woodworking undertaking, directly termed “Project Complexity,” critically influences the suitability of manual implements. Initial attempts at crafting items using hand tools should logically focus on simpler designs. These projects permit the development of fundamental skills, encompassing accurate sawing, chisel control, and basic joinery, without the overwhelming demands of intricate construction. For example, building a small box with simple butt joints provides a manageable entry point, allowing the woodworker to concentrate on precision and technique rather than grappling with complex joinery or elaborate shaping. Prematurely engaging in complex projects can lead to frustration, errors, and potentially, abandonment of the craft.
As proficiency increases, the complexity of projects can be gradually escalated. More elaborate joinery, such as dovetails or mortise and tenons, can be incorporated, alongside techniques for shaping curves or creating intricate details. Success with these advanced projects relies on a solid foundation of basic skills and a thorough understanding of wood behavior. The construction of a small table, for instance, requires precise execution of mortise and tenon joints to ensure structural stability, demanding a higher level of skill than a basic box. Furthermore, complex projects often involve multiple stages, requiring careful planning and meticulous execution to avoid cumulative errors.
Ultimately, the correlation between project complexity and the employment of manual implements lies in the craftsman’s skill level and commitment to gradual improvement. Selecting projects appropriate to one’s current abilities ensures a positive learning experience, fosters confidence, and promotes the continued development of woodworking skills. Complex designs are achievable with hand tools, but success requires a strategic approach, patience, and a willingness to master the fundamentals before tackling intricate constructions. Therefore, managing project complexity becomes an integral part of skill development in woodworking using only manual implements.
Frequently Asked Questions
The following addresses common inquiries regarding the application of manual implements in woodworking, focusing on technical aspects and practical considerations.
Question 1: Is manual woodworking inherently slower than using power tools?
The creation of items using manual implements typically requires more time compared to methods involving power tools. However, the pace is often dictated by the complexity of the design and the skill of the woodworker. The emphasis is on precision and control, rather than speed.
Question 2: What is the minimum set of tools required to begin manual woodworking?
A foundational set includes a hand saw (both rip and crosscut), a set of chisels, a smoothing plane, a marking gauge, a sharpening stone, and measuring tools. This selection enables basic shaping, joinery, and surface preparation.
Question 3: How does one maintain the sharpness of edged tools for manual woodworking?
Maintaining sharpness involves a two-step process: honing and sharpening. Honing, using a fine-grit stone, aligns the edge. Sharpening, using coarser abrasives, removes material to restore the correct bevel. Regular maintenance is essential.
Question 4: What types of wood are best suited for manual woodworking projects?
Softer woods, like pine and poplar, are generally easier to work with when starting. However, hardwoods, such as maple and walnut, offer greater durability and aesthetic appeal, though they require sharper tools and more effort.
Question 5: How can tear-out be minimized when working against the grain with manual implements?
Employing a back bevel on chisels and hand planes can significantly reduce tear-out. Additionally, wetting the wood surface slightly can help to soften the fibers, minimizing splintering.
Question 6: What safety precautions should be observed when working with manual woodworking tools?
Essential precautions include maintaining sharp tools, securing the workpiece firmly, using proper hand placement to avoid accidental cuts, and wearing eye protection. Concentration and deliberate movements are critical.
In summary, achieving proficiency in manual woodworking requires a combination of appropriate tools, diligent maintenance, and adherence to safety protocols. The commitment to these practices yields durable and aesthetically pleasing pieces.
Subsequent sections will address advanced techniques applicable to manual woodworking, delving into complex joinery and intricate shaping methods.
Conclusion
This exploration of projects utilizing manual implements has underscored the critical aspects of tool selection, sharpening proficiency, joinery techniques, wood grain awareness, and project complexity. Proficiency in each of these areas contributes significantly to the successful execution of woodworking endeavors without reliance on power tools. Adherence to established best practices ensures structurally sound and aesthetically pleasing results.
The continued application of these skills preserves a valuable tradition and fosters a deeper understanding of both the materials and processes involved in crafting functional and artistic objects. The diligent practice of these techniques promotes craftsmanship and contributes to the creation of enduring pieces.


