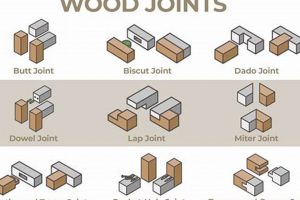
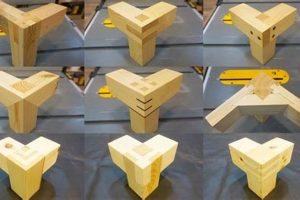
A woodworking machine that produces flat surfaces along the length of boards, preparing them for further processing or assembly is a jointer. The typical application involves creating perfectly square edges on lumber, essential for tight-fitting joints in furniture construction, cabinet making, and other woodworking projects. This machine relies on a rotating cutterhead with knives set flush with the outfeed table. Passing a board over the cutterhead removes material, generating a smooth, even surface.
The precision achieved contributes significantly to the structural integrity and aesthetic appeal of finished wood products. Before the advent of powered machinery, this crucial task was performed by hand using hand planes, which required considerable skill and time. The development of the jointer dramatically improved efficiency and consistency in woodworking, leading to higher-quality outputs and streamlined production processes. It remains a cornerstone of many woodworking workshops.
Following sections will detail specific techniques for maximizing accuracy with this type of machine, exploring factors such as selecting appropriate lumber, adjusting cutterhead height, and employing various push block techniques to ensure safe and efficient operation. Furthermore, the discussion will address common problems encountered during use and offer potential solutions for maintaining optimal performance and prolonging the life of the equipment.
Jointer Usage
The following guidelines offer crucial points for effective and safe utilization of a jointer to achieve optimal results in woodworking projects.
Tip 1: Proper Stock Selection. Begin with lumber that is reasonably straight and free of significant defects, such as excessive warping or knots. This minimizes the amount of material that must be removed to achieve a flat, square surface, thereby increasing efficiency and reducing waste.
Tip 2: Cutterhead Height Adjustment. Precisely adjust the cutterhead height to remove only a small amount of material with each pass. Taking excessive material in a single pass can lead to tear-out, kickback, and inaccurate results. Incremental adjustments are crucial for optimal surface quality.
Tip 3: Infeed and Outfeed Table Alignment. Ensure that the infeed and outfeed tables are perfectly coplanar. Misalignment will prevent creation of a flat, true surface. Consistent checks using a straightedge are advised to maintain proper alignment.
Tip 4: Push Block Technique. Employ push blocks or push pads for all operations, especially when facing and edging shorter or narrower stock. This maintains consistent pressure and control while keeping hands safely away from the cutterhead.
Tip 5: Grain Direction Awareness. Observe the grain direction of the wood and feed the stock accordingly. Cutting against the grain can result in tear-out. Experimentation with short passes can help determine the optimal feeding direction.
Tip 6: Maintaining Sharp Knives. Sharp knives are essential for producing a clean cut and reducing the likelihood of tear-out. Regularly inspect the knives and sharpen or replace them as needed. Dull knives force the material and potentially cause machine-related issues.
Tip 7: Dust Collection. Effective dust collection is paramount for maintaining a safe and healthy work environment. Connect a dust collector to the machine’s dust port to remove airborne particles generated during the process. Failure to do so can lead to respiratory irritation and reduced visibility.
Adherence to these principles allows for the attainment of accurate, clean, and safe stock preparation. Consistent application of these techniques significantly improves the quality of woodworking projects.
The following sections will build upon these fundamentals, delving deeper into specific techniques and troubleshooting to ensure proficient and confident operation.
1. Surface Flattening
Surface flattening is a fundamental process in woodworking, essential for creating a stable and true reference surface on lumber. The jointer woodworking machine is frequently employed to accomplish this, providing a means to correct irregularities and prepare stock for further processing or assembly. The accuracy and efficiency of subsequent woodworking operations depend heavily on the quality of the initial flattening process.
- Establishing a Reference Plane
The jointer excels at establishing a primary reference plane on a workpiece. By removing high spots and correcting twists, the machine creates a flat surface that can then be used as a reference for subsequent cuts on other machines, such as a planer or table saw. This ensures consistent dimensions and accurate joinery. A common scenario involves flattening one face of a rough-sawn board to create a reliable reference point before thicknessing the opposite face to the desired dimension.
- Correcting Warped Stock
Lumber often exhibits warping due to internal stresses or drying inconsistencies. The jointer allows the correction of minor warps by removing material until a flat surface is achieved along the entire length of the board. However, severely warped stock may require multiple passes and careful technique to avoid excessive material loss or introducing new distortions. For example, carefully jointing a slightly cupped board gradually minimizes its curvature, providing a workable surface for further processing.
- Preparing for Edge Jointing
A flat face is crucial for accurate edge jointing, a process that creates a perfectly straight edge on a board for glue-ups or joinery. A reference face established using the jointer allows the user to create a perpendicular, straight edge. If the initial face is not flat, the resulting edge will inherit those imperfections, compromising the strength and appearance of the final assembly. Consider creating a wide panel, where the initial flattening of each board face is critical for achieving a flush and seamless final surface.
- Minimizing Material Waste
While achieving a perfectly flat surface requires removing material, skilled use of the jointer minimizes waste. Understanding the grain direction and making incremental passes prevents tear-out and reduces the overall amount of wood removed. Efficient flattening translates to more usable material and reduces the cost of projects. For instance, observing the grain direction and aligning the workpiece properly minimizes tear-out, and therefore wood loss.
In essence, surface flattening through the use of a jointer provides a critical foundation for all subsequent woodworking operations. It ensures accuracy, stability, and structural integrity, demonstrating the indispensable role of this machine in achieving high-quality finished products. The ability to effectively flatten a surface translates directly to the precision and success of all woodworking endeavors.
2. Edge Squaring
Edge squaring, a fundamental technique in woodworking, is intrinsically linked to the capabilities of a jointer. This process involves creating a perfectly perpendicular edge to a board’s face, an essential prerequisite for many woodworking operations, particularly joinery and panel construction. The precision achieved directly impacts the structural integrity and aesthetic quality of the final product.
- Establishing a True Reference Edge
The jointers primary function in edge squaring is to establish a reference edge that is both straight and perpendicular to the flattened face of the board. This reference edge serves as a guide for subsequent cuts on the table saw or other machinery, ensuring consistent dimensions and accurate joinery. An example would be preparing boards for a frame-and-panel door; the squared edges are critical for tight-fitting joints and a visually appealing result.
- Eliminating Edge Imperfections
Lumber often exhibits irregularities along its edges, such as bows, cups, or twists. Edge squaring on a jointer removes these imperfections, creating a straight and true edge. This ensures that when two edges are joined, they meet seamlessly without gaps or misalignments. The construction of a tabletop often requires the elimination of even slight bows along each board’s edge to create a flat and even surface.
- Facilitating Accurate Joinery
Precise edge squaring is paramount for achieving strong and accurate joints. Whether constructing dovetail joints, mortise-and-tenon joints, or simple butt joints, the accuracy of the joint relies on the edges being perfectly square. Misaligned or imperfect edges lead to weak joints and require additional correction, potentially compromising the project’s structural integrity. The clean, tight fit of a mitered corner in a picture frame is a direct result of accurately squared edges.
- Optimizing Material Utilization
By squaring the edges of lumber, the woodworker can maximize material utilization. Squaring allows for efficient nesting of pieces for cutting, reducing waste and minimizing the number of boards needed for a project. Careful edge squaring allows for precise cutting with minimal loss. For example, minimizing waste by ensuring a precise fit, even when using expensive hardwoods.
In essence, edge squaring via a jointer is a linchpin of precision woodworking. The ability to create straight, perpendicular edges ensures accurate joinery, optimizes material utilization, and ultimately leads to higher-quality finished products. Without this fundamental process, many woodworking projects would be significantly more challenging and the results less satisfactory.
3. Cutterhead Safety
The rotating cutterhead is the central danger of any jointer woodworking machine. Its function involves high-speed cutting, which inherently presents risk. Inadequate safety protocols during operation can lead to severe injuries, including lacerations, amputations, and other trauma. The direct correlation between user awareness, adherence to safety guidelines, and the minimization of accidents cannot be overstated. For instance, failure to use proper push blocks increases the likelihood of hands coming into contact with the spinning knives. The speed and force of the cutterhead leaves little margin for error, thus necessitating strict compliance with safety procedures.
Proper training on the use of a jointer is paramount. Understanding the machine’s operating principles, adjustment mechanisms, and safe handling practices forms the foundation of accident prevention. Regularly inspecting the machine for any defects or malfunctions is also crucial. Dull knives, loose components, or malfunctioning safety guards can significantly increase the risk of injury. The application of effective dust collection systems not only improve visibility but also remove airborne particles that can pose respiratory hazards. All aspects of the machine and its environment contribute to, or detract from, the safety of the user.
In summation, cutterhead safety is an inextricable component of responsible jointer woodworking. Comprehensive training, meticulous machine maintenance, and unwavering adherence to established safety protocols are crucial to mitigate the inherent risks associated with this equipment. The potential consequences of neglecting safety precautions are severe, emphasizing the importance of prioritizing safe operation above all other considerations. Safe practices are integral to achieving professional results.
4. Grain Orientation
Grain orientation, a critical aspect of lumber characteristics, profoundly impacts the efficacy and safety of jointer woodworking. Understanding grain direction and its interaction with the cutterhead is paramount for achieving smooth surfaces, preventing tear-out, and minimizing the risk of kickback.
- Tear-Out Mitigation
Cutting against the grain with a jointer results in tear-out, where the wood fibers are lifted and torn away rather than cleanly severed. This degrades the surface quality, necessitating additional sanding or material removal to correct. For instance, jointing a board with grain rising towards the cutterhead will invariably lead to a splintered, uneven surface. Identifying and working with the grain is crucial for achieving a clean cut.
- Optimal Cutting Angle
The ideal approach involves feeding the lumber so the cutterhead blades engage the wood fibers at a shallow, shearing angle. This minimizes stress on the fibers, promoting clean separation and reducing the likelihood of tear-out. When the grain descends towards the cutterhead, a smoother surface is achieved. This principle is particularly important when working with hardwoods prone to splintering.
- Grain Reversal Identification
Lumber often exhibits localized areas of grain reversal, where the grain direction changes abruptly. These areas pose a challenge during jointing. Careful observation is crucial to identify grain reversals and adjust the feeding direction accordingly. If the wood grain changes direction, a woodworker must change the direction of the cut to avoid tear-out. Employing shallower cuts can also help to mitigate the effects of localized grain reversal.
- Influence on Joint Strength
The orientation of the grain can also impact the strength of joints created using a jointer. For example, when edge-joining boards to create a wider panel, alternating the grain direction between adjacent boards can minimize the effects of seasonal wood movement. This practice contributes to a more stable and durable finished product.
In conclusion, understanding and accommodating grain orientation is fundamental to successful jointer woodworking. By carefully assessing the grain direction and adapting cutting techniques accordingly, the woodworker can minimize tear-out, achieve smooth surfaces, and optimize the strength and stability of finished projects. Neglecting this critical aspect can lead to frustration, wasted material, and compromised results. Paying attention to grain direction allows for the creation of high-quality woodworking pieces.
5. Stock Support
Adequate stock support is a non-negotiable aspect of safe and accurate jointer operation. Proper support mechanisms minimize vibration, prevent workpiece movement during the cutting process, and contribute significantly to the overall quality of the finished surface. Inadequate or absent stock support can lead to inaccurate cuts, increased risk of kickback, and potential injury to the operator.
- Infeed and Outfeed Table Extension
When processing longer workpieces, the standard infeed and outfeed tables of the jointer may prove insufficient. Extending these tables, either through aftermarket additions or shop-fabricated supports, provides continuous, stable contact throughout the cut. This prevents drooping or tilting of the workpiece, which can compromise the flatness and squareness of the final result. An example includes adding roller stands to support long boards being edged, ensuring a consistent cut along the entire length.
- Lateral Support and Fence Stability
Maintaining consistent lateral pressure against the jointer fence is essential for producing square edges. Shims, featherboards, or other clamping devices can be used to secure the workpiece against the fence, preventing it from shifting during the cutting process. Insufficient lateral support may result in a bowed or angled edge, negating the purpose of edge jointing. Consider a scenario where a featherboard is used to apply consistent pressure against the fence, ensuring a perfectly square edge despite minor variations in the wood.
- Roller Stands and Mobile Bases
For large or heavy workpieces, roller stands positioned adjacent to the jointer provide essential support during infeed and outfeed. These stands allow the operator to maintain control over the workpiece while minimizing physical strain. Additionally, mobile bases equipped with locking casters can stabilize the jointer itself, preventing movement or vibration during operation. Heavy workpieces, like large table tops, are often supported using roller stands for a smooth and controlled cut.
- Addressing Internal Stress and Warping
Stock support also plays a role in managing lumber with internal stresses or warping. Strategic placement of shims or supports can help to minimize the effects of these defects during the jointing process. By providing support to counteract the tendency of the wood to distort, the operator can achieve a flatter and more accurate surface. A warped board can be jointed straighter by adding supports beneath the low spots.
These considerations illustrate the significance of proper stock support in jointer woodworking. It is not simply an ancillary aspect, but an integral component of achieving accurate, safe, and high-quality results. The consistent application of thoughtful support strategies significantly elevates the precision and efficiency of jointer operations.
6. Joint Accuracy
The attainment of precise joinery is inextricably linked to the effective use of a jointer. Accurate joints, characterized by seamless fit and structural integrity, are a direct consequence of proper stock preparation utilizing this machine. The jointer’s primary function in this context is to establish flat surfaces and square edges on lumber, essential prerequisites for achieving tight, reliable joints. Without accurately jointed stock, the likelihood of gaps, misalignments, and weak connections increases significantly. Consider the construction of a dovetailed drawer: perfectly square edges on the drawer sides and front, achieved through meticulous jointing, are critical for interlocking the pieces and creating a strong, visually appealing joint. Conversely, poorly jointed stock leads to gaps in the dovetails, compromising the joint’s strength and aesthetic appeal. This underscores the cause-and-effect relationship between jointer woodworking and joint accuracy: the former directly influences the latter.
The importance of joint accuracy extends beyond mere aesthetics; it profoundly affects the structural soundness and longevity of wooden objects. Furniture, cabinetry, and other wood products subjected to stress and strain require robust joinery to withstand the rigors of daily use. Inaccurate joints weaken the overall structure, potentially leading to premature failure. The preparation of lumber for a mortise and tenon joint demonstrates this principle. A perfectly square and flat tenon, created with the aid of a jointer, ensures a snug fit within the mortise, maximizing the glue surface and creating a strong, load-bearing connection. A poorly prepared tenon, however, results in a loose, weak joint that is prone to failure under stress. The precision afforded by a jointer, therefore, directly translates into the durability and lifespan of the finished piece. The consequences of disregarding joint accuracy can range from cosmetic imperfections to structural instability, highlighting its paramount importance in woodworking endeavors.
In summary, achieving optimal joint accuracy is fundamentally dependent upon the proper utilization of a jointer. The machine’s ability to create flat surfaces and square edges provides the necessary foundation for precise and reliable joinery. While challenges such as wood movement and variations in material density can influence the final outcome, the initial preparation of the stock using a jointer is an indispensable step in ensuring the strength, stability, and aesthetic quality of finished wood products. The principles outlined here underscore the significance of meticulous technique and a thorough understanding of the relationship between jointing and joinery in the broader context of woodworking.
Frequently Asked Questions About Jointer Woodworking
The following section addresses common inquiries pertaining to the use of a jointer in woodworking, providing concise and informative responses to aid in understanding the machine’s capabilities and limitations.
Question 1: What constitutes the primary function of a jointer in woodworking?
The primary function of a jointer involves creating flat, true surfaces and square edges on lumber. This process prepares the stock for further milling operations, such as planing, or for assembly into joints.
Question 2: Is it possible to joint excessively warped lumber?
While a jointer can address minor warping, excessively warped lumber presents a significant challenge. Attempting to flatten severely warped stock can result in excessive material removal, structural weakening, or even kickback. In such cases, alternative methods, such as hand planing or milling with a thickness planer, may be more appropriate.
Question 3: What safety precautions are essential when operating a jointer?
Essential safety precautions include wearing appropriate eye and ear protection, using push blocks to keep hands away from the cutterhead, ensuring the machine is properly grounded, and never attempting to joint pieces that are too short or too thin. Regular inspection of the cutterhead and knives is also crucial.
Question 4: How does grain direction impact the jointing process?
Grain direction significantly influences the quality of the cut. Jointing against the grain can result in tear-out, where wood fibers are torn away rather than cleanly severed. It is imperative to orient the workpiece so the grain runs in the direction of the cut, minimizing the risk of tear-out and producing a smooth surface.
Question 5: What is the importance of maintaining sharp knives on a jointer?
Sharp knives are critical for achieving clean, accurate cuts and reducing the risk of kickback. Dull knives require greater force to push the wood through the machine, increasing the potential for accidents. Regular sharpening or replacement of knives is essential for maintaining optimal performance and safety.
Question 6: Can a jointer be used to create perfectly parallel surfaces?
A jointer primarily creates flat surfaces and square edges. To achieve perfectly parallel surfaces, a thickness planer is typically used in conjunction with a jointer. The jointer establishes a flat reference surface, which is then used as a base for planing the opposite side to the desired thickness.
These answers provide essential information regarding the operation and safety aspects. Proper implementation and caution is suggested.
The following sections will delve into troubleshooting common issues encountered during jointer woodworking and explore advanced techniques for achieving precision results.
Conclusion
This exploration of jointer woodworking has illuminated its central role in precision woodworking. From establishing flat reference surfaces to ensuring accurate edge alignment, the capabilities are integral to creating high-quality finished products. Understanding the interplay between machine operation, material properties, and safety protocols is paramount for achieving consistent and predictable results. The discussions have covered various aspects, from stock selection and cutterhead adjustment to grain orientation and the mitigation of tear-out. This comprehensive overview provides a foundation for skillful and responsible application of this core woodworking process.
As woodworking continues to evolve with technological advancements, the fundamental principles of accurate stock preparation will remain essential. Continued dedication to mastering proper techniques ensures the creation of durable, aesthetically pleasing, and structurally sound wooden objects. The commitment to safe operation and an understanding of the material’s characteristics will perpetuate the value and artistry of jointer woodworking.


