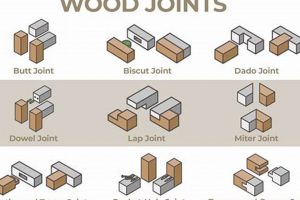
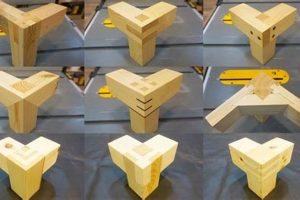
A fundamental technique in woodworking, it connects two pieces of wood. One piece, the mortise, contains a cavity, while the other, the tenon, is shaped to fit precisely into this cavity. When properly executed, the resulting connection exhibits exceptional strength and resistance to stress.
This method offers numerous advantages in furniture construction, timber framing, and other applications. Its inherent durability provides long-lasting structural integrity, surpassing many modern joining methods. Historically, its prevalence reflects its effectiveness and simplicity, predating advanced fasteners and adhesives.
Understanding the nuances of this method is crucial for both novice and experienced woodworkers. Subsequent sections will explore the specific types, appropriate applications, and best practices for achieving robust and aesthetically pleasing results.
Essential Considerations for Strong and Durable Connections
Achieving optimal results requires careful planning and precise execution. The following guidelines ensure robust and aesthetically pleasing results.
Tip 1: Wood Selection: Matching the wood species of the two components is crucial to mitigate differential expansion and contraction, which could compromise the joint’s integrity over time. Consider similar hardness and grain patterns for a visually cohesive outcome.
Tip 2: Precision Measurement: Accurate measurement and marking are paramount. Errors, even minor ones, can lead to weak or misaligned joints. Use sharp marking tools and double-check all dimensions before cutting.
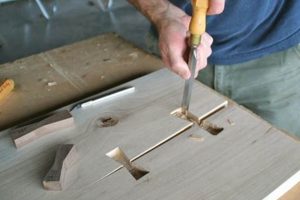
Tip 3: Mortise Execution: When creating the mortise, ensure straight, clean walls and a flat bottom. Over-cutting or angled walls weaken the surrounding wood and compromise the connection. Consider using a mortising machine or a carefully guided chisel.
Tip 4: Tenon Sizing: The tenon should fit snugly into the mortise without being forced. An excessively tight fit can cause the mortise to crack or split, while a loose fit reduces strength. Aim for a slight resistance when inserting the tenon.
Tip 5: Shoulder Placement: Properly fitting shoulders on the tenon provide significant mechanical support. These shoulders should bear evenly against the surrounding surface of the mortise piece. Gaps or uneven contact reduce the overall strength of the assembly.
Tip 6: Adhesive Application: Modern adhesives greatly enhance the strength of the joint. Apply a thin, even layer of high-quality wood glue to both the mortise and tenon surfaces before assembly. Ensure proper clamping pressure during the curing process.
Tip 7: Joint Reinforcement: For heavily stressed joints, consider adding mechanical reinforcement such as pegs or wedges. These augment the glued connection, further preventing movement or separation under load.
Adherence to these principles translates to long-lasting, reliable wooden structures. Proper execution minimizes the risk of failure and ensures the structural integrity of the finished piece.
Subsequent analysis will explore advanced techniques and common pitfalls encountered during the construction of such joints.
1. Joint Geometry
The geometry is inextricably linked to its strength and stability. The shape and dimensions of both the mortise and the tenon directly influence the load-bearing capacity and resistance to racking forces. A precisely dimensioned tenon that fits snugly within its corresponding mortise maximizes surface area contact, thereby optimizing adhesive bonding and mechanical interlocking. In contrast, an ill-fitting joint with gaps or excessive play diminishes its structural integrity, leading to potential failure under stress. Rectangular configurations, commonly used, provide a balance of strength and ease of construction, while dovetail versions, for example, offer enhanced resistance to pull-out forces due to their interlocking shape.
Consider the case of chair construction. The geometry of the joints connecting the legs to the seat directly affects the chair’s ability to withstand the weight and movement of a user. Variations in geometry, such as tapered tenons or wedged connections, enhance the joint’s resistance to loosening over time, a common problem in heavily used furniture. In timber framing, precise geometric alignment of these joints is paramount for distributing the immense weight of the structure, preventing localized stress concentrations that could compromise the entire framework. Furthermore, the shoulders of the tenon, where it meets the mortised piece, play a critical role in transferring loads and preventing shear failure.
In summary, meticulous attention to geometry is not merely an aesthetic consideration but a fundamental requirement for ensuring the structural soundness and longevity of any woodworking project employing this method. The dimensions, angles, and fit must be precisely controlled to maximize the joint’s strength and resistance to various forces. Understanding these geometric principles empowers woodworkers to create durable and reliable connections, capable of withstanding the test of time and use.
2. Material Selection
The choice of material critically influences the performance of connections. Wood species exhibit varying degrees of strength, hardness, and dimensional stability, directly impacting the joint’s longevity and resistance to failure. Hardwoods, such as oak, maple, and walnut, are frequently favored for their inherent strength and durability, rendering them suitable for high-stress applications. Softwoods, like pine or fir, while easier to work with, possess lower density and are more susceptible to deformation under load, limiting their applicability in load-bearing joints. The selection process must, therefore, consider the intended purpose of the assembly and the forces it will endure. In furniture construction, hardwoods are typically employed for the frame where structural integrity is paramount, while softwoods may be used for less critical components.
Furthermore, matching the material of the mortise and tenon pieces is essential to mitigate differential expansion and contraction due to changes in humidity. Disparate wood species expand and contract at varying rates, potentially inducing stress within the joint and leading to loosening or failure over time. Using the same species, or at least species with similar expansion coefficients, minimizes this risk. For example, in timber framing, using green oak for both the mortise and tenon allows for shrinkage that tightens the joint over time. However, if dissimilar materials are used, careful consideration must be given to joint design and the potential need for reinforcement to accommodate these differential movements.
Ultimately, informed material selection constitutes a fundamental aspect of successful execution. Understanding the properties of various wood species and their compatibility within a joint enables woodworkers to create robust, long-lasting structures. The consequences of neglecting this consideration range from premature failure to aesthetic degradation, highlighting the practical significance of material selection in connection construction. Factors, such as moisture content and grain orientation, must also be evaluated to ensure optimal performance and durability.
3. Cutting Precision
Accuracy in cutting represents a cornerstone of quality in mortise and tenon joinery. Deviations from specified dimensions or angles directly impact the strength, stability, and aesthetic appeal of the assembled joint. Suboptimal cutting compromises the integrity of the resulting structure, potentially leading to premature failure.
- Dimensional Accuracy
Precise measurements are crucial for achieving a snug fit between the mortise and tenon. Overly large mortises reduce the glue surface area and diminish mechanical interlocking, whereas oversized tenons induce stress within the mortise, risking wood splitting during assembly. Adhering to design specifications minimizes gaps and ensures optimal load transfer across the joint.
- Angularity and Squareness
Maintaining squareness of the mortise and tenon is vital for proper alignment and uniform load distribution. Angled or skewed cuts result in uneven contact between mating surfaces, concentrating stress and weakening the overall structure. Precise angled cuts are also necessary for creating angled mortise and tenon joints to improve the visual designs of wooden product.
- Surface Finish
Smooth, clean cut surfaces promote optimal adhesive bonding. Rough or uneven surfaces reduce contact area, weakening the glue line and increasing the risk of joint failure. Proper tool selection and maintenance are essential for achieving the required surface finish, minimizing the need for excessive sanding or filling.
- Tool Selection and Maintenance
Appropriate tool selection, including chisels, saws, and mortising machines, directly impacts cutting precision. Sharp, well-maintained tools produce clean, accurate cuts, reducing the risk of errors and improving the overall efficiency of the construction process. Regular tool sharpening and proper setup are essential for consistently achieving high-quality results.
In essence, cutting precision forms an indispensable element of strong and durable connections. Consistent application of accurate cutting techniques ensures that each mortise and tenon joint functions as designed, contributing to the overall structural integrity and aesthetic quality of the completed project.
4. Assembly Method
The assembly method is a critical determinant of the final strength and integrity when constructing mortise and tenon joints. A poorly executed assembly can negate the benefits of precise cutting and proper material selection, leading to a compromised joint susceptible to failure. Therefore, the assembly process requires careful planning and meticulous execution.
- Dry Fitting and Adjustment
Prior to adhesive application, a dry fitting is crucial. This step allows for the identification and correction of any minor discrepancies in the cut. A properly fitted joint should exhibit slight resistance during assembly, indicating sufficient contact area. Adjustments, such as minor planing or chiseling, should be performed at this stage to ensure a snug, even fit before gluing.
- Adhesive Application and Selection
The type and application of adhesive significantly influence joint strength. High-quality wood glue, appropriate for the wood species and application, should be applied evenly to both the mortise and tenon surfaces. Insufficient adhesive weakens the bond, while excessive adhesive can create a glue-starved joint by preventing proper wood-to-wood contact. Proper clamping pressure is essential to ensure intimate contact during the curing process.
- Clamping Techniques and Pressure
Clamping pressure must be sufficient to hold the joint firmly together during adhesive curing, but not so excessive as to crush the wood fibers. The choice of clamps and clamping configuration should distribute pressure evenly across the joint surface. Cauls, or clamping pads, can be used to protect the wood from clamp marks and ensure uniform pressure distribution. Inadequate clamping results in a weak, unreliable bond.
- Alignment and Squareness Verification
During clamping, careful attention must be paid to maintaining proper alignment and squareness of the assembled components. Misalignment can introduce stress and compromise the structural integrity of the joint. Measuring diagonals and using squares to verify alignment throughout the clamping process is vital for achieving a stable and aesthetically pleasing result.
Effective employment of these assembly techniques ensures the realization of the full potential in mortise and tenon joinery. The careful combination of dry fitting, proper adhesive usage, suitable clamping methods, and constant verification processes will lead to joints with augmented fortitude and enduring stability.
5. Reinforcement Techniques
When subjected to significant stress or impact, the inherent strength of a mortise and tenon joint can be augmented through the incorporation of various reinforcement techniques. These techniques aim to increase the joint’s resistance to shear forces, tensile stress, and racking, thereby prolonging its lifespan and enhancing its structural integrity. The necessity for reinforcement arises from factors such as the type of wood used, the magnitude of the applied load, and the specific design requirements of the woodworking project. For instance, a joint constructed from softwood may require reinforcement to compensate for its lower inherent strength compared to hardwood.
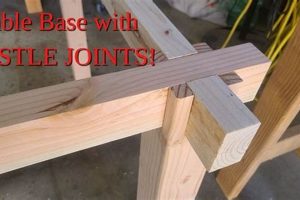
Several methods exist for reinforcing mortise and tenon joints. Pegging, a common technique, involves drilling holes through the mortise and tenon and inserting wooden dowels or pegs. These pegs act as mechanical fasteners, preventing the tenon from pulling out of the mortise and adding shear strength. Wedging, another approach, utilizes wedges driven into the tenon within the mortise. The wedges expand the tenon, creating a tighter fit and increasing resistance to movement. Metal fasteners, such as screws or bolts, can also be used for reinforcement, providing additional clamping force and shear resistance. Real-world examples of reinforced joints are prevalent in timber-framed buildings, where large-scale mortise and tenon joints are often pegged or bolted to withstand the considerable weight and forces imposed on the structure. Similarly, heavily used furniture, such as chairs or tables, may employ reinforced joints to prevent loosening or breakage over time.
In summary, reinforcement represents a crucial consideration in mortise and tenon joinery, particularly in applications involving high stress or demanding performance requirements. Pegging, wedging, and metal fasteners offer viable solutions for enhancing joint strength and durability. Proper implementation of these techniques requires careful planning and execution, considering the specific needs of the woodworking project. Over-reinforcement can also weaken the joint, therefore, a balance must be struck. This understanding ensures the creation of robust and reliable wooden structures capable of withstanding the test of time and use.
Frequently Asked Questions
The following addresses common inquiries and misconceptions surrounding mortise and tenon joints, providing concise and authoritative answers.
Question 1: What distinguishes a mortise and tenon joint from other woodworking joints?
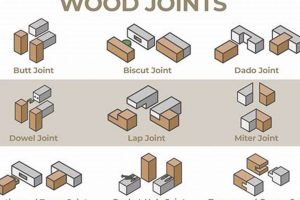
The mortise and tenon joint is characterized by a cavity (mortise) cut into one piece of wood and a corresponding projection (tenon) on another piece, designed to fit precisely into the mortise. This interlocking design offers superior strength and stability compared to simpler joints like butt joints or lap joints, which rely primarily on adhesive or fasteners for support.
Question 2: Which wood species are best suited for mortise and tenon construction?
Hardwoods such as oak, maple, and walnut are generally preferred due to their high density and resistance to wear. However, softwoods can be used for less demanding applications. It is critical to match the wood species of the mortise and tenon pieces to minimize differential expansion and contraction, which can weaken the joint.
Question 3: What is the optimal tenon thickness for a given mortise size?
The tenon thickness should typically be one-third the thickness of the mortised piece. This ratio provides a balance between strength and stability, ensuring that the tenon is robust enough to withstand stress without compromising the integrity of the surrounding wood.
Question 4: How can mortise and tenon joints be strengthened for heavy-duty applications?
Reinforcement techniques, such as pegging or wedging, can significantly enhance the joint’s load-bearing capacity. Pegs are inserted through the mortise and tenon, while wedges expand the tenon within the mortise, creating a tighter and more secure connection.
Question 5: What are the common causes of mortise and tenon joint failure?
Common causes include inaccurate cutting, resulting in a loose or excessively tight fit; improper adhesive application; insufficient clamping pressure during assembly; and the use of incompatible wood species. Environmental factors, such as excessive moisture or dryness, can also contribute to joint failure over time.
Question 6: Is specialized equipment required to create mortise and tenon joints?
While mortise and tenon joints can be created using hand tools such as chisels and saws, specialized equipment such as mortising machines, routers, or tenoning jigs can improve accuracy and efficiency, particularly for large-scale projects. The choice of tools depends on the complexity of the joint and the level of precision required.
Mastering the construction of these joints involves a comprehensive understanding of materials, techniques, and potential failure points. Diligence in execution is key to achieving reliable and durable results.
The subsequent section will explore the historical evolution and cultural significance associated with this technique.
The Enduring Legacy of Woodwork Mortise and Tenon Joints
This exploration has highlighted the enduring significance of woodwork mortise and tenon joints, showcasing their fundamental role in crafting durable and aesthetically pleasing wooden structures. From their basic geometry and material considerations to the nuances of cutting precision, assembly methods, and reinforcement techniques, a comprehensive understanding of these elements is crucial for achieving optimal results. The frequently asked questions section addressed common points of confusion, emphasizing the critical balance between skill and knowledge in their creation.
As modern woodworking techniques evolve, the principles underpinning woodwork mortise and tenon joints remain relevant. Their inherent strength and adaptability ensure their continued application in both traditional and contemporary designs. By appreciating their legacy and mastering their construction, artisans and engineers alike can continue to build structures with integrity and enduring value, perpetuating a timeless craft. The continued study and refinement of these techniques will serve to further enrich the field of woodworking for generations to come.


