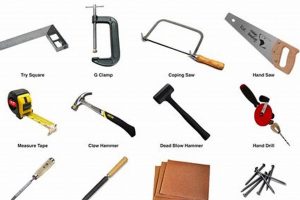
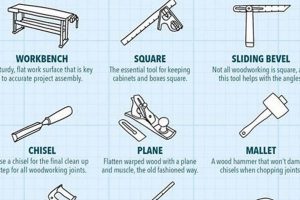
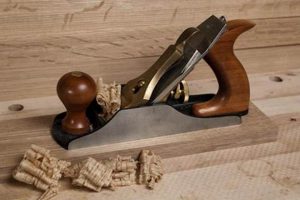
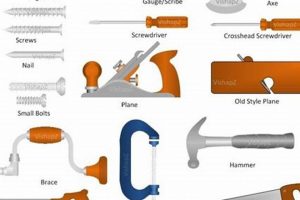
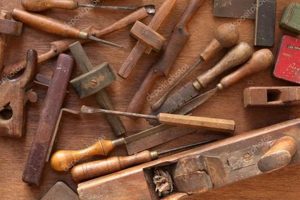
Shaping wood by hand necessitates specialized implements designed for precision and control. These instruments, often characterized by their enduring designs and reliance on manual power, represent a core element of the woodworking craft. A plane, for instance, exemplifies this category; it is employed to flatten, smooth, and reduce the thickness of timber surfaces through controlled shaving action.
The significance of these tools extends beyond mere functionality. They embody a connection to historical techniques, promote tactile engagement with the material, and afford a level of nuanced control often unmatched by power tools. The resultant handcrafted pieces frequently exhibit unique character attributable to the subtle variations inherent in manual shaping processes, adding aesthetic and intrinsic value. The tools have formed the basis of craft and industry since ancient times.
Understanding the diverse range and application of these essential implements provides a foundation for appreciating the intricacies of woodworking. The following sections will delve into specific types, their proper usage, and their contribution to various woodworking projects, thereby revealing the depth and artistry involved in shaping wood by hand.
Tips for Optimal Wood Shaping
Effective utilization of manual woodworking implements requires adherence to established techniques and a commitment to precision. The following tips offer guidance for achieving superior results.
Tip 1: Blade Sharpness is Paramount: A dull blade necessitates excessive force, leading to inaccurate cuts and potential damage to the wood. Regular honing and sharpening are essential.
Tip 2: Grain Direction Matters: Shaping with the grain minimizes tear-out and produces a smoother surface. Always observe the grain pattern before commencing work.
Tip 3: Secure Workpiece Fixture: Employ vises or clamps to firmly secure the wood. This stability ensures control and reduces the risk of slippage.
Tip 4: Controlled and Deliberate Movements: Avoid rushing the shaping process. Apply steady, even pressure and maintain a consistent angle for optimal results.
Tip 5: Practice Proper Tool Maintenance: Clean and lubricate tools after each use to prevent rust and ensure longevity. Proper storage is crucial.
Tip 6: Start with Shallow Cuts: Gradually remove material to prevent over-shaping and maintain control. Multiple light passes are preferable to a single deep cut.
Tip 7: Develop a Keen Eye for Detail: Regularly inspect the workpiece for imperfections and make adjustments as needed. Visual assessment is an integral part of the shaping process.
Mastering these techniques enhances efficiency, improves the quality of the finished product, and maximizes the lifespan of the tools involved. Dedication to proper technique delivers rewarding results.
The concluding sections will elaborate on the historical significance, current applications, and future trends related to shaping wood by hand, providing a comprehensive understanding of this enduring craft.
1. Blade Geometry
Blade geometry is a critical factor in determining the performance and suitability of a traditional woodworking hand tool for specific shaping tasks. The angles, curves, and overall design of a tool’s cutting edge directly impact its ability to efficiently and cleanly remove wood.
- Bevel Angle
The bevel angle, the angle ground onto the cutting edge of the blade, influences the aggressiveness of the cut. Lower angles are sharper and ideal for softwoods, while higher angles provide greater durability for hardwoods. A chisel with a low bevel angle will excel at paring softwoods, whereas a higher angle offers robustness when mortising hardwoods.
- Relief Angle
The relief angle, the angle behind the cutting edge, reduces friction between the blade and the wood. An insufficient relief angle leads to increased resistance and a burnished surface. Conversely, an excessive relief angle weakens the cutting edge, potentially causing premature dulling or chipping. The balance between sharpness and durability is crucial.
- Blade Curvature
The curvature of the blade, as seen in tools like spokeshaves, dictates the shape of the cut. A concave blade is ideal for shaping convex surfaces, while a convex blade is used for concave surfaces. This design element allows for controlled removal of wood to achieve specific contours in chair legs or other curved components.
- Blade Thickness
Blade thickness contributes to rigidity and resistance to deflection during cutting. A thicker blade provides stability and reduces chatter, particularly when working with dense or figured woods. A thin blade might offer a finer cut but is more susceptible to flexing, resulting in inaccuracies.
These geometric elements, working in concert, define the efficiency and precision of the tool. Careful consideration of blade geometry ensures proper tool selection for specific woodworking tasks, enhancing the quality and accuracy of the final product.
2. Material Hardness
Material hardness profoundly influences the selection, application, and maintenance of traditional woodworking hand tools. The resistance of wood to indentation or scratching dictates the forces required for shaping and, consequently, the tool’s durability and effectiveness.
- Tool Selection and Adaptation
Harder woods, such as maple or oak, necessitate tools with robust construction and higher-tempered blades to withstand increased cutting forces. Conversely, softer woods like pine or basswood can be effectively shaped with lighter tools and finer cutting edges. The woodworker adapts tool choice based on the material’s resistance to shaping.
- Sharpening Frequency and Technique
Working with abrasive hardwoods accelerates the dulling of cutting edges, demanding more frequent sharpening. The sharpening process itself may require different techniques, such as employing finer abrasive stones or adjusting honing angles, to maintain optimal cutting performance. The maintenance regime is directly correlated to the wood’s abrasive qualities.
- Cutting Angle and Technique Modification
Achieving clean cuts in hardwoods often requires adjusting cutting angles or employing specialized techniques. For instance, a higher cutting angle can reduce tear-out in figured hardwoods, while controlled, deliberate strokes minimize resistance and prevent tool chatter. Skillful manipulation of tool and technique compensates for the wood’s inherent density.
The interplay between material hardness and hand tool woodworking is a critical determinant of success. Adaptations in tool selection, maintenance, and technique are essential for achieving precise, aesthetically pleasing results across a diverse range of wood species. Understanding the hardness characteristics of the chosen material enables the woodworker to work efficiently and skillfully with each project.
3. Handle ergonomics
The ergonomics of handles on traditional woodworking hand tools significantly impact the efficiency, accuracy, and safety of wood shaping. Handle design directly affects the user’s grip, control, and force application during tool operation. An inadequately designed handle can lead to discomfort, fatigue, and, consequently, reduced precision or increased risk of injury. The shape, size, material, and surface texture of a handle all contribute to its ergonomic quality. For example, a plane with a handle that does not properly fit the user’s hand may require excessive force to maintain a consistent cutting depth, resulting in uneven planing and user strain. Similarly, a chisel with a slippery handle increases the likelihood of misdirected force and potential injury. Therefore, handle ergonomics is not merely a matter of comfort but a critical component of effective tool design.
Consider the variations in handle design across different woodworking tools. A drawknife, designed for aggressive material removal, typically features two handles oriented perpendicular to the blade, allowing for powerful pulling strokes. In contrast, a carving gouge, intended for intricate shaping, usually incorporates a shorter, palm-sized handle to facilitate precise, controlled movements. Furthermore, the materials used in handle construction also affect ergonomics. Wooden handles, often made from hardwoods like beech or rosewood, offer a balance of durability, tactile feel, and shock absorption. Handles wrapped in leather or other textured materials provide enhanced grip and reduce the likelihood of slippage. By addressing these ergonomic variables, tool manufacturers can enhance the user’s ability to apply force effectively and minimize physical strain during prolonged use.
In summary, handle ergonomics is an indispensable aspect of traditional woodworking hand tool design. A well-designed handle optimizes grip, control, and force application, improving the user’s efficiency, accuracy, and safety. Recognizing the impact of handle shape, size, material, and texture allows woodworkers to select and maintain tools that minimize fatigue and maximize performance. Prioritizing handle ergonomics contributes to a more enjoyable and productive woodworking experience, underscoring its importance within the broader context of manual wood shaping.
4. Sharpening method
The sharpening method employed directly dictates the performance and longevity of a traditional woodworking hand tool used to shape wood. A meticulously sharpened edge ensures clean cuts, reduces user fatigue, and prolongs the tool’s functional lifespan. The choice of sharpening technique must align with the tool’s steel composition, geometry, and intended application.
- Abrasive Selection and Progression
The selection of appropriate abrasives, ranging from coarse grinding stones to fine polishing compounds, is critical for efficient sharpening. Progressing through a series of progressively finer abrasives refines the cutting edge, removing material and creating a highly polished surface. This process removes imperfections, establishes the correct bevel angle, and prepares the tool for optimal cutting performance. The type of abrasive, whether natural or synthetic, also influences the speed and quality of the sharpening process. For example, a water stone produces a finer, more polished edge compared to an oil stone, which tends to cut faster but leaves a coarser finish.
- Bevel Angle Maintenance
Maintaining the correct bevel angle throughout the sharpening process is paramount. Deviations from the original bevel angle alter the tool’s cutting characteristics and can render it ineffective for its intended purpose. The use of honing guides or jigs ensures consistent angle maintenance, particularly for those with less experience. A properly maintained bevel angle ensures that the tool cuts cleanly and efficiently without undue force or resistance.
- Honing Technique and Stroke
The technique employed during honing, including the pressure applied, the direction of the stroke, and the overall consistency of movement, significantly impacts the sharpness of the cutting edge. A consistent and controlled honing technique creates a uniform cutting edge, free from micro-bevels or rounding. The stroke should be executed smoothly and deliberately, ensuring that the entire cutting edge comes into contact with the abrasive. Variations in honing technique, such as back-beveling or microbeveling, can further refine the cutting edge and tailor it to specific wood types or cutting tasks.
- Deburring and Stropping
The final stages of sharpening involve removing the burr, a fine wire edge that forms on the back of the blade during honing, and stropping, which polishes the cutting edge to a razor sharpness. Deburring eliminates the fragile wire edge, preventing it from breaking off during use and creating a ragged cut. Stropping, using a leather strop impregnated with polishing compound, further refines the cutting edge and enhances its durability. These final steps are essential for achieving optimal sharpness and maximizing the tool’s performance.
In conclusion, the sharpening method is inextricably linked to the functionality of traditional woodworking hand tools. The selection of appropriate abrasives, the maintenance of the correct bevel angle, the employment of a consistent honing technique, and the execution of deburring and stropping procedures collectively determine the tool’s ability to shape wood with precision and efficiency. A well-sharpened tool not only improves the quality of the finished product but also enhances the user’s woodworking experience.
5. Wood grain direction
Wood grain direction is a fundamental consideration in woodworking, particularly when utilizing traditional hand tools for shaping. The orientation of wood fibers significantly influences the ease, quality, and predictability of cuts. Understanding and respecting grain direction is essential for achieving smooth surfaces, preventing tear-out, and ensuring structural integrity.
- Planing with the Grain (Following Grain)
Planing with the grain, or following the grain direction, involves orienting the hand plane so that the blade cuts in the same direction as the wood fibers are aligned. This results in a smooth, clean surface with minimal risk of tear-out. Imagine planing a tabletop; observing the grain and planing in the direction of the fibers yields a polished surface. Conversely, planing against the grain can cause the wood fibers to lift and splinter, creating a rough and uneven texture. Failure to account for the grain’s direction can lead to substantial rework or even project failure.
- Planing Against the Grain (Opposing Grain)
Planing against the grain, where the tool moves contrary to the fiber direction, invariably produces tear-out. While typically avoided, controlled instances of planing against the grain may be employed to remove small imperfections or to refine a specific area. However, this technique requires exceptionally sharp tools and a delicate touch. Attempting to aggressively plane against the grain with a dull tool will almost certainly result in unacceptable surface quality and increased effort.
- Dealing with Interlocked Grain
Interlocked grain, where the grain direction alternates or spirals, presents a significant challenge. Traditional tools may struggle to produce a smooth surface in areas with severe interlock. Techniques like skewing the plane or using a scraper plane can mitigate tear-out in these cases. Skewing the plane involves angling the tool across the grain, reducing the effective cutting angle. A scraper plane, with its high-angle blade, scrapes the surface rather than cutting, allowing for controlled material removal in difficult grain patterns. Understanding how to adapt to interlocked grain is a hallmark of experienced woodworkers.
- Grain Direction and Joint Strength
Grain direction also affects the strength and stability of joints. Aligning the grain direction of joining pieces can maximize glue surface and create a stronger bond. Conversely, joining pieces with opposing grain directions can lead to differential movement and potential joint failure over time. Constructing a mortise and tenon joint, for example, requires careful consideration of grain direction to ensure that the tenon’s grain runs parallel to the mortise face, enhancing the joint’s resistance to stress. These considerations are vital for creating durable and lasting woodworking projects.
The preceding facets highlight the critical interplay between wood grain direction and the effective use of shaping tools. By understanding the nuances of grain orientation and adapting techniques accordingly, woodworkers can achieve optimal results, producing finely crafted pieces that exhibit both beauty and structural integrity. Neglecting the importance of grain direction undermines the potential of any project, regardless of the quality of materials or tools employed.
6. Cutting technique
The effectiveness of any traditional woodworking hand tool for shaping wood is inextricably linked to the employed cutting technique. The tool itself is merely a mechanism; the operator’s skill in applying it determines the quality of the resulting form. Incorrect technique can render even the sharpest and most finely crafted tool ineffective, leading to inaccurate cuts, surface imperfections, and wasted material. Conversely, a mastery of cutting technique allows a skilled woodworker to coax remarkable results from even a modest tool. Consider the use of a hand saw: improper stance, grip, or sawing motion will result in a wandering cut, whereas a controlled and deliberate approach yields a straight and accurate line. The tool’s potential is fully realized only through the application of correct cutting technique.
Specific examples further illustrate this dependency. The paring of a mortise using a chisel demands precise control of the tool and the application of focused pressure. A forceful or imprecise strike will damage the mortise walls and compromise the joint’s integrity. Instead, a skilled artisan employs controlled paring strokes, gradually removing material to achieve a clean and accurate fit. Similarly, using a spokeshave to shape a curved chair leg requires a fluid and consistent motion, guided by an understanding of the wood’s grain direction and the desired curve profile. Jerky or inconsistent movements will result in uneven surfaces and a lack of aesthetic refinement. The cutting technique is not simply an ancillary skill; it is the very essence of hand tool woodworking.
In conclusion, the cutting technique is paramount. Understanding the intimate relationship between hand tool and cutting technique allows the woodworker to achieve superior results, reduce waste, and create objects of enduring beauty and precision. The tool and technique are interconnected and each depends on each other to create the outcome. It is this symbiotic relationship that defines the art of traditional woodworking and distinguishes it from mechanised processes. The continuous refinement of cutting technique is, therefore, the lifelong pursuit of the skilled woodworker.
Frequently Asked Questions
This section addresses common inquiries regarding the selection, application, and maintenance of traditional implements used for shaping wood by hand.
Question 1: What distinguishes a traditional wood shaping tool from its power-driven counterpart?
Manual implements rely entirely on human force for operation, affording tactile feedback and nuanced control. Power-driven tools, conversely, prioritize speed and material removal, often sacrificing the finesse attainable through handcraft.
Question 2: How does one determine the appropriate tool for a given shaping task?
Tool selection hinges upon the type of cut desired, the wood’s hardness and grain structure, and the overall project scope. Consider blade geometry, handle ergonomics, and the tool’s inherent capacity for precision versus bulk material removal.
Question 3: What is the recommended procedure for maintaining a sharp cutting edge?
Regular honing and sharpening are essential. Employ a series of progressively finer abrasive stones, maintaining the original bevel angle. Periodic stropping refines the edge and prolongs sharpness.
Question 4: How does wood grain direction affect the shaping process?
Shaping with the grain minimizes tear-out and produces smoother surfaces. Adapting technique or selecting specialized tools, such as scraper planes, is necessary when dealing with interlocked or reversing grain.
Question 5: What safety precautions should be observed when using these tools?
Ensure a stable and secure work environment. Maintain a firm grip on the tool, direct the cutting edge away from the body, and wear appropriate eye protection. Sharp tools are safer than dull ones, as they require less force.
Question 6: Can manual wood shaping techniques be effectively integrated into modern woodworking practices?
Yes. Manual methods offer unparalleled control for intricate details and fine adjustments. Integrating hand tool skills with power tool capabilities expands creative possibilities and enhances overall craftsmanship.
The answers provided offer a foundation for understanding and effectively utilizing manual wood shaping implements. Ongoing learning and practical experience are essential for mastery.
The concluding section will provide resources for further learning and exploration of manual woodworking techniques.
Conclusion
The preceding discussion has illuminated the multifaceted nature of the core implements used for manual shaping of timber. From blade geometry and material hardness to handle ergonomics and cutting technique, proficiency requires comprehensive understanding of the tool’s properties and practical application to specific materials. Moreover, grain direction and proper sharpening methods underscore precision and quality of outcome.
The enduring utility of shaping tools is a testament to their fundamental importance within woodworking. Mastery empowers the artisan to create aesthetically pleasing and structurally sound articles, while recognizing the history and future of this craft. Further study and deliberate practice remain key to continued refinement of these woodworking skills.


